Integrate ITSI with Splunk SOAR
Integrate IT Service Intelligence (ITSI) and Splunk SOAR to automatically resolve issues in your IT environment. Splunk SOAR is an orchestration, automation, and response platform designed to help scale your IT and security operations. Splunk SOAR lets you automate tasks, orchestrate workflows, and support a broad range of NOC and SOC functions. Splunk SOAR is available for cloud and on-premises. For more information, see About Splunk SOAR (Cloud) in the About Splunk SOAR (Cloud) manual or About Splunk SOAR (On-premises) in the About Splunk SOAR (On-premises) manual.
With the ITSI integration with Splunk SOAR, you can send episodes directly to Splunk SOAR and run custom playbooks to resolve issues in your IT environment. This functionality lets you automate simple and complex IT operations workflows to increase service availability and operational efficiency. The following diagram shows the end-to-end workflow of ingesting data into ITSI, triaging and routing issues with Event Analytics, and sending the issues to Splunk SOAR to be automatically resolved:

When you send an ITSI episode to Splunk SOAR, the episode itself is mapped to a container in Splunk SOAR and the notable events within the episode are mapped as artifacts of the container. The ITSI episode ID is mapped to the source ID of the Splunk SOAR container. The container then runs an associated playbook that performs the appropriate remediation steps.
Deployment requirements
You must have the following versions of these associated apps to integrate ITSI with Splunk SOAR:
| Link to app | Version |
|---|---|
| Splunk Enterprise | 7.3.3 or later |
| IT Service Intelligence (ITSI) | 4.7.0 or later |
| Splunk App for SOAR | 1.0.0 or later |
Step 1: Create an automation user in Splunk SOAR
The automation user is a default internal service account used by Splunk SOAR for running automated playbooks and asset actions, such as data ingestion. The automation user provides REST authentication tokens that you can use to read and write data to the REST backend and perform other useful activities.
For instructions on adding an automation user, see:
- Create an automation user in Splunk SOAR (Cloud) in the Administer SOAR (Cloud) manual
- Create an automation user in Splunk SOAR (On-premises) in the Administer SOAR (On-premises) manual.
Step 2: Configure Splunk App for SOAR
Perform the following steps to configure Splunk Enterprise to work with Splunk App for SOAR.
Install Splunk App for SOAR
Download and install version the Splunk App for SOAR from Splunkbase.
Configure Splunk App for SOAR capabilities in Splunk Enterprise
You must provide specific capabilities to the admin role so Splunk administrators can set up the Splunk SOAR integration.
- Within Splunk Enterprise, navigate to Settings > Roles (or Settings > Access controls > Roles in Splunk Enterprise versions earlier than 8.1.0).
- Select the admin role.
- On the Capabilities tab, verify that the admin role has the following capabilities:
- admin_all_objects
- phantom_read
- phantom_write
- list_storage_passwords
- Click Save.
Disable HTTPS certificate validation
Configure HTTPS certificate validation by editing the phantom.conf Splunk App for SOAR configuration file.
Prerequisites
- Only users with file system access, such as system administrators, can disable HTTPS certificate validation in Splunk SOAR.
- Review the steps in How to edit a configuration file in the Splunk Enterprise Admin Manual.
Never change or copy the configuration files in the default directory. The files in the default directory must remain intact and in their original location.
- Create a local version of the phantom.conf file at
$SPLUNK_HOME/etc/apps/phantom/local/. - Add the following stanza to disable HTTPS certificate validation:
[verify_certs]
value = false
- Save the file and restart your Splunk software.
Configure Splunk SOAR
Provide the automation user's REST API authorization token value to Splunk SOAR. For more information, see
- Edit an automation user to view the REST API authorization token and associated assets
- Edit an automation user to view the REST API authorization token and associated assets
Step 3: Configure IT Service Intelligence
After you configure Splunk SOAR, configure your ITSI environment to send episodes to Splunk SOAR.
Create correlation searches
A correlation search is a recurring search that scans multiple data sources for defined patterns. You can configure a correlation search to generate a notable event, also known as an alert, when the search results meet specific conditions. As correlation searches begin to generate notable events, the events are grouped into episodes using the notable event aggregation policies you configure in the next step.
Configure several correlation searches to bring in data to ITSI that you want to aggregate and send to Splunk SOAR. For instructions on creating correlation searches, see Overview of correlation searches in ITSI.
Configure aggregation policies to send episodes to Splunk SOAR
Notable event aggregation policies group notable events into episodes and organize them in Episode Review. They also let you take automatic actions on an episode, such as sending it to Splunk SOAR), when certain trigger conditions are met.
Configure the action rules of one or more aggregation policies in your environment to send episodes to Splunk SOAR. For more information about configuring action rules, see Configure episode action rules in ITSI.
- On the ITSI main menu, click Configuration > Notable Event Aggregation Policies and open an existing policy.
- Go to the Action Rules tab.
- Click +Add Rule or expand an existing action rule.
- Provide an If condition.
The following image shows the best practice, which is to send an episode to Splunk SOAR immediately after it's created, when the first event is added:

- For the THEN condition, choose the action called Send to Phantom. The following example action rule sends an episode to Splunk SOAR:
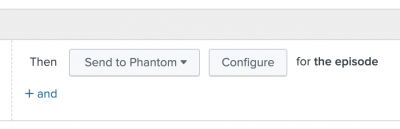
- Click Configure and configure the following Phantom fields:
Field Description Phantom Server The Splunk SOAR server to send the episode to. Create and configure a Splunk SOAR server in the Phantom App for Splunk. Phantom Label Splunk SOAR determines which playbooks to run for an ingested event based on the label associated with the event. Specify a label here to determine which playbooks to run. You can associate one or more labels to a playbook.


If you change the Phantom label after you initially create the aggregation policy, a new event with the new label is created in Splunk SOAR. Future notable events that are grouped by the aggregation policy are sent to that event.
|
PREVIOUS Integrate ITSI with Splunk On-Call (VictorOps) |
NEXT Set up custom episode actions in ITSI |
This documentation applies to the following versions of Splunk® IT Service Intelligence: 4.11.0, 4.11.1, 4.11.2, 4.11.3, 4.11.4, 4.11.5, 4.11.6, 4.12.0 Cloud only, 4.12.1 Cloud only, 4.12.2 Cloud only, 4.13.0, 4.13.1, 4.13.2, 4.13.3, 4.14.0 Cloud only, 4.14.1 Cloud only, 4.14.2 Cloud only, 4.15.0, 4.15.1, 4.15.2, 4.15.3, 4.16.0 Cloud only
Feedback submitted, thanks!