In the last few Parts of this tutorial, you learned the basics of searching using the Splunk software, how to use a subsearch, and how to add fields from lookup tables. Part 6 shows you how to save and share your searches and explores more detailed search examples.
The remaining Parts in this tutorial depend on you completing the steps in the section Enabling field lookups.
If you do not configure the field lookups, the searches will not produce the correct results.
Save a search as a report
Reports are created whenever you save a search. After you create a report, you can do a lot with it.
- Set the time range to Last 7 days and run the following search.
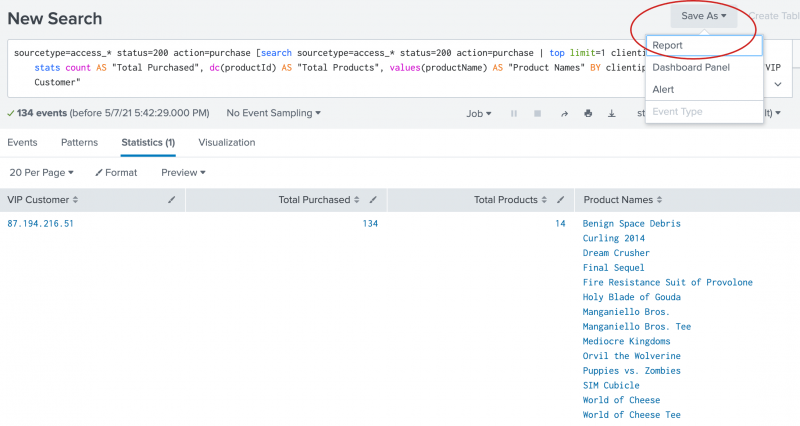
This is the same search that you ran in the section Search with field lookups.sourcetype=access_* status=200 action=purchase [search sourcetype=access_* status=200 action=purchase | top limit=1 clientip | table clientip] | stats count AS "Total Purchased", dc(productId) AS "Total Products", values(productName) AS "Product Names" BY clientip | rename clientip AS "VIP Customer"If your search does not return results, increase the time range of the search. For example, you can run this search over the time range Last 30 days or All Time.
- Above the Search bar, click Save as and select Report.
- In the Save As Report dialog box for Title type
VIP Customer. - For Description, type
Buttercup Games most frequent shopper.
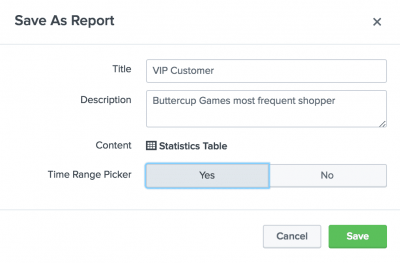
- For Time Range Picker, click Yes.
When you include a Time range picker in a report, it gives you the option of running the report with a different time range. - Click Save.
A confirmation dialog box opens confirming that your report has been created. From this dialog box you can perform the following actions.- Continue Editing. To refine the search and report format.
- Add to Dashboard. To add the report to a new or existing dashboard.
- View. To view the report.
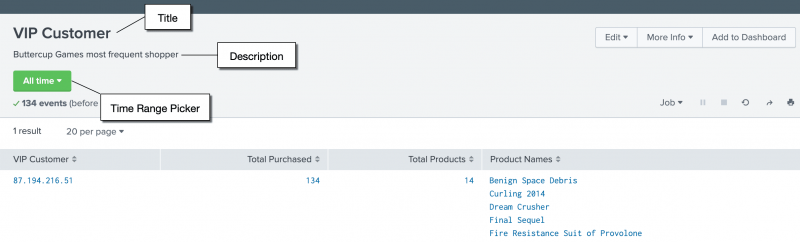
- Click View.
The title and description that you specified appear at the top of the report. Time range picker is also included at the top of the report. If you specified some other time range for the search, that time range appears in the report.


View and edit reports
You can view and edit reports that you have saved. You edit a report directly from within the report.
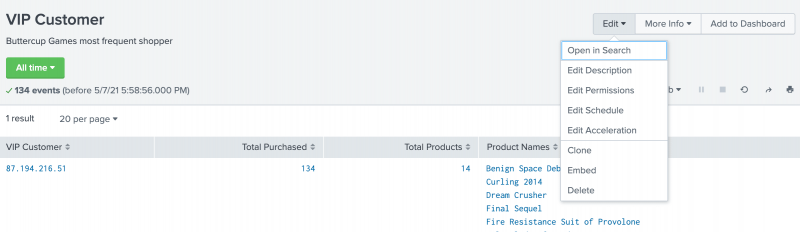
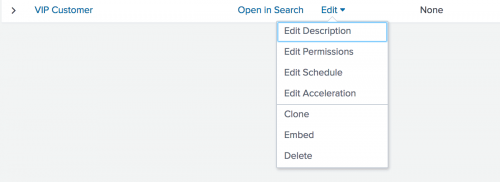
- In the VIP Customer report, click Edit.
The options are to open the report in the Search view, or to edit the report description, permissions, schedule, and acceleration. You can also clone, embed, and delete the report from this menu.
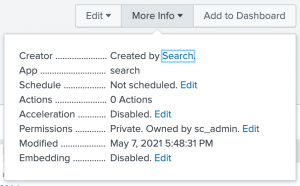
- Click More Info to view information about the report.
From the More Info menu, you can view and edit different properties of the report, including its schedule, acceleration, permissions, and embedding.
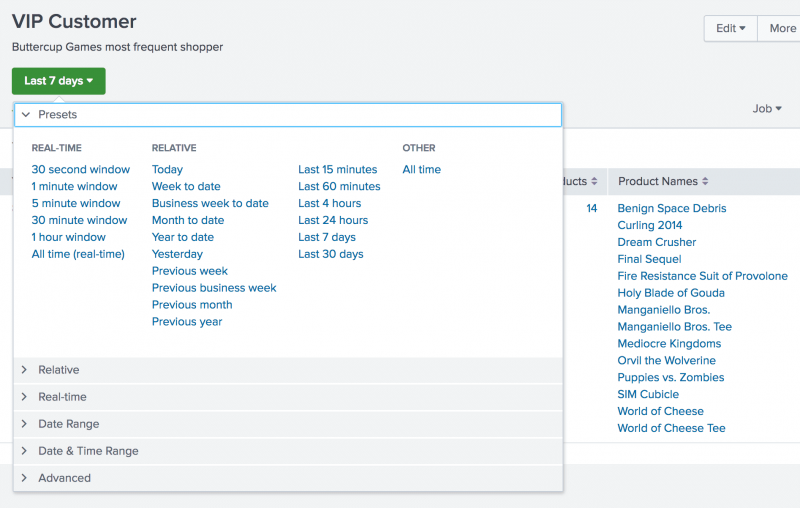
- Look at the time range picker, located at the upper left corner of the window.
With the Time range picker, you can change the time period to run this search. For example, you can use the time range picker to run this search for the VIP Customer Week to date, Last 60 minutes, or Last 24 hours just by selecting the Preset time range or defining a custom time range.


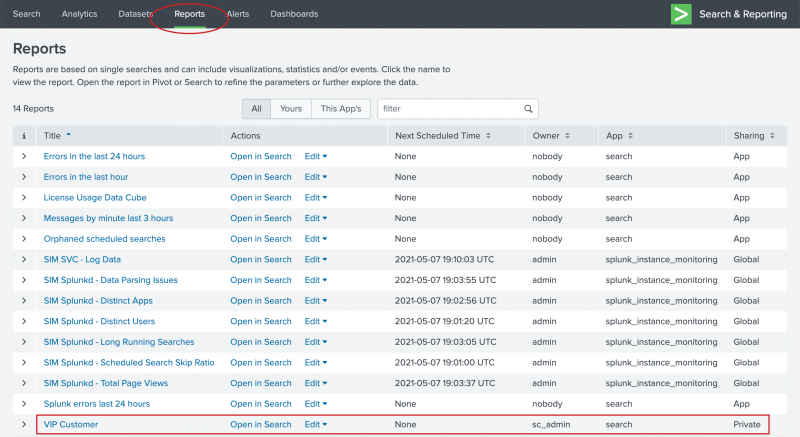
You can access your reports using the App bar.
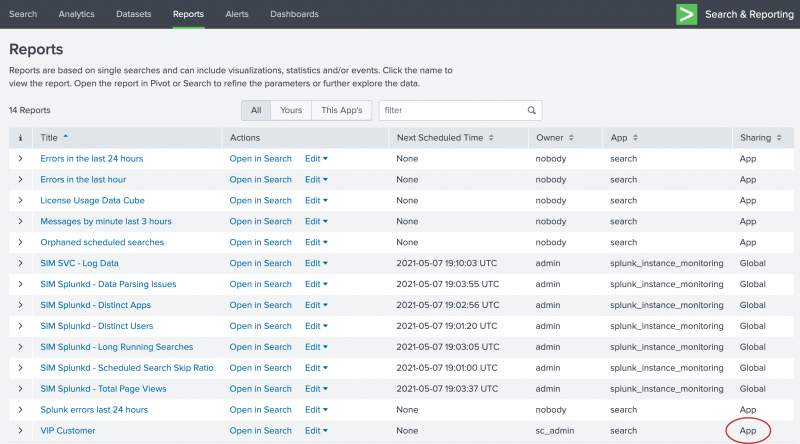
- Click Reports to open the Reports page and view the list of reports.
When you save a report, Sharing is set to Private. Only you can view and edit the report. You can allow other apps to view, edit, or both view and edit the report by changing the report permission. - For the VIP Customer report, under Actions click Edit.
- Select Edit Permissions.
- In the Edit Permissions dialog box, set Display For to App.
The display expands to show more settings. - For Everyone, mark the check box under Read.
This action gives everyone who has access to this app the permission to view the report.
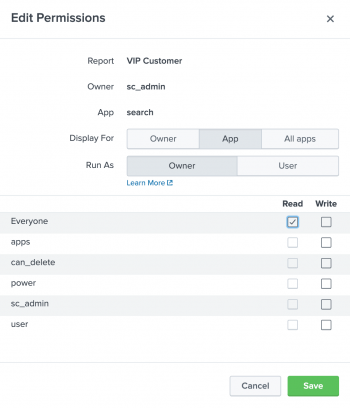
- Click Save.
The Reports page appears. The Sharing setting for the VIP Customer report now reads App instead of Private.


Next step
Let's explore some other search examples, work with chart visualizations, and save the searches as reports, starting with Create a basic chart.
See also
In the Reporting Manual
| Search with field lookups | Create a basic chart |
This documentation applies to the following versions of Splunk® Enterprise: 8.2.0, 8.2.1, 8.2.2, 8.2.3, 8.2.4, 8.2.5, 8.2.6, 8.2.7, 8.2.8, 8.2.9, 8.2.10, 8.2.11, 8.2.12, 9.0.0, 9.0.1, 9.0.2, 9.0.3, 9.0.4, 9.0.5, 9.0.6, 9.0.7, 9.0.8, 9.0.9, 9.0.10, 9.1.0, 9.1.1, 9.1.2, 9.1.3, 9.1.4, 9.1.5, 9.1.6, 9.1.7, 9.1.8, 9.1.9, 9.2.0, 9.2.1, 9.2.2, 9.2.3, 9.2.4, 9.2.5, 9.2.6, 9.3.0, 9.3.1, 9.3.2, 9.3.3, 9.3.4, 9.4.0, 9.4.1, 9.4.2
Feedback submitted, thanks!