Session replay in Splunk RUM 🔗
Replay a session to take a look at exactly what a user experienced and make informed decisions about what to do next. Sessions have a maximum duration of four hours.
Note
You are responsible for using Splunk Observability Cloud in compliance with applicable laws, including but not limited to providing notice to and obtaining any necessary consent from individuals whose data will be collected by Customer’s use of the services.
Use cases 🔗
There are many reasons why you might want to replay sessions. Here are a few:
Reduce the amount of time support teams take to troubleshoot a problem. By seeing errors from the perspective of an actual user, support teams can quickly identify what happened, and take action. Without session replay, support teams could spend a long time investigating a variety of possible causes based on an incomplete description of the problem.
Introduce fast fixes to your applications by honing in on errors and seeing what errors impact users.
Improve UX by seeing how users interact with your applications and following their navigation path. For example, if customers aren’t adding promo codes from a targeted ad campaign, review the checkout workflow to see if customers can even find the dropdown to add a promo code.
Prerequisite 🔗
Session replay is available for enterprise customers only. For more information on each type of subscription, see Splunk RUM Pricing .
Set up session replay 🔗
There are two ways to set up session replay: CDN or NPM.
Note
Initialize Splunk Browser RUM before you initialize the session recorder package.
This example shows the order in which to initialize the scripts:
<script src="https://cdn.signalfx.com/o11y-gdi-rum/latest/splunk-otel-web.js" crossorigin="anonymous"></script>
<script src="https://cdn.signalfx.com/o11y-gdi-rum/latest/splunk-otel-web-session-recorder.js" crossorigin="anonymous"></script>
<script>
SplunkRum.init({
    realm: '<realm>',
    rumAccessToken: '<your_rum_token>',
    applicationName: '<your_app_name>',
    version: '<your_app_version>',
    deploymentEnvironment: '<your_environment_name>'
});
SplunkSessionRecorder.init({
    realm: '<realm>',
    rumAccessToken: '<your_rum_token>'
});
</script>
CDN 🔗
Initialize this code snippet to set up session replay through Splunk CDN.
<script src="https://cdn.signalfx.com/o11y-gdi-rum/latest/splunk-otel-web-session-recorder.js" crossorigin="anonymous"></script>
<script>
SplunkSessionRecorder.init({
    realm: '<realm>',
    rumAccessToken: '<your_rum_token>'
});
</script>
NPM 🔗
Use the following command to set up session replay with NPM through a package named @splunk/otel-web-session-recorder.
npm install @splunk/otel-web-session-recorder
Next, initialize this code snippet:
import SplunkSessionRecorder from '@splunk/otel-web-session-recorder'

SplunkSessionRecorder.init({
    realm: '<realm>',
    rumAccessToken: '<your_rum_token>'
});
Deactivate session replay 🔗
To deactivate session replay you can either:
Turn it off for the particular session replay.
Remove the instrumentation if you want to deactivate it completely.
Additional instrumentation settings 🔗
For more information on configuration options, see rrweb guide on GitHub.
Redact information 🔗
Text and inputs are redacted by default. You can optionally configure image redaction as well. The following image illustrates what the Splunk RUM homepage looks with text redaction enabled. All text is replaced by * characters.
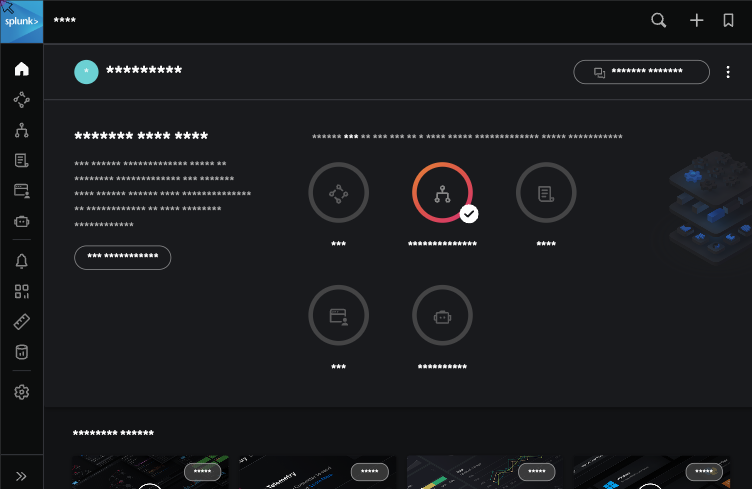
To disable all text redaction, set maskTextSelector: false. To customize which elements are redacted, you can use the rr-mask class. Any element with this class will have its text redacted. Additionally, you can customize the class name by setting maskTextClass or maskTextSelector to a custom value. The custom value can be a regular expression.
Input redaction is handled separately. To disable all input redaction, set maskAllInputs: false. To customize which inputs are redacted use the maskInputOptions option.
Note
In the rrweb documentation, the default value of maskTextSelector is null and the default value of maskAllInputs is false. However, Splunk RUM changes these default values in our configuration to ensure that all text and inputs are redacted by default. As a result, you must explicitly set maskTextSelector or maskAllInputs to false when no redaction is desired.
Examples:
// Will disable text redaction on all elements except elements with default 'rr-mask' class
SplunkSessionRecorder.init({
    // ... other configuration options
    maskTextSelector: false
});

// Will redact only elements with 'my-custom-mask-class' class
SplunkSessionRecorder.init({
    // ...
    maskTextClass: 'my-custom-mask-class',
    maskTextSelector: false
});

// Redacts elements with class names starting with "sensitive-" or with specified IDs
SplunkSessionRecorder.init({
    // ...
    maskTextClass: /^sensitive-.*$/,
    maskTextSelector: '#private-info, #hidden-section'
});

// Will disable input redaction on all elements except password inputs
SplunkSessionRecorder.init({
    // ...
    maskAllInputs: false,
    maskInputOptions: {
        password: true
    }
});
Image redaction 🔗
To redact images, set inlineImages: false in the SplunkSessionRecorder.init function.
For more information on how to customize your instrumentation, see the Privacy section of the rrweb guide on GitHub.
Replay a session 🔗
To replay a session, open the session you’re interested in session waterfall, and if there’s a replay option available, click Replay. Here are a few controls you can configure:
Adjust the speed of the session and the size of the window.
Toggle the timeline to see multiple replay segments if the user had multiple instances of the application open at the same time.
Troubleshooting 🔗
Try these methods:
If a session is incomplete, it might be because the network bandwidth isn’t strong enough, which can cause part of a session to drop off.
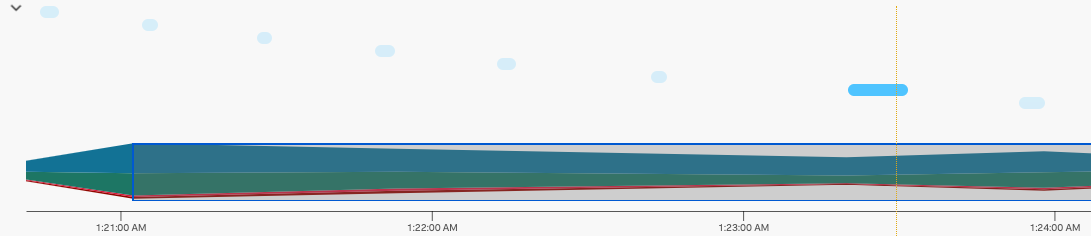
If a user has multiple tabs of the same application open, then there is a session replay available for each tab. Make sure to open the tab below session replay and navigate to the tab you’re interested in. For example, in the following image, the blue tabs at the top of the chart represent a user loading the page again, or opening the app in a different page.
Elements or images aren’t appearing in your session replay. It’s possible that the images or elements are blocked by a content security policy. Review the policy and CDN provider to confirm.
Aspect ratio is distorted. The aspect ratio is dependent on the user’s window size.