Edit a lookup file in the Splunk App for Lookup File Editing
After you add a lookup file to the Splunk App for Lookup File Editing, you can locate, open, and then edit that lookup file. You can also restore an earlier version of a lookup file using the version history.
To edit a lookup file in the Splunk App for Lookup File Editing, complete the following steps:
- On the Lookups page, locate the file you want to edit from the list of imported CSV file and KV store lookups. You can filter the list to help find a particular lookup.
- Select the name of the lookup file you want to edit. The file opens in an edit view.
You can only edit lookup files up to 10 MB in size.
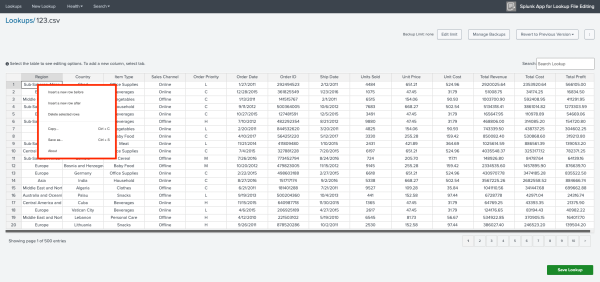
- Select any cell in the table to see the editing options.

- Make your changes to the file.
- (Optional) To change the text alignment in the lookup columns, select the left (
 ), right (
  ), or center (
  ) icon.
 - Select Save Lookup.
- (Optional) If you want to save a backup for the lookup file, select the toggle switch for Save backup.
If you have less than 10% of your disk space remaining, you must manage your disk space and create more space to save a backup.
- To confirm your changes, select Save lookup.
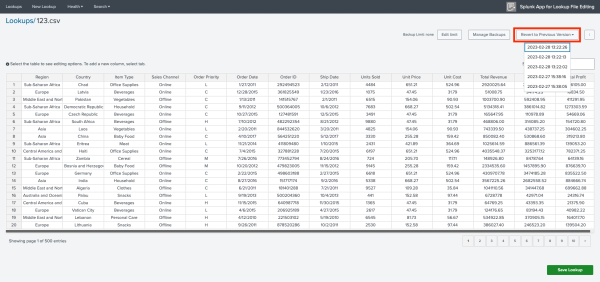
- (Optional) If you made an error or need to view a previous version of the file, select the version you want from the Revert to previous version drop-down list. Then select Save Lookup to restore that version.

When several users edit the same lookup file concurrently, the last user saving the lookup file overwrites all the changes made by the previous user.
Edit the backup size limit for CSV lookups
To prevent backups from filling up disk storage, you can edit the total backup size limit for each CSV lookup. For example, you can set the backup size limit to 100 MB for a particular CSV lookup, and then you can save two backups of 50 MB each for that respective lookup file. To edit the limit, complete the following steps:
- Create a new lookup by selecting New Lookup > Create CSV lookup, or edit an existing lookup by selecting the name of the file on the Lookups page.
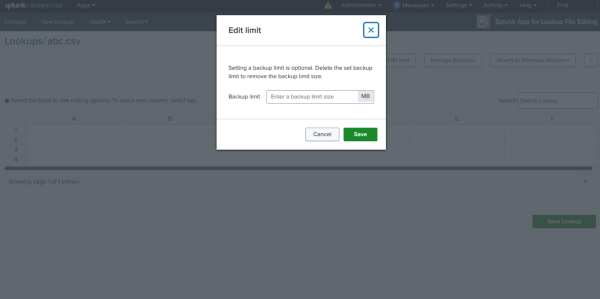
- Select Edit limit.
- Enter the backup limit in MB. If you don't want to set a backup limit, leave the backup limit field empty.

- Select Save.
After you save the backup size limit, you can find the new limit listed above the table of that particular lookup file.
| Create a new lookup in the Splunk App for Lookup File Editing | Troubleshoot the Splunk App for Lookup File Editing |
This documentation applies to the following versions of Splunk® App for Lookup File Editing: 4.0.2, 4.0.4
 Download manual
Feedback submitted, thanks!