Launch Splunk Web
These steps apply only to Splunk Enterprise. If you're using Splunk Cloud, go to Navigating Splunk Web.
After you download and install the software, you must start Splunk Enterprise and launch Splunk Web.
- Start Splunk Enterprise on Linux
- Start Splunk Enterprise on Windows
- Start Splunk Enterprise on Mac OS X
Start Splunk Enterprise on Linux
After you install Splunk Enterprise, use the Splunk CLI to start Splunk Enterprise.
Prerequisite
You need to understand how to access the CLI. See About the CLI in the Admin Manual.
Steps
- Simplify the CLI access by adding a
SPLUNK_HOMEenvironment variable for the top-level installation directory, and adding$SPLUNK_HOME/binto your shell's path.- If you installed in the default location for Linux, then your export path looks like this:
# export SPLUNK_HOME=/opt/splunk
# export PATH=$SPLUNK_HOME/bin:$PATH
- If you installed in another location, use that path for the
SPLUNK_HOMEenvironment variable.
- In the CLI, to start Splunk Enterprise type
$SPLUNK_HOME/bin/splunk start - Accept the Splunk Enterprise license.
- After you run the
startcommand, Splunk Enterprise displays the license agreement and prompts you to accept the license before the startup sequence continues.
- Troubleshooting: If you have problems starting Splunk Enterprise, see Start Splunk Enterprise for the first time in the Installation Manual.
- After you run the
- Go to Login to Splunk Web.
Useful CLI commands
If you need to stop, restart, or check the status of your Splunk Enterprise server, use these CLI commands:
$ splunk stop
$ splunk restart
$ splunk status
Start Splunk Enterprise on Windows
After the Windows installation finishes, Splunk Enterprise starts and opens Splunk Web in a supported browser.
- If Splunk Enterprise does not start, use one of the following options to start it.
- Start Splunk Enterprise from the Start menu.
- Use the Windows Services Manager to start Splunk Enterprise.
- Open a
cmdwindow, go to\Program Files\Splunk\bin, and typesplunk start.
- Go to Login to Splunk Web.
Start Splunk Enterprise on Mac OS X
In Mac OS X, you can start Splunk Enterprise from the Finder.
- Double-click the Splunk icon on your desktop to launch the Splunk helper application, called Splunk's Little Helper.
- The first time you run the helper application, it notifies you that it needs to perform an initialization.
- Click OK for Splunk Enterprise to initialize and set up the trial license.
- After the helper application opens, select Start and Show Splunk. This option starts Splunk Enterprise and directs your web browser to open a page to Splunk Web.
- You can also use the helper application to stop Splunk Enterprise.
- Go to Login to Splunk Web.
Login to Splunk Web
At the end of the startup sequence, a message appears about where to access Splunk Web:
The Splunk Web interface is at http://localhost:8000
Splunk Web runs by default on port 8000 of the host on which it is installed. If you use Splunk Enterprise on your local machine, the URL to access Splunk Web is http://localhost:8000.
Using an Enterprise license
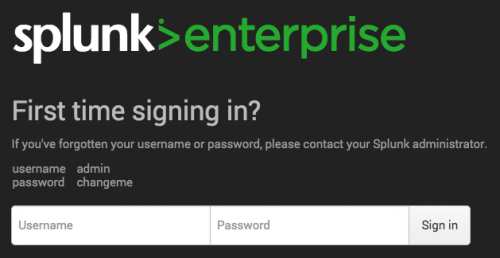
If you are using an Enterprise license, when you launch Splunk Enterprise for the first time, this login screen appears.
Follow the screen instructions to authenticate with the default credentials.
username: admin
password: changeme
When you sign in with the default password, you can either create a password, or click Skip to continue to use the default password.
The first page you see is Splunk Home.
Using a Free license
If you are using a Free license, you do not need to authenticate to use Splunk Enterprise. When you start Splunk Enterprise you do not see this login screen. Instead, you go directly to Splunk Home or whatever is set as the default app for your account.
Next step
You have downloaded the tutorial data files and installed Splunk Enterprise.
Continue to Navigating Splunk Web.
| Install Splunk Enterprise | Navigating Splunk Web |
This documentation applies to the following versions of Splunk® Enterprise: 7.0.0, 7.0.1, 7.0.2, 7.0.3, 7.0.4, 7.0.5, 7.0.6, 7.0.7, 7.0.8, 7.0.9, 7.0.10, 7.0.11, 7.0.13

 Download manual
Feedback submitted, thanks!