Enabling field lookups
The events used in this tutorial data contain fields with the product codes and product IDs. Those codes and IDs do not tell you much about the products themselves, such as the product names. Being able to display the actual product names in reports and dashboards is useful to anyone who reads those reports or dashboards. That is where lookup files come in.
Lookup files contain data that does not change very often. This can include information about customers, products, employees, equipment, and so forth. For this tutorial, you will use a CSV lookup file that contains product IDs, product names, regular prices, sales prices, and product codes.
There are five key steps to enabling field lookups:
- Upload the lookup file
- Share the uploaded file with the applications
- Create a lookup definition
- Share the lookup definition with the applications
- Optional. Make the lookup definition automatic
The remaining Parts in this tutorial depend on you completing the steps in this section.
If you do not configure the field lookups, the searches will not produce the correct results.
Download and uncompress the tutorial lookup file
With the tutorial lookup file, you can match the codes or IDs in the Buttercup Games store events with the codes or IDs in a lookup file. This matching is referred to as field lookups. After the field lookups are configured, you can add any of the fields from the lookup file to your searches. The lookup files are sometimes referred to as lookup tables or lookup table files.
- Download the
Prices.csv.zipfile. - Uncompress the
Prices.csv.zipfile. There is only one file in the ZIP file,prices.csv.
- The
prices.csvfile contains the product names, price, and code. For example:
- The
productId product_name price sale_price Code DB-SG-G01 Mediocre Kingdoms 24.99 19.99 A DC-SG-G02 Dream Crusher 39.99 24.99 B FS-SG-G03 Final Sequel 24.99 16.99 C WC-SH-G04 World of Cheese 24.99 19.99 D
Find the Lookups manager
- In the Splunk bar, click Settings.
- In the Knowledge section, click Lookups.
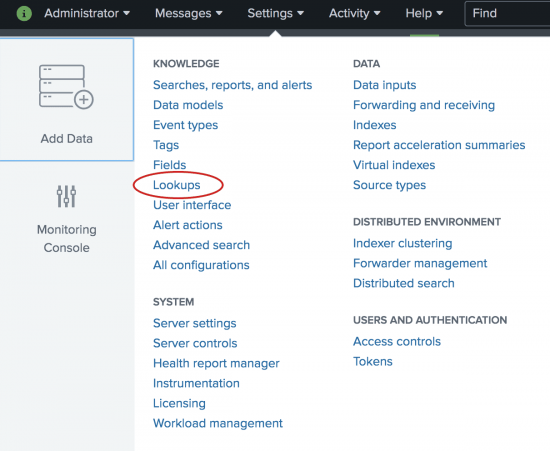
The Lookups manager opens, where you can create new lookups or edit existing lookups.
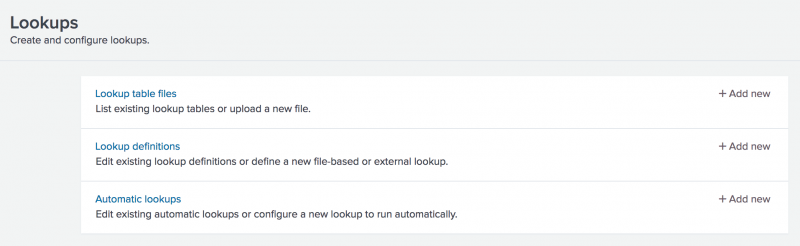


You can view and edit existing lookups by clicking on the links in the Lookups manager. In the next few sections of this tutorial, you will upload a lookup table file, create a lookup definition, and create an automatic lookup.
Upload the lookup table file
To use a lookup table file, you must upload the file to your Splunk platform.
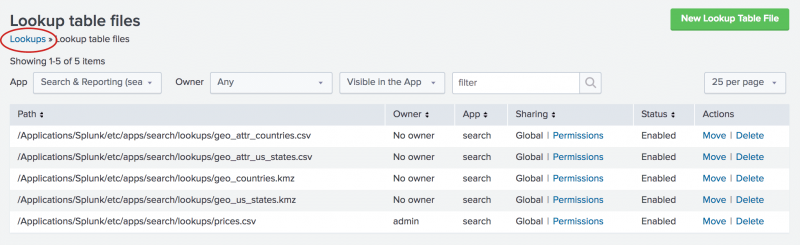
- In the Lookups manager, locate Lookup table files and click Add new.
You use the Add new view to upload the CSV file that you want to as a lookup table.
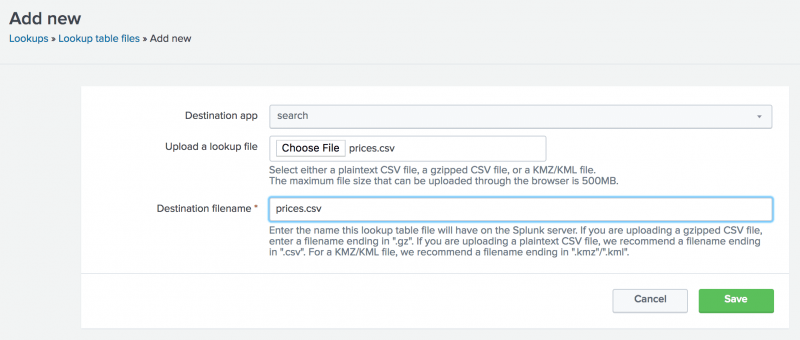
- The Destination app field specifies which app you want to upload the lookup table file to. To upload the file in the Search app, you do not need to change anything. The default value is search.
- Under Upload a lookup file, click Choose File and browse for the prices.csv file.
- Under Destination filename, type
prices.csv.
This is the name that you will use when you create a lookup definition. - Click Save.
This uploads your lookup file to the Search app and displays the lookup table files list.

If the Splunk software does not recognize or cannot upload the file, you can take the following actions.
- Check that the file is uncompressed.
- If an error message indicates that the file does not have line breaks, the file has become corrupted. This can happen if the file is opened in Microsoft Excel before it is uploaded. You should delete the
Prices.csv.zipandprices.csvfiles. Then download the ZIP file again, and uncompress the file.

The other lookup table files in the list are included with the Splunk software.
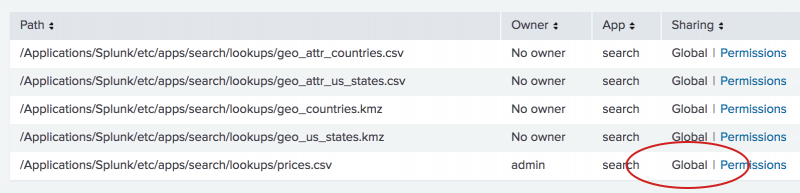
When you upload a lookup table file, the default sharing setting is Private. To use the file with other applications or with specific roles, you need to change the permissions to the file. For this tutorial, you are going to share the lookup table file with all applications.
- In the Lookup table files list, locate the
prices.csvfile at the bottom of the Path list. - In the Sharing column, notice that
prices.csvis listed as Private. - To share the lookup table file, click Permissions.
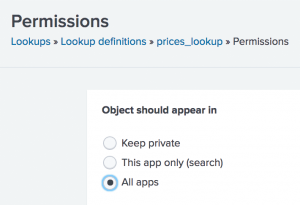
- In the Permissions dialog box, under Object should appear in, select All apps.
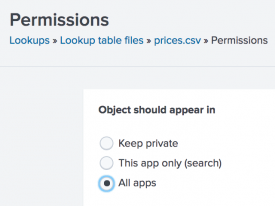
- Click Save.
The Sharing setting for the prices.csv lookup table is set to Global.


Add the field lookup definition
It is not sufficient to share the lookup table file with an application. You must define the information in the lookup table file and how that information relates to the fields in your events. This is called a lookup definition.
- In the Lookup table file dialog box, select Lookups in the breadcrumbs to return to the Lookups manager.
- For Lookup definitions, click Add New.
The Add new lookups definitions page opens, where you define the field lookup. - There is no need to change the Destination app setting. It is already set to search, referring to the Search app.
- For Name, type
prices_lookup. - For Type, select File-based.
A file-based lookup is typically a static table, such as a CSV file. - For Lookup file, select prices.csv, which is the name of the lookup table file that you created.
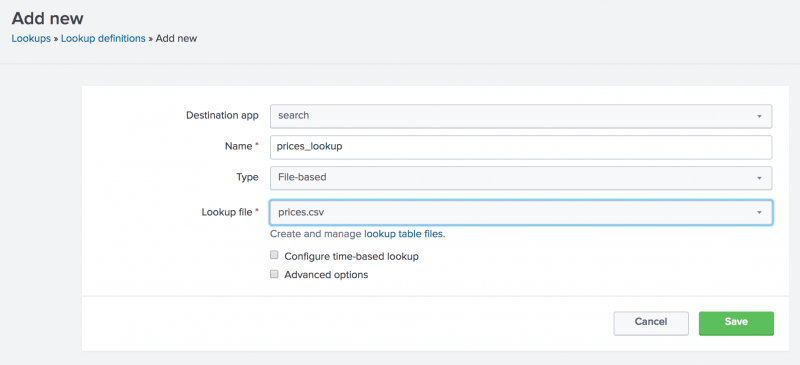
- Leave the check boxes for Configure time-based lookup and Advanced options unchecked.
- Click Save.
The prices_lookup is now defined as a file-based lookup.
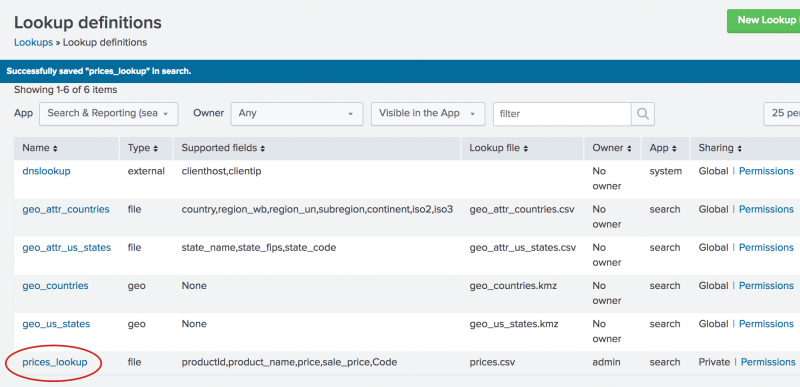
Notice the Supported fields column in the Lookup Definitions page. The Splunk software automatically interprets the first row in a CSV lookup table file as the field names, or column headings, for the lookup table.


Now that you have created the lookup definition, you need to specify in which apps you want to use the lookup table.
- In the Lookup definitions list, for the prices_lookup, click Permissions.
- In the Permissions dialog box, under Object should appear in, select All apps.
- Click Save.
In the Lookup definitions page, prices_lookup now has Global permissions.

You can use this field lookup to add information from the lookup table file to your events. You use the field lookup by specifying the lookup command in a search. Or, you can set the field lookup to run automatically.
Make the lookup automatic
Instead of using the lookup command in your search when you want to apply a field lookup to your events, you can set the lookup to run automatically.
- In the Lookup table file dialog box, select Lookups in the breadcrumbs to return to the Lookups manager.
- In the Lookups manager, for Automatic lookups, click Add New.
This takes you to the Add new automatic lookups view, where you configure the lookup to run automatically.
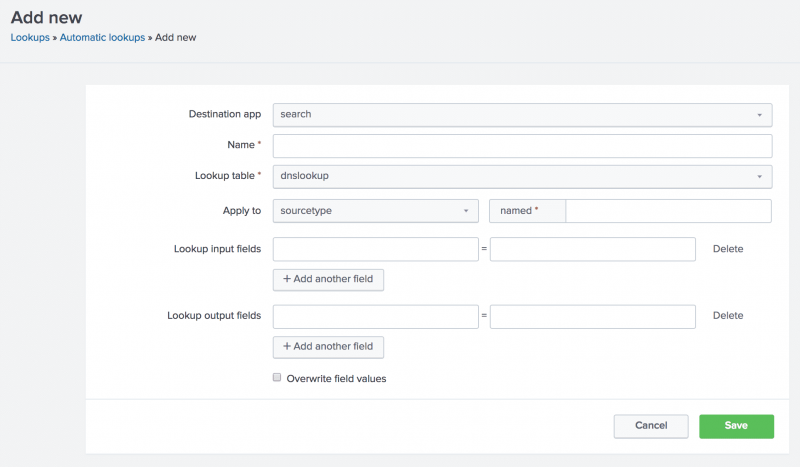
- There is no need to change the Destination app setting. It is already set to search, referring to the Search app.
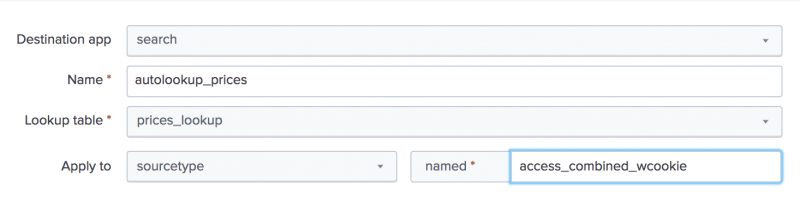
- For Name, type
autolookup_prices. - For Lookup table, select prices_lookup.
The other options are lookup table files that come with the product. - For Apply to, the value sourcetype is already selected. For named, type
access_combined_wcookie.
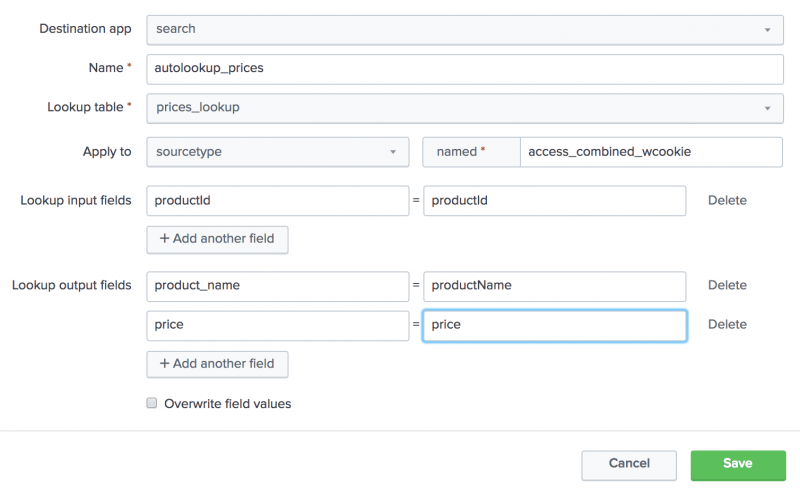
- For Lookup input fields, type
productIdin both text boxes.
The lookup input fields are the fields that the lookup table and the events have in common. The lookup input fields are used to associate, or link, the fields from the lookup table file with fields in your events.- The first text box specifies the field name in the lookup table file.
- The second text box specifies the field name in your events.
The lookup table file has a productId column that contains values that match the values in the productId field in the events.

- For Lookup output fields, specify the names of the fields from the lookup table file that you want to add to your event data. You can specify different names.
The lookup table file has several fields. You will specify two of the fields in the lookup table to appear in your events.- In the first text box, type
product_name. This is the field in theprices.csvfile that contains the descriptive name for each productId. - In the second text box, after the equal sign, type
productName. This is the name of the field that will appear in your events for the descriptive name of the product. - Click Add another field to add another field after the first one.
- Type
pricein the first text box. This is the field in theprices.csvfile that contains the price for each productId. Let's use the same name for the field that will appear in your events. Typepricein the second text box.
- In the first text box, type
- Keep Overwrite field values unchecked.
- Click Save.
The Automatic lookup view appears and the lookup that you configured, autolookup_prices, is in the list. The full name is access_combined_wcookie : LOOKUP-autolookup_prices.


Next step
You have setup the Search app to automatically retrieve information from your lookup table definition.
Now, you will search using those lookup definitions.
| Use a subsearch | Search with field lookups |
This documentation applies to the following versions of Splunk® Enterprise: 7.3.0, 7.3.1, 7.3.2, 7.3.3, 7.3.4, 7.3.5, 7.3.6, 7.3.7, 7.3.8, 7.3.9
Feedback submitted, thanks!