Use the Splunk Add-on Builder
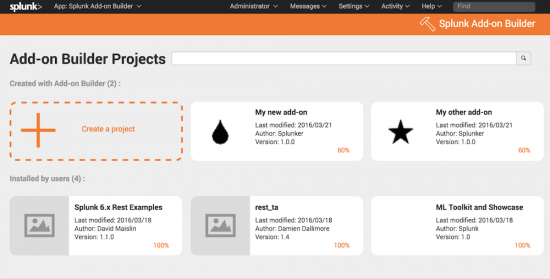
The home page of the Splunk Add-on Builder displays all of the add-on projects that were created using the Splunk Add-on Builder, along with any other apps and add-ons that have been installed on your instance of Splunk Enterprise.
The progress of each add-on project is displayed as a completion percentage, along with other basic properties. You can search for apps and add-ons by name, and sort the order in which they are displayed.
- Click Create a project to begin building an add-on using the Add-on Builder.
- Click an existing Add-on Builder project to continue working on it.
- Click the X on an Add-on Builder project to delete it.
- Click a user-installed app or add-on to validate it using the Add-on Builder.
The Splunk Add-on Builder guides you through the workflow of building an add-on. You must complete each section in order, but you can revisit and modify your work as needed. The workflow is divided into the following sections:
Use the Name Project section to set basic properties for your add-on project. | |
Use the Configure Data Inputs section to get data into your add-on by configuring data inputs. You can also configure setup options for your add-on. | |
Use the Upload Sample Data section to upload sample data for your data inputs so that you can create knowledge object from your data. | |
Use the Extract Fields section to create field extractions from the data inputs you configured. | |
Use the Map to CIM Data section to map the fields from the field extractions to the common information model (CIM). | |
Use the Validate section to validate the add-on for best practices, and test the modular/scripted inputs, field extractions, and CIM mappings. The Splunk Add-on Builder shows you any errors or warnings, along with recommendations about how to address them. | |
Use the Summarize section to package the add-on when you are ready to install your add-on and use it. The result is a compressed file that contains a directory with the necessary configuration files. |
| What to know before you build add-ons | Name Project |
This documentation applies to the following versions of Splunk® Add-on Builder: 1.0.0, 1.0.1

 Download manual
Feedback submitted, thanks!