Install and configure Splunk DB Connect on a single instance Splunk platform deployment
This topic shows you how to install and configure Splunk® DB Connect on a single instance (the indexer and Splunk Web both running on the same system). Ensure you meet all prerequisites before installing.
Install the Splunk DB Connect
To install Splunk DB Connect, use Splunk Web:
- Log in to Splunk Web and go to Apps > Find More Apps.
- Use the search box to find
db connect. - Click the green Install button next to Splunk DB Connect.
- Click Restart Splunk.
You can also download the app package from Splunkbase and then install it offline:
- Download Splunk DB Connect and save it to a temporary location that you can access from your Splunk Enterprise instance.
- Log in to Splunk Web, go to Apps > Manage Apps, then click Install app from file.
- Navigate to the package that you downloaded—splunk_app_db_connect-<version>.tgz—and click Upload.
- Click Restart Splunk.
You can also install DB Connect by copying its directory into your Splunk Enterprise apps directory:
- Download Splunk DB Connect and save it to a temporary location that you can access from your Splunk Enterprise instance.
- Un-tar the download.
- Move the splunk_app_db_connect directory into $SPLUNK_HOME/etc/apps.
- Restart Splunk Enterprise.
Install database drivers
Before setting up Splunk DB Connect, install a JDBC driver for your database. See Install database drivers. You can proceed without having first installed database drivers, but you need to do so before you can use DB Connect to connect to your database.
Set up Splunk DB Connect
Before you can start using Splunk DB Connect, you need to set it up.
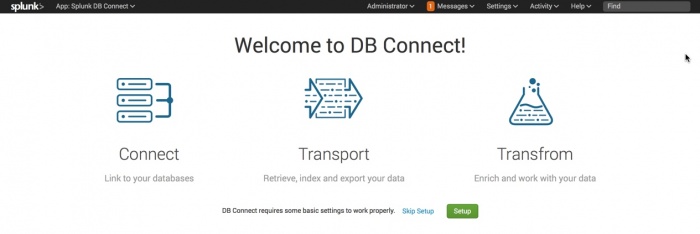
When you open Splunk DB Connect for the first time, you see the following screen:
Click Setup to access the general settings page. See General Settings for more detailed instruction on how to configure the settings of this page.
Note: When you install Splunk DB Connect and enable SSL for the RPC server, DB Connect generates an RPC server SSL certificate with a validity period of two years at $SPLUNK_HOME/etc/apps/splunk_app_db_connect/certs/default.jks. Periodically check the validity of the certificate by running the following command:
$JRE_Installation_Path/bin/keytool -list -v -keystore $SPLUNK_HOME/etc/apps/splunk_app_db_connect/certs/default.jksTo renew the certificate, delete the default.jks file just before or after it is set to expire. DB Connect regenerates the certificate.
| Migrate DB Connect deployment to DB Connect 3 | Check DB Connect installation health |
This documentation applies to the following versions of Splunk® DB Connect: 3.4.0, 3.4.1, 3.4.2, 4.0.0

 Download manual
Feedback submitted, thanks!