Add dispositions to risk notables
Ram adds dispositions to the risk notables using the Incident Review dashboard to identify the threat level associated with the notable accurately. Adding a disposition helps to classify the notables, separate the false positives, and drill down on the notables that pose the highest threat. This helps Ram to accelerate the triage of notables during an investigation and respond to security threats faster.
- From the Splunk Enterprise Security menu bar, Ram clicks the Incident Review page and scrolls down to the table that lists the notables.
- Ram sorts them to bubble up only the risk notables and selects the checkbox beside the risk notables for which he wants to add a disposition.
- Ram clicks Edit Selected to edit the notable that he selected.
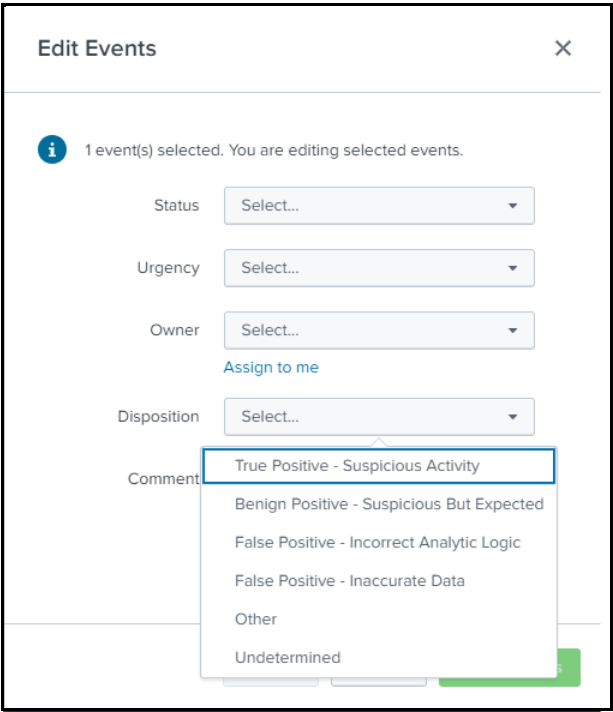
- For each risk notable, Ram selects one of the options from the Disposition drop-down list as shown in the following image and saves his changes.
Now Ram needs to investigate only risk notables that are tagged as True Positive - Suspicious Activity.
This documentation applies to the following versions of Splunk® Enterprise Security: 7.0.1, 7.0.2, 7.1.0, 7.1.1, 7.2.0

 Download manual
Feedback submitted, thanks!