Create a new lookup in the Splunk App for Lookup File Editing
Using the Splunk App for Lookup File Editing, you can edit, import, and export KV store and CSV file lookups in an interface similar to Microsoft Excel.
To create a new lookup in the Splunk App for Lookup File Editing, complete the following steps:
- Log in to Splunk Web.
- From the Apps listing, select the Splunk App for Lookup File Editing.
- Select Lookups > Create New Lookup, or select the New Lookup tab. You can create either a CSV lookup or a KV store lookup. The following steps use a CSV lookup as an example.
- Select Create CSV Lookup
- (Optional) If you're creating a new CSV lookup, you can edit the total backup size limit for that particular lookup file. See Edit the backup size limit for CSV lookups.
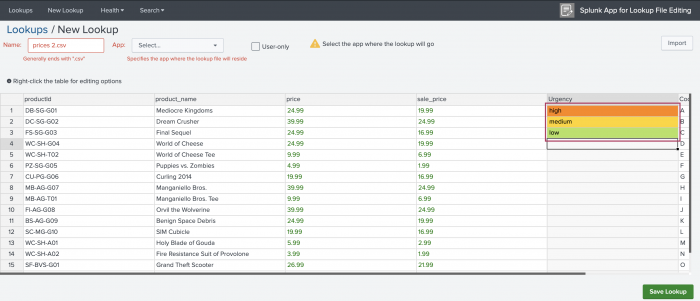
- On the New Lookup page, select Import. In the resulting dialog box, you can upload your CSV file or drag and drop it.
The size limit for lookups is 100 MB.

- After the CSV file imports, select any cell in the table to make edits.
CSV files can use only one cell delimiter to correctly import and separate data into columns. If your data does not separate into columns correctly, check the CSV file for values such as semicolons or pipes that might misidentify as delimiters.
You can also use the keywords High, Medium, and Low to color-code the corresponding fields.

- (Optional) Select the User only check box to keep the lookup private.
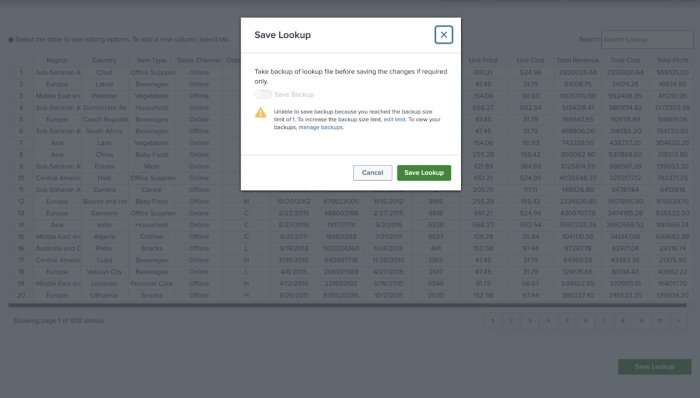
- Select Save Lookup.
- (Optional) Select the toggle switch to save a backup of the lookup file. If you set a backup limit for the lookup file and you've already reached the limit, you can either edit the total backup limit size or navigate to the backup manager page where you can delete unwanted backups and organize your existing backups.
If you have less than 10% of your disk space remaining, you must manage the disk space in the backup manager to free up space.

- Select Save Lookup again to confirm your changes.
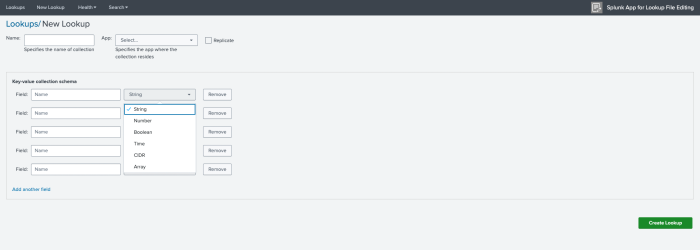
The process for creating a CSV file lookup is similar to the process for creating a KV store lookup. When you create a KV store lookup rather than a CSV file lookup, there are some differences in the user interface of the New Lookup page.

| Getting started with the Splunk App for Lookup File Editing | Edit a lookup file in the Splunk App for Lookup File Editing |
This documentation applies to the following versions of Splunk® App for Lookup File Editing: 4.0.0
 Download manual
Feedback submitted, thanks!