Edit fields list
Add automatically extracted fields
The Auto-extract field type is an extracted field that is recognized automatically (such as a default or indexed field) or a search-time field extraction that you have defined in Splunk Web on the Field Extractions page or, if you are using Splunk Enterprise, by editing the props.conf and transforms.conf files.
- In the Buttercup Games dataset editor, click Add Field.
- Select Auto-Extracted.
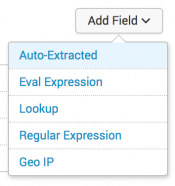
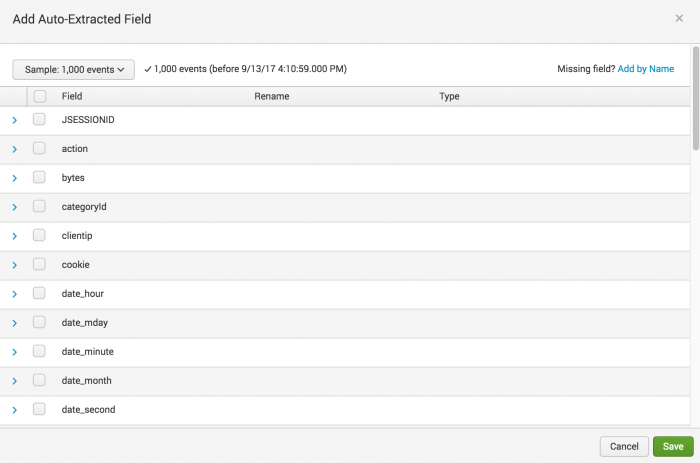
- Scroll through the list of automatically extracted fields and check the following fields:
actioncategoryIdproductIdstatus
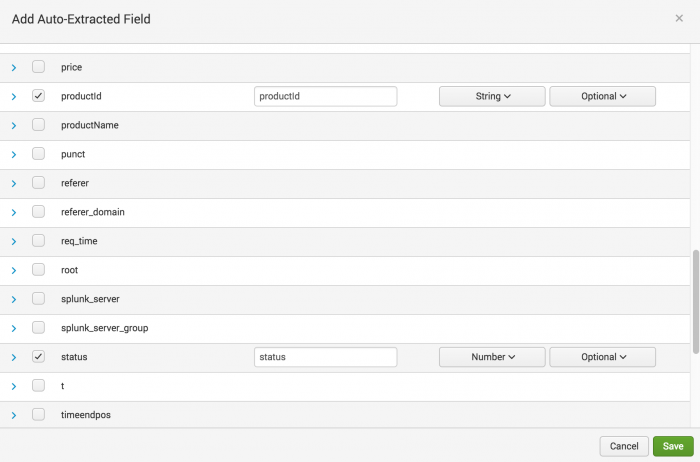 For each field you check, the data type of the field in displayed. For example, the
 statusfield should show Number for the data type.
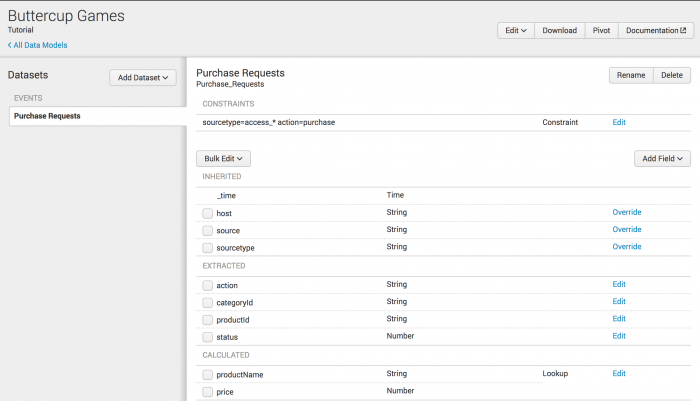
You can designate that dataset fields be Required, Optional, Hidden, or Hidden & Required. Optional means that the field does not need to appear in every event represented by the dataset. The field might appear in some of the dataset events and not others. The default is Optional, which is the setting you want for these fields. - Click Save. The fields are added to the dataset under the EXTRACTED field category.
Add lookup fields to the dataset
Creating a lookup field requires at least one lookup definition defined in the Lookups manager. The lookup definition tells Splunk software where the lookup table is and how to connect to it. When the lookup definition is in place, Splunk software can match the values of a field in your events to the values of a field in the lookup table. The corresponding field/value combinations are applied to your dataset as lookup fields.
Prerequisite
- The field lookup must be uploaded and defined before you edit the data model dataset. Verify that you added the
prices.csvlookup table and defined theprice_lookupin Part 1 of this tutorial. See Add lookup files.
- If you define an automatic lookup, then the fields are already added to the events. You must then add the lookup fields as automatically extracted fields.
If you do not define an automatic lookup, use the following steps to add the lookup fields to the dataset.
- You should still be in the Buttercup Games dataset editor with the Purchase Requests dataset displayed.
- Click Add Field and select Lookup.
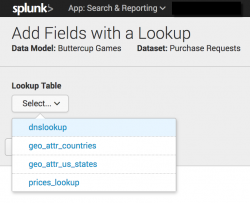
- For Lookup Table, select prices_lookup.
- Under Input, for the Field in Lookup the
productIdshould already be selected.
The Field in Lookup is the name of the field used in the CSV lookup table. - For the Field in Dataset select
productId.
The Field in Dataset is the name of the field used in the event data. - Under Output, check the product_name and price fields.
The output fields listed are from the header row of the lookup table are listed under Field Names. You can specify a Display Name for each fields. This display name is the name used for the field in your events.
Because productId is the field used to match between the events and lookup table, you cannot change its display name. - For product_name, in the Display Name field type
productName. - For price, in the Display Name field type
price. Ensure that the Type is set to Number.
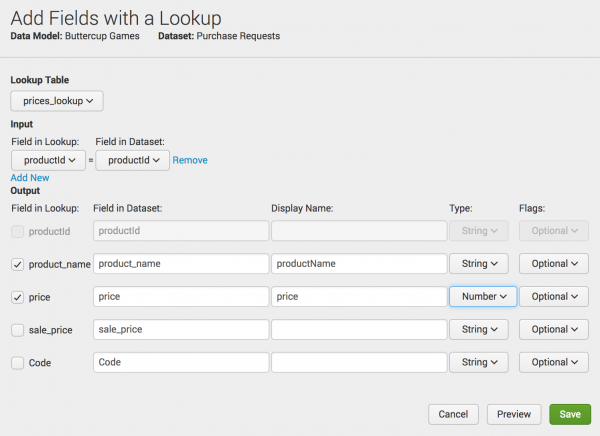
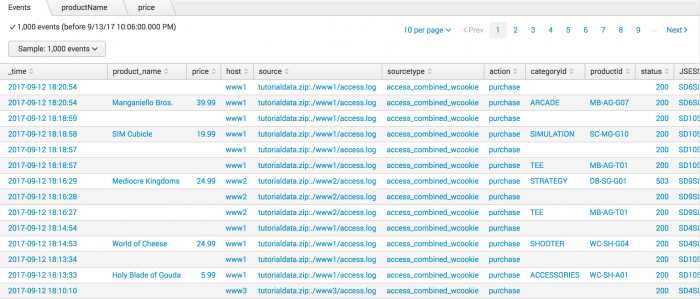
- Click Preview to review the fields that you want to add.
Scroll down to see the preview. Use the Events tabs to view the events in a table. There are also tabs for each of the fields you specified as output fields. In this tutorial you specified productName and prices as the output fields. - Click Save. The lookup fields are added to the dataset under the CALCULATED field category.
The prices_lookup file has descriptive product names and prices for each of the items sold on the Buttercup Games website. The lookup table has headers and values like the following sample:
productId,product_name,price,sale_price,Code
DB-SG-G01,Mediocre Kingdoms,24.99,19.99,A
You can specify the input and output fields.
Next steps
| Define a root dataset for the data model | Define child datasets |
This documentation applies to the following versions of Splunk® Enterprise: 7.0.0, 7.0.1, 7.0.2, 7.0.3, 7.0.4, 7.0.5, 7.0.6, 7.0.7, 7.0.8, 7.0.9, 7.0.10, 7.0.11, 7.0.13
 Download manual
Feedback submitted, thanks!