Lookup example in Splunk Web
This example defines a file-based CSV lookup that adds two fields, status_description and status_type, to your web access events. This lets you search for events when you do not know the specific error code. Instead of searching for all server error codes, use status="Server Error".
Upload the lookup table to Splunk Enterprise
Prerequisities
- See Define a CSV lookup in Splunk Web.
- Download the
http_status.csvfile: http_status.csv file.
The following is a sample of the file:
status,status_description,status_type
100,Continue,Informational
101,Switching Protocols,Informational
200,OK,Successful
201,Created,Successful
202,Accepted,Successful
203,Non-Authoritative Information,Successful
...
Steps
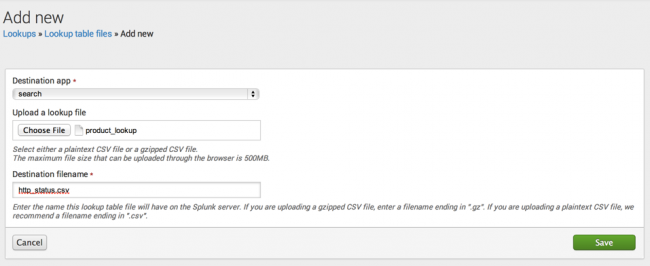
- From the Search app, then select Settings > Lookups.
- Select Add new for Lookup table files.
- Select search for the destination app.
- Browse for the CSV file that you downloaded earlier.
- Name the lookup table
http_status. - Click Save.
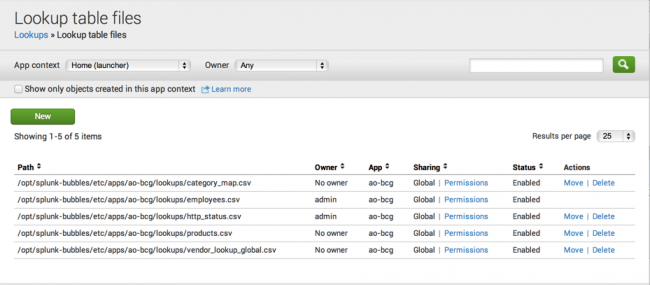
After Splunk Enterprise saves the file, it takes you to the following view:

Define the lookup
Prerequisites
Steps
- From Settings > Lookups, select Add new for Lookup definitions.
- Select search for the Destination app.
- Name your lookup definition
http_status. - Select File-based under Type.
- Click Save.

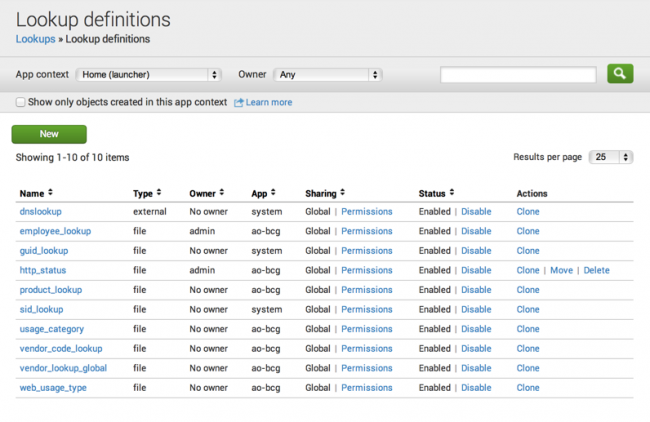
Notice there are some actions you can take on your lookup definition. Permissions lets you change the accessibility of the lookup table. You can Disable, Clone, and Move the lookup definition to a different app. Or, you can Delete the definition. Once you define the lookup, you can use thelookupcommand to invoke it in a search or you can configure the lookup to run automatically.
Set the lookup to run automatically
Prerequisites
Steps
- Return to the Settings > Lookups view and select Add new for Automatic lookups.
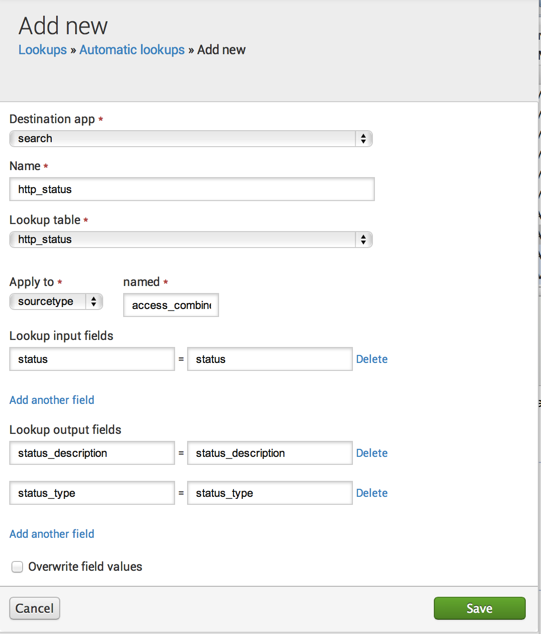
- In the Add new page:

- Select search for the Destination app.
- Name the lookup http_status.
- Select
http_statusfrom the Lookup table drop down. - Apply the lookup to the
sourcetypenamedaccess_combined.

- Lookup input fields are the fields in our events that you want to match with the lookup table. Here, both are named
status(the CSV column name goes on the left and the field that you want to match goes on the right):
- Lookup output fields are the fields from the lookup table that you want to add to your events:
status_descriptionandstatus_type. The CSV column name goes on the left and the field that you want to match goes on the right.
- Click Save.
| Define an automatic lookup in Splunk Web | Introduction to lookup configuration |
This documentation applies to the following versions of Splunk® Enterprise: 7.0.0, 7.0.1, 7.0.2, 7.0.3, 7.0.4, 7.0.5, 7.0.6, 7.0.7, 7.0.8, 7.0.9, 7.0.10, 7.0.11, 7.0.13, 7.1.0, 7.1.1, 7.1.2, 7.1.3, 7.1.4, 7.1.5, 7.1.6, 7.1.7, 7.1.8, 7.1.9, 7.1.10, 7.2.0, 7.2.1, 7.2.2, 7.2.3, 7.2.4, 7.2.5, 7.2.6, 7.2.7, 7.2.8, 7.2.9, 7.2.10

 Download manual
Feedback submitted, thanks!