Define child datasets
A child dataset inherits all of the constraints and fields that belong to its parent dataset. When you define a new child dataset, you give it one or more additional constraints, to further focus the dataset.
In the previous topic, you added a root dataset called Purchase Requests to track purchases on the Buttercup Games website. Now you want to add child datasets for tracking successful and failed purchases.
Add a child dataset
- In the Buttercup Games dataset editor page, click Add Dataset and select Child.
This opens an editor window, Add Child Dataset. - On the Add Child Dataset page, for Dataset Name type
Successful Purchases. - The Dataset ID field should show
Successful_Purchases. For this tutorial, you are not going to change the Dataset ID. Similar the Dataset ID for the root dataset, the ID cannot be changed after you save the dataset. - For Inherit From select Purchase Requests from the list.
This setting tells the child dataset which parent dataset to inherit the fields and constraints from. - In the Additional Constraints field, type
status=200.
This status code is for successful purchases. The search for the events in this dataset will look something like this:sourcetype=access_* action=purchase status=200 - Optional. You can click Preview to see the events that are returned.
- Click Save.
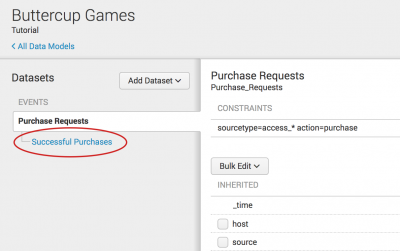
- The Buttercup Games dataset editor page shows that the Successful Purchases child dataset is added to the Purchase Requests root dataset.

Add a second child dataset
- In the Buttercup Games dataset editor page, click Add Dataset and select Child.
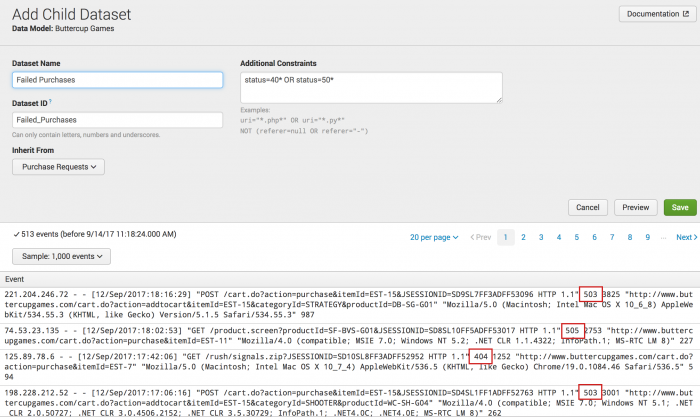
- On the Add Child Dataset page, for Dataset Name type
Failed Purchases. - The Dataset ID field should show
Failed_Purchases. For this tutorial, you are not going to change the Dataset ID. - For Inherit From, make sure that Purchase Requests is selected.
- In the Additional Constraints field, type
status=40* OR status=50*.
This status code is for server or system errors, which result in failed purchases. The search for the events in this dataset will look something like this:sourcetype=access_* action=purchase status=40* OR status=50* - Optional. You can click Preview to see the events that are returned.
- Click Save.
Next steps
Now that you've created data models, you can generate pivot reports. Continue to the next chapter to learn about Pivot and how to create pivot reports.
| Edit fields list | About Pivot |
This documentation applies to the following versions of Splunk® Enterprise: 7.0.0, 7.0.1, 7.0.2, 7.0.3, 7.0.4, 7.0.5, 7.0.6, 7.0.7, 7.0.8, 7.0.9, 7.0.10, 7.0.11, 7.0.13

 Download manual
Feedback submitted, thanks!