Configure Custom Logs in Data Manager
In your Amazon Web Services (AWS) deployment, use Amazon CloudWatch Logs to store, access and monitor logs from custom log sources. In Data Manager, use the Amazon CloudWatch Logs Custom Logs data source to ingest AWS custom logs into your Splunk Cloud platform instance.
For more information see https://docs.aws.amazon.com/AmazonCloudWatch/latest/logs/AWS-logs-and-resource-policy.html.
Custom source types in Data Manager
A custom source type is a default field that identifies the data structure of an event. A source type determines how the Splunk platform formats the data during the indexing process.
Your custom source type serves as the source type for events ingested through this input. Custom source types are only supported by the Custom Logs data source. The aws:cloudwatchlogs: prefix is added to the beginning of your custom source type by default.
Log groups in Data Manager
Onboard log groups by specific log group names, or bulk ingest all log groups by region, or by selected common log group prefixes.
You can onboard a given log group only once.
Create a log group in CloudWatch Logs
A log group is created when you install a CloudWatch Logs agent on an Amazon EC2 instance process. Log groups can also be created in the CloudWatch console.
CloudWatch Logs automatically receive log events from some AWS services. Users can also send log events to CloudWatch Logs.
For more information, see https://docs.aws.amazon.com/AmazonCloudWatch/latest/logs/Working-with-log-groups-and-streams.html
Configure Custom Logs in Data Manager
Perform the following steps to configure custom logs in Data Manager.
- On the Data Management page, select New Data Input.
- On the Choose Cloud Data Platform page, select Amazon Web Services, and then select Next.
- On the AWS Data Onboarding page, select Amazon CloudWatch Logs - Custom Logs, and then select Next.
The prerequisites page opens. It walks you through the prerequisite steps for onboarding custom logs. - Create the SplunkDMReadOnly role. Ask your AWS admin to create this role in the AWS account. This role allows Splunk Cloud to read the configurations from the various AWS services that data is collected from. The role policy and trust relationship that are needed for creation of this role are available In Data Manager. Make sure that the AWS admin replaces the account identifiers in the policy.
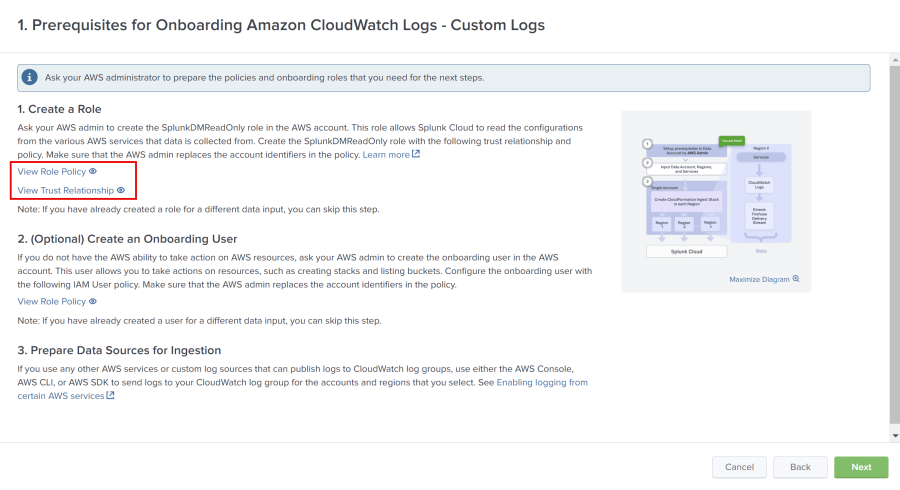
If you have already created a role for a different data input, you can skip this step.
- Select Next.
- On the Input Amazon CloudWatch Logs Data Information - Custom Logs page, do the following actions:
- Enter a Data Input Name.
- Enter an AWS Data Account ID.
- In the Selected Data Sources section, select a data destination for your Custom Logs from the drop-down menu.
- In the Select IAM Roles Region section, select the region for creating IAM roles.
- In the Select Regions section, select the regions where your log groups are located to onboard data.
- In the Enter a Custom Source Type section, enter a custom source type name. The
aws:cloudwatchlogs: prefix is added to the beginning of your custom source type by default. - In the Onboard log groups section, select Add groups.
- On the Onboard log groups page, select the log groups that you want to onboard from the drop-down menu for each available region.
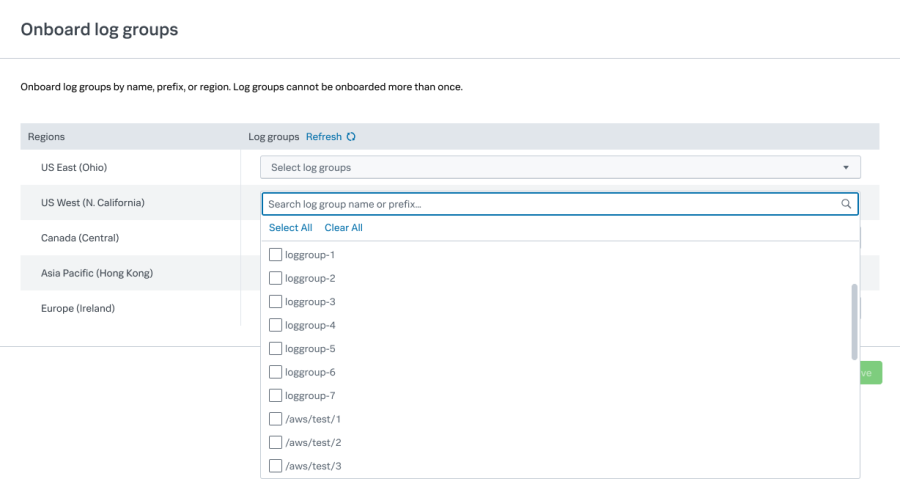
- Select Save.
- Select Review Data Input.
- On the Review Data Input page, review your data input selections, then select Next.
- On the Setup Data Ingestion page, do the following:
- Navigate to the Download the CloudFormation Stack Template section, and select the Data Ingestion Template button to download the CloudFormation Stack Template that you will run in every region in your AWS deployment to establish resources for sending data from that region.
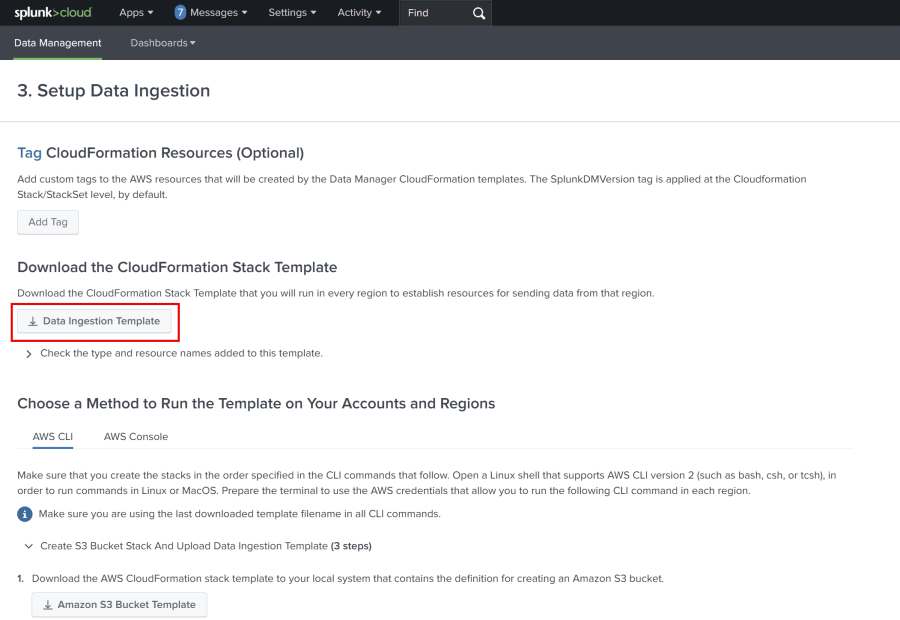
- In the Choose a Method to Run the Template on Your Accounts and Regions section, select either the AWS CLI or the AWS Console method, and perform the listed steps in order to run the template on your AWS account and regions.
AWS CLI steps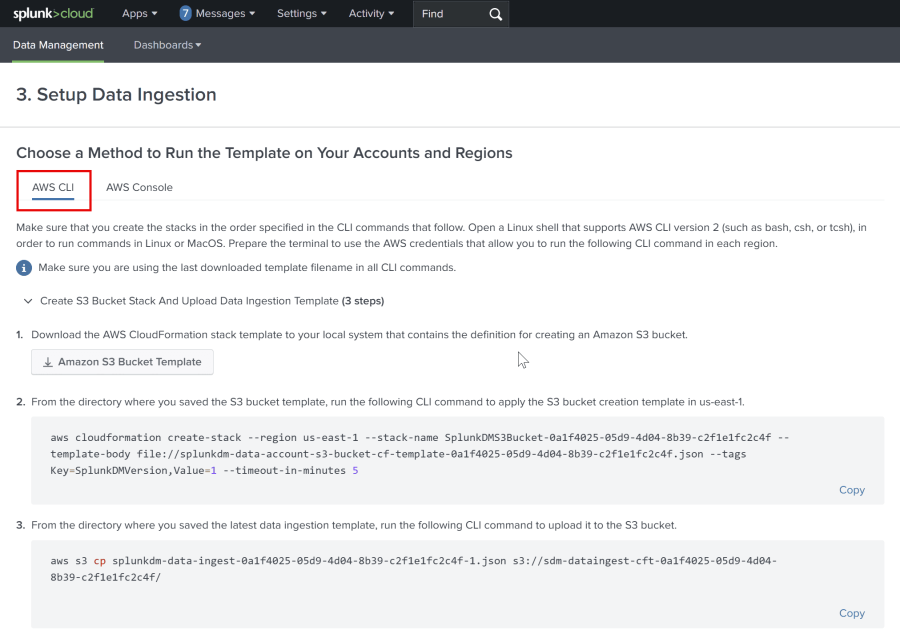
AWS Console steps
If you choose the AWS Console method, navigate to step four, and copy the listed Stack Name, which will be used when you navigate to your AWS deployment to create your CloudFormation stack.
Once you have created your CloudFormation stack, and have run the CloudFormation template on your accounts and regions, click Review Finish Setup and Monitor Data Input.
- Navigate to the Download the CloudFormation Stack Template section, and select the Data Ingestion Template button to download the CloudFormation Stack Template that you will run in every region in your AWS deployment to establish resources for sending data from that region.
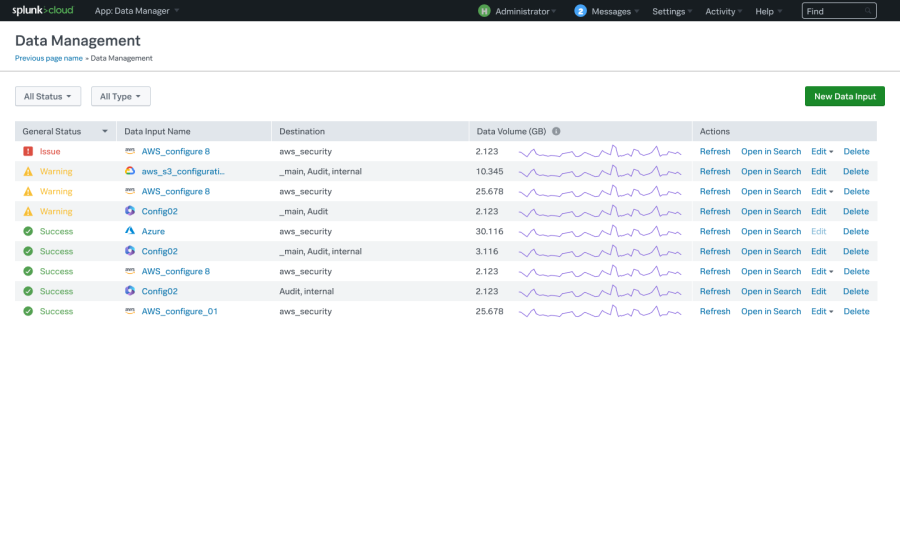
- On the Data Management page, you can see the status of your data input.


| Create input for AWS Organizations | Verify the data input for AWS in Data Manager |
This documentation applies to the following versions of Data Manager: 1.13.0
Feedback submitted, thanks!