Verify installation
To verify that the Splunk ODBC Driver was installed successfully:
- Click the Start button (or, in Windows 8, go to the Start screen).
- Type odbc.
- Click whichever of the following items that appears. If more than one appears, click the one that corresponds to the ODBC Driver architecture you installed: Data Sources (ODBC), 32-bit ODBC Data Source Administrator, or 64-bit ODBC Data Source Administrator.
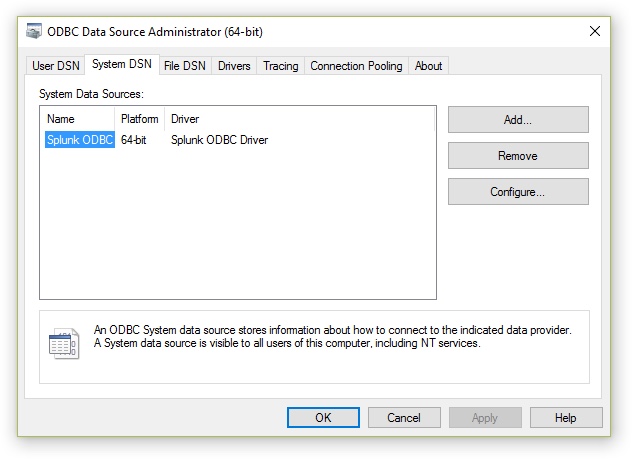
- In the ODBC Data Source Administrator window, click the System DSN tab and look for "Splunk ODBC" in the list of system data sources, as shown in the following screen shot.
| Install the Splunk ODBC Driver | Enter or change configuration information |
This documentation applies to the following versions of Splunk® ODBC Driver: 2.1.0, 2.1.1

 Download manual
Feedback submitted, thanks!