Let's get acquainted with the Splunk user interface.
Splunk Web is the primary interface for searching, problem investigation, reporting on results, and administrating Splunk deployments.
About Splunk Home
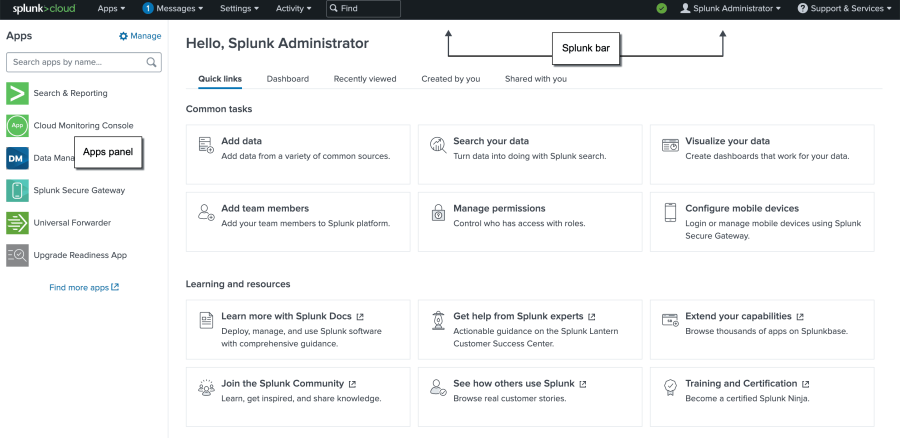
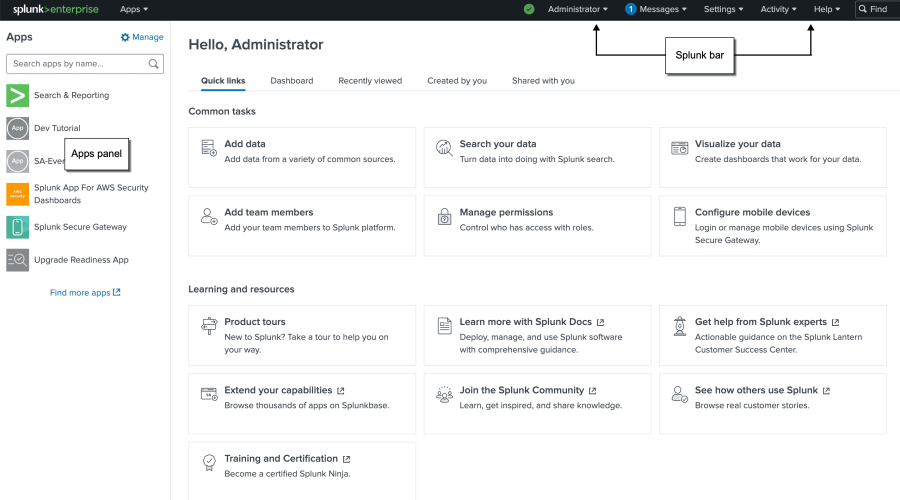
Splunk Home is the initial page in Splunk Web. Splunk Home is an interactive portal to the data and applications that you can access from your Splunk instance. The main parts of the Splunk Home page are the Apps panel, the Explore Splunk panel, and the Splunk bar.
- Splunk Cloud Platform
- The following screen image shows the Splunk Home page for Splunk Cloud Platform.
- Splunk Enterprise
- The following screen image shows the Splunk Home page for Splunk Enterprise:
Apps panel
The Apps panel lists the applications that are installed on your Splunk instance. The list shows only the apps that you have permission to view.
When you first open Splunk Web, you see Search & Reporting in the Apps panel. The Search & Reporting app is sometimes referred to as simply the Search app. There might be other apps listed on the Apps panel if other applications are installed on your computer.
Explore Splunk panel
The Explore Splunk panel contains links to pages to help you get started.
Splunk bar
The Splunk bar appears on every page in Splunk Web. You use this bar to switch between apps, configure your Splunk deployment, view system-level messages, and monitor the progress of search jobs.
- On the Splunk Home page, click Search & Reporting in the Apps Panel to open the Search app.
When you are in an app, the Applications menu displays in the Splunk bar. You can use the Applications menu to switch between apps.
We will explore the Search app in detail. For now, let's return to Splunk Home.
- Click the Splunk logo on the Splunk bar.
Regardless of where you are in an app, you can always click the Splunk logo to return to Splunk Home.
In addition to the Applications menu, the Splunk bar has several other menus. Let's explore a few of them.
Use the Account menu to edit your account settings, set your preferences, and to logout.
- Splunk Cloud Platform
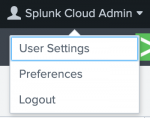
- The Account menu displays Splunk Administrator.
- Select Splunk Administrator > User Settings.

- In the Full name field, you can type your name or a nickname, or leave it as is. For this tutorial, we will not change the other settings.
- Click Save.
- Click the Splunk logo to return to Splunk Home.
- Splunk Enterprise
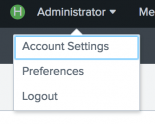
- The Account menu displays Administrator. It shows Administrator initially, because that is the default user name for a new installation.
- Select Administrator > Account Settings.

- In the Full name field, you can type your name or a nickname, or leave it as is. For this tutorial, you will not change the other settings.
- Click Save.
- Click the Splunk logo to return to Splunk Home.
All system-level error messages are listed on the Messages menu. When you have a new message to review, a numerical notification appears next to the Messages menu. The notification indicates the number of messages that you have.
Assistance
The menu that you use to get help with the Splunk software depends on the Splunk platform that you are using.
- Splunk Cloud Platform
- The Support & Services menu contains a set of links to Splunk Answers, the Documentation home page, and the Splunk Support and Services page. You can also search the online documentation.
- Splunk Enterprise
- The Help menu contains a set of links to the product release notes, tutorials, Splunk Answers, and the Splunk Support and Services page. You can also search the online documentation.
You will explore the other menus on the Splunk bar later in this tutorial.
Next step
This completes Part 1 of the Search Tutorial.
You are now familiar with Splunk Web. Continue to Part 2: Uploading the tutorial data.
| Launch Splunk Web | About uploading data |
This documentation applies to the following versions of Splunk Cloud Platform™: 9.1.2312, 9.0.2303, 9.0.2305, 9.1.2308


 Download manual
Feedback submitted, thanks!