Using the Neural Network Designer Assistant
The Neural Network Designer Assistant helps you accelerate experimentation and the creation of neural network models within three steps. The Neural Network Designer Assistant provides a guided workflow to define your dataset, train a binary neural network classifier, and evaluate the results. Steps are numbered in the Assistant user interface.
This Assistant works best on a densely connected neural network with a binary target variable. Ensure your data is clean and well-prepared before using it with the Assistant.
Prerequisites
Make sure you have a Golden Image CPU or GPU development container up and running, and that it contains the binary_nn_classifier_designer.ipynb notebook.
The Assistant works best when you provide a clean matrix of data as the foundation for building your model. Complete any data preprocessing using SPL to take full advantage of the Assistant's capabilities. To learn more, see Preparing your data for machine learning in the Splunk Machine Learning Toolkit User Guide.
Neural Network Designer Assistant architecture
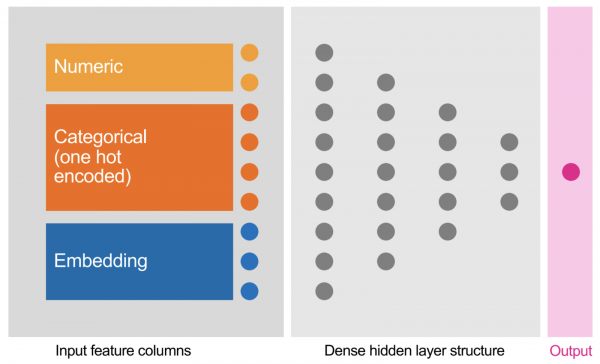
The architecture of this neural network is derived from the classic archetype of a Multilayer Perceptron and its typical architecture. The following diagram represents that architecture:
The network architecture consists of the following components:
- An input layer with different input types
- Multiple densely connected hidden layers with rectified linear unit (ReLU) activation functions ,and a dropout layer for regularization purposes
- A binary output layer
For each training epoch the weights in the neural network are calculated by backpropagation using an Adam optimizer and binary cross-entropy. You can define the hidden layer structure, batch size, and other options in the Assistant.
The input layer can be flexibly composed with different input types. See the following table for details.
| Input layer | Description |
|---|---|
| Numerical | Useful for purely numerical fields. You must ensure that only numeric values are present in your dataset for the selected numerical fields, otherwise conversion and casting errors will occur during training. You might want to consider standardizing your numerical fields with MinMaxScaler preprocessing or similar techniques for better convergence of your model. |
| Categorical | Useful for fields that contain categories. The data in categorical fields is automatically one-hot encoded according to a retrieved dictionary of all found distinct categories (the vocabulary of the dictionary). If a field is of high cardinality (>100s or >1000s of dimensions) it might be a better candidate to define it as an embedding layer. |
| Embedding | Useful for freeform text fields or fields with high cardinality. As the number of categories grows large, it becomes infeasible to train a neural network using one-hot encodings. We can use an embedding column to overcome this limitation. Instead of representing the data as a one-hot vector of many dimensions, an embedding column represents that data as a lower-dimensional, dense vector in which each cell can contain any number, not just 0 or 1. |
This approach was inspired by the TensorFlow Tutorial for working with structured data. See, https://www.tensorflow.org/tutorials/structured_data/feature_columns.
Assistant workflow
The Assistant guided workflow consisted of three major steps: Define your dataset, Train your neural network model, and Evaluate your model.
The Assistant is populated with the diabetes.csv dataset from MLTK, acting as a working example you can follow. This working example is limited to showcasing the Assistant workflow. You can modify the Assistant field configurations based on your own data and use case.
From the working example you can also change and optimize the neural network source code, and tune hyperparameters in the binary_nn_classifier_designer.ipynb notebook. You can check TensorBoard to investigate the progress of your model training and how your neural network converges.
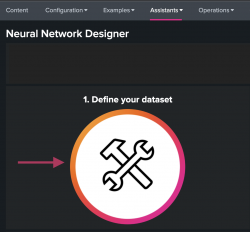
From the Neural Network Designer Assistant page, select the Define your dataset icon to begin.
Each stage of the workflow offers dashboard panels where you can further explore the defined dataset and the resulting model. The bottom of each step of the guided workflow is where you can select the next step of the workflow.
| Using multi-GPU computing for heavily parallelled processing | Troubleshoot the Splunk App for Data Science and Deep Learning |
This documentation applies to the following versions of Splunk® App for Data Science and Deep Learning: 5.0.0, 5.1.0, 5.1.1, 5.1.2


 Download manual
Feedback submitted, thanks!