General settings
The Splunk App for Enterprise Security provides several configuration panels for functions of the app. Select Configure > All Configurations to view the options listed under the General configuration panel.
Credential Management
Click Credential Management to view and edit the stored user credentials for Enterprise Security App data inputs.
The Credential Management page shows stored credentials for objects such as threat lists or lookups that run as scripted or modular inputs. An input that has been configured with a credential tries to find the credential values here.
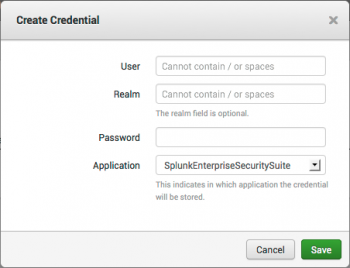
Add a new credential for an input
1. Click New Credential to add a new user credential.
2. Use the edit panel to add the user name and password for the new credential.
3. Add the user name and password. The Realm field is optional, and can be used to differentiate between multiple credentials that have the same user name.
4. Select the Application for the credential.
5. Click Save. The new credential appears in the Credential Management list.
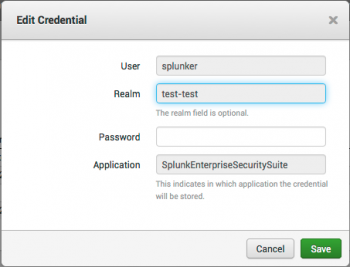
Edit an existing input credential
1. Click Edit next to the credential name.
2. Use the editor to change the user name, password, or application for the credential. You cannot change the realm setting after it has been applied to a credential. You must create a new credential to have a different realm.
3. Click Save when you are done with your changes.
Delete an existing input credential
Use the REST API to delete an existing credential from the Credential Management page. See "DELETE storage passwords" in the Splunk Enterprise REST API Reference Manual.
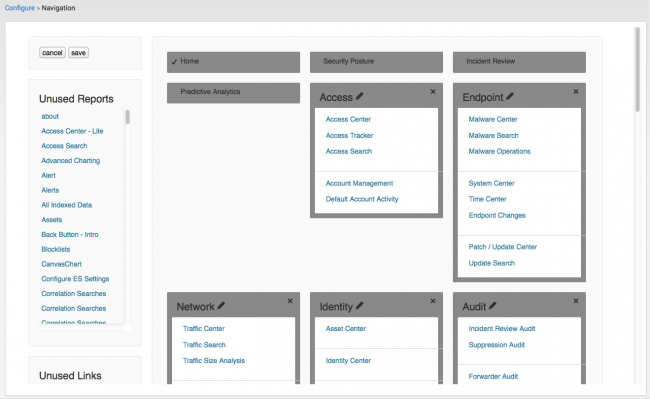
The Navigation editor is used to arrange and expose the domains and dashboards displayed in the Splunk App for Enterprise Security menu bar. Browse to Configure > General > Navigation to open the Navigation Editor.
You must have Enterprise Security administrator privileges to modify menu bar settings.
Select items and add to an existing menu or create a new menu item. Removing domains or dashboards from the menu bar disables the navigation and display of that item only.
1. You may disable individual items or an entire menu using the Navigation editor.
- To disable a domain or dashboard, click the "X" on the main menu panel.
- To disable a single menu item, select the item (a check mark shows that the item is selected) and then click the "X" next to the item.
2. To rearrange display of the menus, select and drag them into a new order.
3. When you complete your changes, click Save.
An unused, disabled, or removed objects are shown in the Unused Reports list on the left of the Navigation editor.
- From the Navigation editor, select the new item from the list of Unused Reports at the left.
- Drag the report into the menu area and place it under a menu title. The existing menu items will shift to make room for the new item.
- Click Save.
For the list of dashboards that may be added to the menu bar using the Navigation editor, see the "Dashboard to data model" topic in this manual.
| Steps to configure | Configure users and roles |
This documentation applies to the following versions of Splunk® Enterprise Security: 3.1, 3.1.1, 3.2, 3.2.1, 3.2.2, 3.3.0, 3.3.1, 3.3.2, 3.3.3


 Download manual
Feedback submitted, thanks!