Step 10: Save a report
You can use one of our searches from Step 8 or 9 to create a saved report. For example, you can use this simple search we tried in step 7:
- index=ponyindex | rex field=source "/data/(?<file_name>[^/]+)$" | stats count values(sourcetype) as sourcetype values(tasktracker) as tasktracker by host file_name
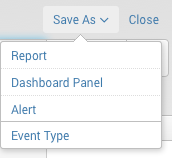
1. Above the search bar, click Save as and select Report.
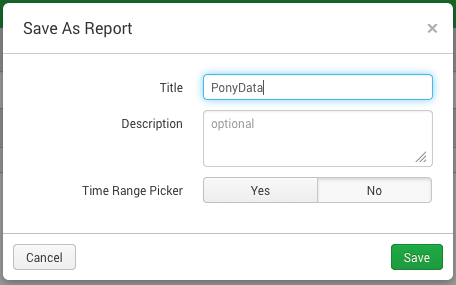
2. Enter a Title and Description (optional).
3. For Visualization, click None.
4. For the Time Range Picker, click None.
4. Click Save.
The Your report has been created window opens.
There are other options in this window. Continue Editing lets you refine the search and report format. You can also Add to dashboard, which we will address in the next step. You can also click View to view the report.
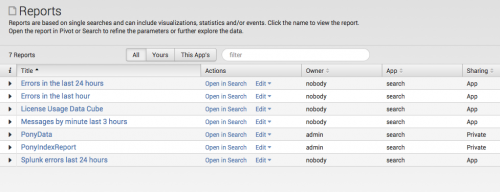
You can access your saved reports by clicking on Reports in the app navigation bar.
When you save a new report, its Permissions are set to "Private" by default. This means that only you can view and edit the report. You can allow other apps to view, or edit, or view and edit the reports by changing its Permissions.
To share the new report with everyone,
1. Under Actions, click Edit and select Edit Permissions. This opens the Edit Permissions dialog.
2. Next to Display for, click App and check the box under Read for Everyone.
3. Click Save.
Back at the Reports listing page, your new report permissions are now available to the App.
A note about report acceleration
As of 6.0, Report Acceleration is not available for virtual indexes, though if you are running Hunk and Splunk Enterprise together, you can still use report acceleration on your Splunk Enterprise local indexes. See "Accelerate Reports" topic in the Splunk Enterprise Reporting Manual for more information.
| Step 9: Search using a sourcetype | Learn more |
This documentation applies to the following versions of Hunk®(Legacy): 6.0, 6.0.1, 6.0.2, 6.0.3, 6.1, 6.1.1, 6.1.2, 6.1.3, 6.2, 6.2.1, 6.2.2, 6.2.3, 6.2.4, 6.2.5, 6.2.6, 6.2.7, 6.2.8, 6.2.9, 6.2.10, 6.2.11, 6.2.12, 6.2.13, 6.3.0, 6.3.1, 6.3.2, 6.3.3, 6.3.4, 6.3.5, 6.3.6, 6.4.0, 6.4.1, 6.4.2, 6.4.3, 6.4.4, 6.4.5, 6.4.6, 6.4.7, 6.4.8, 6.4.9, 6.4.10, 6.4.11


 Download manual
Feedback submitted, thanks!