Step 4: Install and license Hunk
1. Copy the Splunk for Linux 64bit tgz version from http://www.splunk.com/download/hunk into your directory.
2. Untar your Splunk instance:
3. Start Splunk:
4. Install your Hunk license:
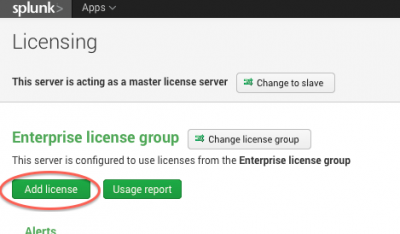
- Select Settings > Licensing.
- Click Add license.
- Either click Choose file and browse for your Hunk license file and select it, or click copy & paste the license XML directly... and paste the text of your license file into the provided field.
- Click Install. If this is the first license that you are installing, you must restart Splunk for the license to take effect and Hunk functionality to become available.
| Step 3: Set up an HDFS directory for Hunk access | Step 5: Configure an HDFS provider |
This documentation applies to the following versions of Hunk®(Legacy): 6.0, 6.0.1, 6.0.2, 6.0.3, 6.1, 6.1.1, 6.1.2, 6.1.3, 6.2, 6.2.1, 6.2.2, 6.2.3, 6.2.4, 6.2.5, 6.2.6, 6.2.7, 6.2.8, 6.2.9, 6.2.10, 6.2.11, 6.2.12, 6.2.13, 6.3.0, 6.3.1, 6.3.2, 6.3.3, 6.3.4, 6.3.5, 6.3.6, 6.4.0, 6.4.1, 6.4.2, 6.4.3, 6.4.4, 6.4.5, 6.4.6, 6.4.7, 6.4.8, 6.4.9, 6.4.10, 6.4.11

 Download manual
Feedback submitted, thanks!