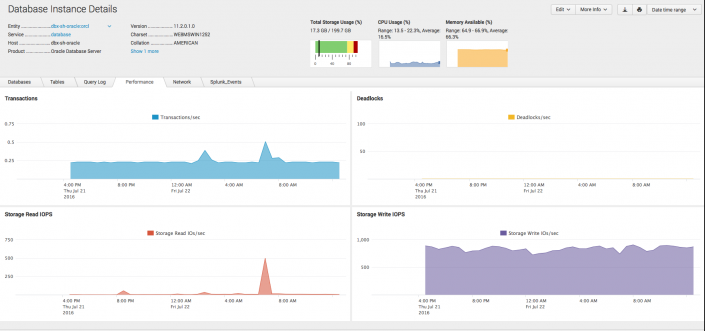
Database Module configurations
Configure the ITSI Database Module to connect your database instance data to your Splunk platform deployment.
Module entity roles
See the below table to identify the roles that the Database Module assigns to entities:
| ITSI Module | ITSI Role |
|---|---|
| ITSI Database Module | database_instance |
Step 1: Install supported technologies
The Database Module uses either the Splunk DB Connect 2 or 3 add-on to collect data for the Splunk Add-on for Microsoft SQL Server and the Splunk Add-on for Oracle Database.
The ITSI Database Module requires installation of the Splunk Add-on for Unix and Linux, or the Splunk Add-on for Microsoft Windows to collect host-level metrics, such as Host, CPU, and Memory.
See About installing Splunk add-ons to learn how to install a Splunk add-on in the following deployment scenarios.
Install your ITSI supported technologies onto your deployment using the reference table below. For single-instance deployments, install all supported technologies on your single instance.
| Technology Name | Installation Link | Search Heads | Universal Forwarders (Install on each host that has a database server installed) | Heavy Forwarder (Install on a host dedicated to running only DB Connect) |
|---|---|---|---|---|
| Splunk DB Connect | Installation guide | X | ||
| Splunk Add-on for Microsoft SQL Server | Installation guide | X | X | |
| Splunk Add-on for Oracle Database | Installation guide | X | ||
| Splunk Add-on for Microsoft Windows | Installation guide | X | X | |
| Splunk Add-on for Unix and Linux | Installation guide | X | X |
Step 2: Configure supported technologies to collect data and send to your Splunk deployment
The ITSI Database Module uses the Splunk Add-on for Microsoft Windows and the Splunk Add-on for Unix and Linux to display OS host level metrics including CPU, Memory, Storage, and Network in the drilldown visualizations.
Once installed, the Windows and Unix add-ons can be used with the ITSI Operating System Module for additional KPIs and visualizations.
See the Operating System Module configurations section of the ITSI Operating System Module manual to install and configure your operating system host data.
Step 3: Configure the Splunk add-on for DB Connect to collect data and send to your Splunk deployment
Use DB Connect version 2 or 3 to connect to and poll databases to retrieve performance and inventory data for populating the ITSI Database Module.
- Ensure that DB Connect is installed on a Heavy Forwarder that can be dedicated specifically to running DB Connect.
- Create a new database identity to connect to your database.
- Create a new database connection through the DB Connect UI, or in
databases.conf - Copy the contents of the template files in the below add-ons, and paste to the
$SPLUNK_HOME/etc/apps/splunk_app_db_connect/local/db_inputs.conffile of DB Connect. - Configure the
local/db_inputs.conffile in DB Connect using the below table for reference.
| Add-on | Template file location | Configuration inputs for DB Connect |
|---|---|---|
| Splunk Add-on for Microsoft SQL Server | $SPLUNK_HOME/etc/apps/Splunk_TA_microsoft-
|
|
| Splunk Add-on for Oracle Database | $SPLUNK_HOME/etc/apps/Splunk_TA_oracle/
|
|
For more information on DB Connect, see the Install DB Connect installation and setup checklist. For information on installing the DB Connect in a distributed deployment, see the Distributed Deployment section of the Splunk DB Connect manual.
Step 4: Configure lookups
Configure lookup file for Microsoft SQL Server
Data collection through the Splunk Add-on for Microsoft SQL Server requires the configuration of a lookup file to correlate the database server, database instances, and host data. To retrieve the database server name, run SELECT CONVERT(varchar(128),SERVERPROPERTY('ServerName')) AS database_instance; in your SQL server management studio.
In $SPLUNK_HOME/etc/apps/Splunk_TA_microsoft-sqlserver/lookups/sqlserver_host_dbserver_lookup.csv on the indexers, enter your database information in the database_instance and port fields:
| database_instance | port | |
|---|---|---|
| Example: | TAG-EX-W12R2-100 | 1433 |
The SQL queries in the '''port''' field will be populated at index-time in the event.
Step 5: Enable entity discovery
Enable entity discovery for the module to automatically discover entities for which relevant data has been collected. See Enable the automatic entity discovery search.
| About the Database Module | Database Module KPIs and thresholds |
This documentation applies to the following versions of Splunk® IT Service Intelligence: 4.11.0, 4.11.1, 4.11.2, 4.11.3, 4.11.4, 4.11.5, 4.11.6, 4.12.0 Cloud only, 4.12.1 Cloud only, 4.12.2 Cloud only, 4.13.0, 4.13.1, 4.13.2, 4.13.3, 4.14.0 Cloud only, 4.14.1 Cloud only, 4.14.2 Cloud only, 4.15.0, 4.15.1, 4.15.2, 4.15.3, 4.16.0 Cloud only, 4.17.0, 4.17.1, 4.18.0, 4.18.1

 Download manual
Feedback submitted, thanks!