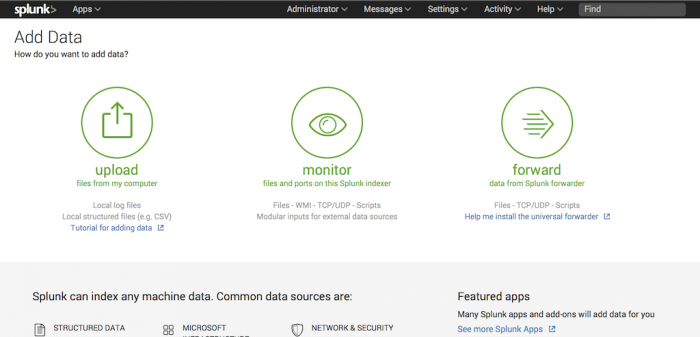
How do you want to add data?
The fastest way to add data to your Splunk Enterprise deployment is to use Splunk Web.
The Add Data page
After you log into your Splunk deployment, the Home page appears.
To add data, click the Add Data button (to the right of the list of apps.) The Add Data page appears. (If your Splunk deployment is a e-commerce Splunk Cloud deployment, choose Settings and click Add Data.)
There are some conditions where the Add Data page does not appear:
- This instance is part of a search head cluster. See About search head clustering in the Distributed Search manual.
- This instance is a managed Splunk Cloud instance.
There are three options for getting data into your Splunk deployment with Splunk Web: Upload, Monitor, and Forward.
Upload
The Upload option lets you upload a file or archive of files for indexing. When you click Upload, Splunk Web goes to a page that starts the upload process. See Upload data.
Monitor
The Monitor option lets you monitor one or more files, directories, network streams, scripts, Event Logs (on Windows hosts only), performance metrics, or any other type of machine data that the Splunk Enterprise instance has access to. When you click Monitor, Splunk Web loads a page that starts the monitoring process. See Monitor data.
Forward
The Forward option lets you receive data from forwarders into your Splunk deployment. When you click on the "Forward" button, Splunk Web takes you to a page that starts the data collection process from forwarders. See Forward data.
The Forward option requires additional configuration. Use it only in a single-instance Splunk environment.
| How handles your data | Upload data |
This documentation applies to the following versions of Splunk® Enterprise: 7.0.0, 7.0.1, 7.0.2, 7.0.3, 7.0.4, 7.0.5, 7.0.6, 7.0.7, 7.0.8, 7.0.9, 7.0.10, 7.0.11, 7.0.13


 Download manual
Feedback submitted, thanks!