Import and export an add-on project
Each add-on you create in Splunk Add-on Builder has a corresponding project that contains the configuration settings for the add-on. The only way you can modify certain parts of your add-on that are built by add-on builder, such as data inputs or field extractions, is by having access to the add-on project.
If you want to modify your add-on on a different computer from the one you used for developing it, or if you want to share your add-on project, you can export the add-on project as a TGZ file. Then, the project file can be imported to a different instance of Splunk Enterprise running Add-on Builder.
There are two ways to import and export add-on project, Splunk Web or using migration tool.
- Using Splunk web is very straightforward and usually recommended, the exported file is gzipped.
- If you want to automate the process or for code repository (such as git) check-in, you can also use the migration tool provided by Splunk Add-on builder. The exported file is an extracted folder.
You can only import and export projects for add-ons that were created in Splunk Add-on Builder.
To import an add-on project using Splunk web
- On the Splunk Add-on Builder home page on the Created with Add-on Builder tab, click Import Project.
- Navigate to the add-on TGZ project file and click Open.
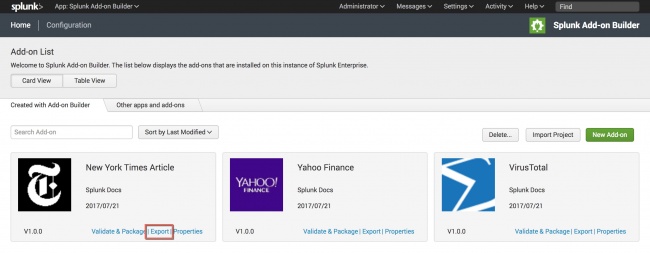
To export an add-on project using Splunk web
- On the Splunk Add-on Builder home page on the Created with Add-on Builder tab, click Export for the add-on.
To import or export project using migration tool
Run shell command migration tool project_migration_tool under $SPLUNK_HOME$/etc/apps/splunk_app_addon-builder/bin/aob/aob_tools.
Arguments of the migration tool
  -h, --help  Show the help of the migration tool and then exit
  -l,--log_level  {DEBUG,INFO,WARNING,ERROR}  Log level of the migration tool. Default:INFO
  -o, --output_dir  The output directory to export the project to.
  -t, --ta_name  The project name of which you want to import/export.
  -u, --user  Splunk user name. Default:admin
  -p, --password   Splunk password. Default:changeme
  -s, --splunk_web   Splunk platform URL. Default: http://localhost:8000
  -a, --action {export,import}    The operation you want to do. Default:export
  -i, --input_directory  The source directory of the project.
  -v, --version         Show the version of the migration tool.
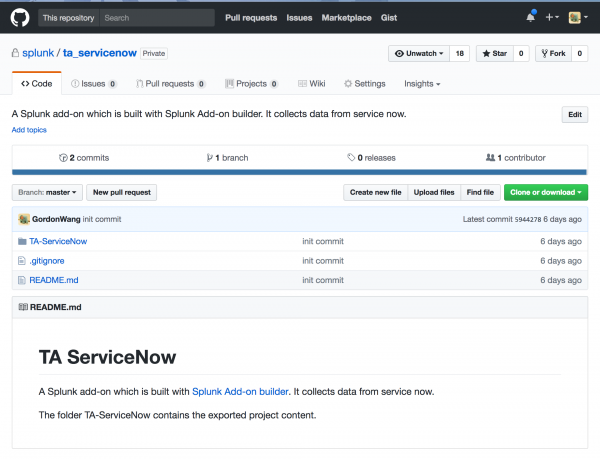
Example: Import the ServiceNow add-on on github to Splunk add-on builder under
$YOUR_FOLDER/ta_servicenow.
Run the following command of the migration tool:
./project_migration_tool -a import -i $YOUR_FOLDER/ta_servicenow/TA-ServiceNow -s http://localhost:8000 -u admin -p changeme

Example: Export the ServiceNow add-on on your local Splunk instance to github.
- Run the following command:
./project_migration_tool -a export -t TA-ServiceNow -o /tmp/ta_servicenow/ -s http://localhost:8000 -u admin -p changeme - Copy the exported content to git repo directory.
cp -r /tmp/ta_servicenow/TA-ServiceNow/* $YOUR_FOLDER/ta_servicenow/TA-ServiceNow - Check in the changes.
| Use the Splunk Add-on Builder | Create an add-on |
This documentation applies to the following versions of Splunk® Add-on Builder: 2.2.0


 Download manual
Feedback submitted, thanks!