Part 3: Create a risk incident rule
Now that you have raised the risk score for watchlisted users, you need to create risk incident rules so that risk notables are created.
A risk incident rule reviews the events in the risk index for anomalous events and threat activities and uses an aggregation of events impacting a single risk object, which can be an asset or identity, to generate risk notables in Splunk Enterprise Security.
Risk notables are created when the risk scores surpass a specified threshold over a period of time and help to evaluate the risk associated with the asset or a system and an identity or a user.
Identify the tactic to enrich the risk incident rule
Begin by creating a risk incident rule that gets enriched by the discovery tactics in the MITRE ATT&CK cyber-security framework.
Follow these steps to identify the MITRE tactic to enrich the risk incident rule:
- Identify the available discovery tactics in the MITRE framework by entering the following search in Splunk Enterprise Security:
|inputlookup mitre_attack_lookup
|search mitre_tactic="discovery"
|table mitre_tactic, mitre_technique, mitre_technique_id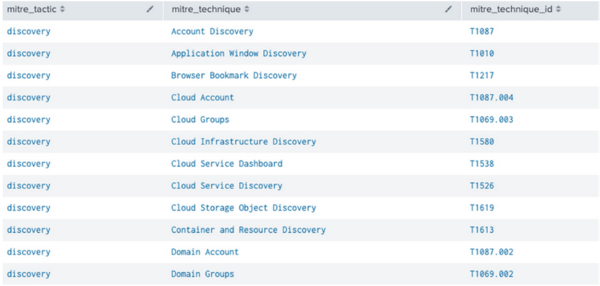
- Select one technique from the list of available discovery techniques.
When you configure the risk incident rule in the next task, you can choose to create the risk incident rule based on the technique, T1049: System Network Connections Discovery (https://github.com/redcanaryco/atomic-red-team/blob/master/atomics/T1049/T1049.md).
The risk incident rule tracks adversaries who want to get a list of all network connections to and from a compromised system and from remote systems by querying information over the network.

Configure the risk incident rule
Follow these steps to configure a risk incident rule to identify network connections associated with compromised systems:
- In the Splunk Enterprise Security app, select Configure, then select Content.
- Select Content Management.
- From the Create New Content drop-down list, select Correlation Search.
- In the Correlation Search Editor, enter the search name: RR - System Network Connections Discovery.
- In the Description field, enter the following text: Adversaries might attempt to get a listing of network connections to or from the compromised system they are currently accessing or from remote systems by querying for information over the network.
- In the Search field, enter the following search:
sourcetype="xmlwineventlog:microsoft-windows-sysmon/operational" EventCode=1
(process_name="net.exe" OR process_name="netstat.exe")
AND (process_command_line="*net* use *" OR process_command_line="*net* sessions*" OR
process_command_line="*net* file*" OR process_command_line="*netstat*")
| table _time,user,dest,process_command_line,parent_process_name,
process_name,CurrentDirectory,ParentCommandLine
| rex field=dest "^(?<dest>.*?)[\.|$]"
| eval user=lower(if(match(user,".*\\\\.*"), replace(user,".*\\\\",""), user)), dest=lower(dest)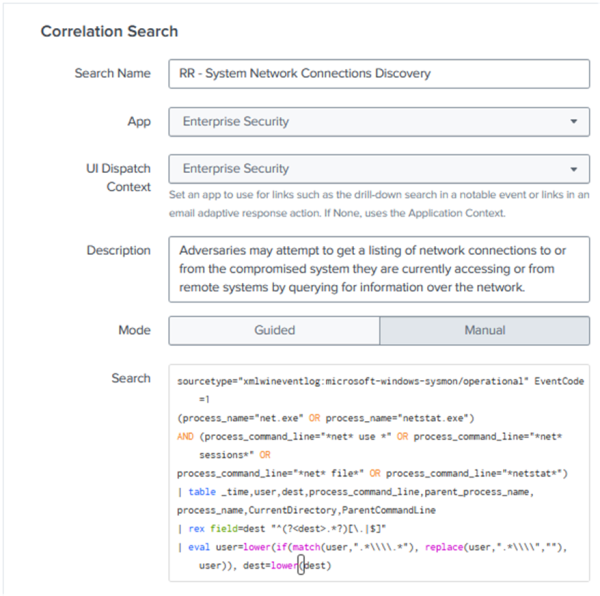

After you configure the correlation search, move to the Map the risk incident rule to the MITRE tactic section to map the risk incident rule to the MITRE tactic.
Map the risk incident rule to the MITRE tactic
Follow these steps to map the risk incident rule to the MITRE tactic T1049:
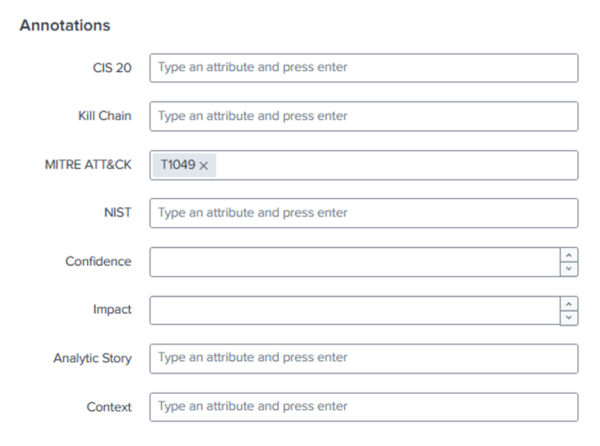
- In the Correlation Search Editor, go to Annotations.
- For the MITRE ATT&CK field, enter T1049.

After you map the risk incident rule to the MITRE tactic, add the time range and throttling conditions to the risk incident rule so that you can generate risk notables.
Add time range and throttling conditions to the risk incident rule
Now, follow these steps to add time range and throttling conditions that the risk incident rule uses to generate risk notables:
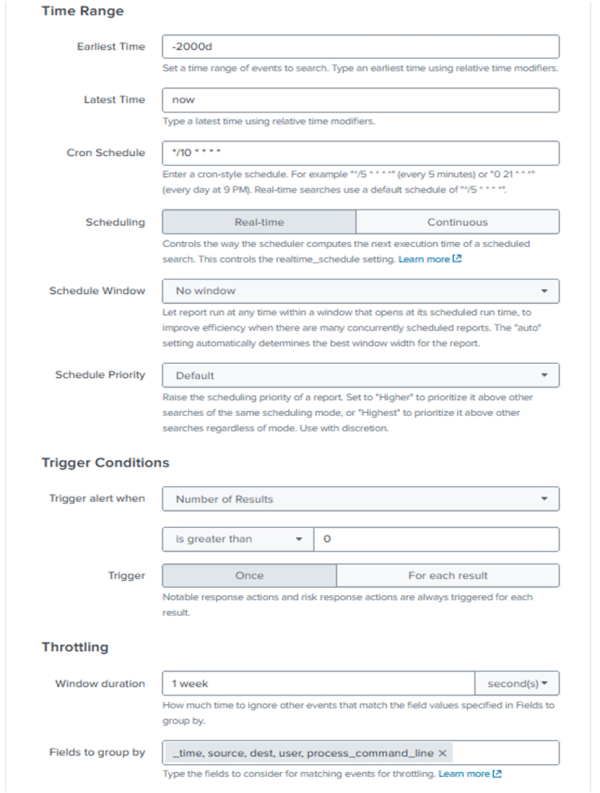
- In the Correlation Search Editor, for the Earliest Time field enter -2000d.
- In the Latest Time field, enter: now.
- In the Cron Schedule field, enter: */10 * * * *.
- Next, go to the Throttling section in the Window Duration field, enter: 1 week(s)
- In Fields to group by, enter: _time, source, dest, user, process_command_line.

Add the Risk Analysis adaptive response action
Next, follow these steps to associate risk with the risk incident rule:
- In the Correlation Search editor, go to Adaptive Response Actions.
- Select Risk Analysis.
- In the Risk Message field, enter: A network discovery command ($process_command_line$) was performed on '$dest$' by user $user$' and launched by '$parent_process_name$'
- Go to Risk Modifiers, and for the Risk Score field, enter 5.
- For the Risk Object field, enter dest.
- For the Risk Object Type field, enter system.
- Select Add a new risk modifier.
- Go to Risk Modifiers, and for the Risk Score field, enter 5.
- For the Risk Object field, enter user.
- For the Risk Object Type field, enter user.
- Go to Threat Object, and for the Threat Object field, enter process_command_line as the potential indicator of compromise.
- For the Threat Object Type field, enter command.
- Select Save.
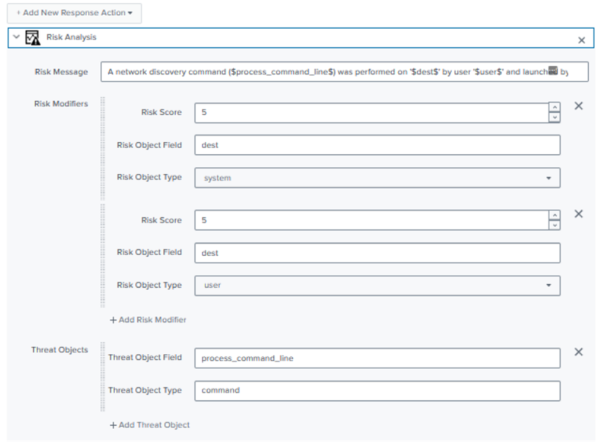
The dataset supports both system and user risk objects, so you have created risk modifiers for both.

Validate the risk incident rule
Follow these steps to validate the risk incident rule that you created:
- In Splunk Enterprise Security, go to Content.
- Select Content Management and search for the risk incident rule that you created.

- Under Actions, verify that the risk incident rule is enabled.
- In Splunk Enterprise Security, go to Search and select Search.
- Enter the following search in the search bar:
index=risk
| stats values(risk_object_type) count sum(risk_score) values(risk_message)
values(annotations.mitre_attack.mitre_technique)
values(annotations.mitre_attack.mitre_tactic) by risk_object
This risk incident rule searches the risk index to identify 226 risk events as shown in the following screenshot:
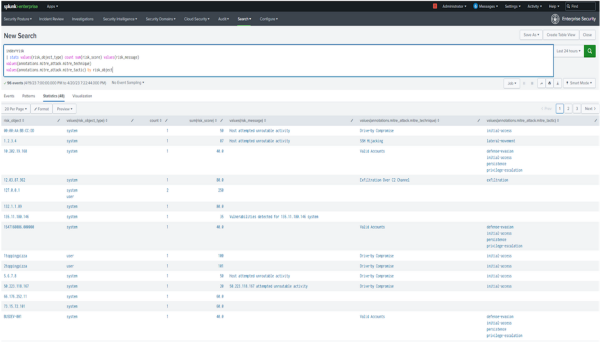
- Review the following items:
- risk object types for both system and user
- sum of the risk score to see if the threshold is too high or low
- risk messages to verify if the tokens look correct
- values to verify if the MITRE annotations lookup is working correctly
- Expand any one of the search results to identify new fields that can get added by the RBA framework.


See also
For more information on risk incident rules, see the product documentation:
Next step
Now that you have created a risk incident rule, you can explore how to review risk in the Risk Analysis dashboard.
| Part 2: Raise the risk score of watchlisted users using risk factors | Part 4: Review risk using the Risk Analysis dashboard |
This documentation applies to the following versions of Splunk® Enterprise Security: 7.2.0, 7.3.0, 7.3.1, 7.3.2, 7.3.3
Feedback submitted, thanks!