Help reading searches
The Search bar contains features to help you read, parse, or interpret the Splunk Search Processing Language (SPL) syntax. The syntax highlighting feature displays parts of SPL in different colors. There are also keyboard shortcuts to help you find information in your searches.
Syntax highlighting
With syntax highlighting, the SPL commands, arguments, functions, and keywords are color-coded to make it easer to read a search.
Consider the following search.
sourcetype=access_* | timechart count(eval(action=purchase)) BY productName usenull=false useother=false
With syntax highlighting turned on, the search is easier to read. The following image shows the syntax highlighting Light theme.

By default, syntax highlighting is turned on.
Color codes
The color coding that is used for the search syntax depends on the color theme that is implemented. The Light theme is the default theme. The color codes for the Light and Dark themes are described in the following table.
| Syntax component | Color | Example |
|---|---|---|
| Commands | Blue | ...timechart |
| Command arguments | Green | ...timechart usenull=false |
| Functions | Pink | ...timechart count |
| Keyword modifiers and Boolean operators | Orange | ...timechart count BY productName |
Syntax validation
If a command, argument, function, or boolean operator is not spelled or capitalized correctly, the term is not highlighted in color. The lack of color alerts you to incorrect syntax.
If you specify an incorrect data type for an argument, the value is red. For example, the limit argument for the top command expects an integer. If you type ...|top limit=false the term false is highlighted in red because it is not an integer.
Turn off syntax highlighting
You can turn syntax highlighting off.
- On the Splunk bar, select [User_account_name] > Account Settings.
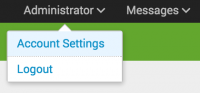
- In the Search section under Syntax highlighting, select Black on white.
- Click Save.

Color themes
You can change the appearance of the criteria in the Search bar by specifying a color theme. There are several themes to choose from.
| Theme name | Description | Notes |
|---|---|---|
| Black on white | White background. Black text. No other colors. | |
| Light theme | White background. Black text. Colors for commands, arguments, functions, keyword modifiers, and Boolean operators. | Default theme |
| Dark theme | Black background. Light grey text. Colors for commands, arguments, functions, keyword modifiers, and Boolean operators. |
The following image shows syntax highlighting with the Dark theme.

Change your theme
You change the color theme in the Search bar by using the account menu.
- On the Splunk bar, select [User_account_name] > Account Settings.
- In the Search section under Syntax highlighting, select the color theme that you want to use.
- Click Save.
Auto-format search syntax
As you build a search, you can set up the Splunk software to format the search syntax as you type. Auto-format makes your searches more readable. Each each pipe section is parsed onto a separate line. Any subsearches are indented.
The following image shows how a search appears in the Search bar when auto-format is turned off.

When auto-format is turned on, this same search is parsed as shown in the following image.

Turn on Search auto-format
By default, automatic formatting of search syntax is turned off. You can turn on the automatic formatting of the search syntax in the Settings dialog box.
- On the Splunk bar, select [User_account_name] > Account Settings.
- In the Search section under Search auto-format, select On.
- Click Save.

Changing the options in the Settings dialog box changes the setting only for you. It does not impact the setting for other users.
Characters that trigger auto-format
| Character | Automatic formatting |
|---|---|
| Pipe ( | ) | The pipe is placed on a new line to separate each new piped section of your search criteria. |
| Left square bracket ( [ ) | The left square bracket, which signifies the start of a subsearch, is placed on a new line and indented several spaces. |
If the pipe or left bracket is inside a quoted string, the auto-format is not triggered.
Auto-format works only on searches that you type
The auto-format feature works on searches that you type into the Search bar. If you paste a search into the Search bar or select a search from Search History, the search is not automatically formatted even when the auto-format feature is turned on.
To apply auto-formatting to a search that you paste into the Search bar or select from Search History, use the following keyboard shortcut to apply auto-formatting to that search.
- On Linux or Windows use Ctrl + \
- On Mac OSX use Command + \
Number search lines
To make reading your searches easier, you can display line numbers in the Search bar.

Turn on line numbering
By default, line numbering is turned off. You turn on line numbering in the Settings dialog box.
- On the Splunk bar, select [User_account_name] > Account Settings.
- In the Search section under Show line numbers, select On.
- Click Save.
Changing the options in the Settings dialog box changes the setting only for you. It does not impact the setting for other users. See Change the default Search settings for all users.
A row in the Search bar is not a line
The line numbering feature applies numbers only to lines. A row in the Search bar is not necessarily a line. You might have a long line that spans multiple rows in the Search bar, but is still only one line.
For example, if you paste a long search into the Search bar that has not been formatted with multiple lines, the search has one line number and spans multiple rows.
You can create lines in the Search bar by using the following methods.
- The Search auto-formatting feature is turned on and you type a pipe character or left square bracket.
- You use the keyboard shortcut to auto-format the current search.
- On Linux or Windows use Ctrl + \
- On Mac OSX use Command + \
- You press Shift + Enter to split the active row at the cursor. Pressing Enter does not create a new line in the Search bar.
Search bar shortcuts
In the Search bar, you can use keyboard shortcuts to help you develop, read, and parse your search criteria.
Make searches easier to read
Long searches can be difficult to read. For example, the following search uses multiple commands and includes many occurrences of renaming columns in the search results.
sourcetype=access_* status=200 | stats count AS views count(eval(action="addtocart")) AS addtocart count(eval(action="purchase")) AS purchases by productName | eval viewsToPurchases=(purchases/views)*100 | eval cartToPurchases=(purchases/addtocart)*100 | table productName views addtocart purchases viewsToPurchases cartToPurchases | rename productName AS "Product Name", views AS "Views", addtocart as "Adds To Cart", purchases AS "Purchases"
The following image shows how this search appears in the Search bar.
You can use a keyboard shortcut to parse each pipe section on a separate line. Any subsearches are indented.
- On Linux or Windows use Ctrl + \
- On Mac OSX use Command + \
The results of the shortcut are shown in the following image.
You can also use Shift + Enter to force a new line. See Line and word shortcuts.
Expand your search
You can see the contents of your search with a keyboard shortcut, Command-Shift-E (Mac OSX) or Control-Shift-E (Linux or Windows) from the Search bar in the Search page. This opens a preview that displays the expanded search string, including all search macros and saved searches. If syntax highlighting or line numbering are turned on, those features also appear in the preview.

You can copy parts of the search in the preview. You can also click Open in Search to run your search in a new window from the preview. See Preview your search.
Highlight search terms
- To highlight all of the occurrences of a word in the search, double-click on that word.

Locate matching parenthesis
- Position your cursor immediately after an open or close parenthesis. The matching parenthesis is highlighted.

Undo and Redo shortcuts
Use these keyboard shortcuts to undo and redo actions in the Search bar.
| Action | Linux or Windows | Mac OSX |
|---|---|---|
| Undo the previous action. | Ctrl + Z | Command + Z |
| Redo the previous action. | Ctrl + Y or Ctrl + Shift + Z |
Command + Y or Command + Shift + Z |
Search assistant window shortcuts
With the Compact mode of the search assistant, you can use keyboard shortcuts to select items in the list, and close and reopen the search assistant window.
| Action | Linux or Windows | Mac OSX |
|---|---|---|
| Move your cursor into the search assistant window. | Down arrow key | Down arrow key |
| Close the search assistant window. | ESC | ESC |
| Reopen the search assistant window. | Ctrl + Space | Control + Space |
| Select an item in the search assistant window and insert it into the Search bar. | Use the Up arrow and Down arrow keys to highlight the item and press Enter. | Use the Up arrow and Down arrow keys to highlight the item and press Enter. |
| Toggle between the list and the Learn More link in the search assistant window. | Tab | Tab |
Find and replace shortcuts
Use the following keyboard shortcuts to find and replace terms in the Search bar.
| Action | Linux or Windows | Mac OSX |
|---|---|---|
| Find a term. | Ctrl + F | Command + F |
| Find and replace a term. | Ctrl + H | Command + Option + F |
Line and word shortcuts
The distinction between rows and lines is important to understand when you use keyboard shortcuts to manipulate rows or lines in your search criteria in the Search bar.
- Long searches appear on multiple rows in the Search bar.
- If the search is not parsed, the search is one line.
- If the search is parsed, separating each piped section and subsearch into its own line, a row is the same as a line.
| Action | Linux or Windows | Mac OSX |
|---|---|---|
| Split the active row at the cursor. | Shift + Enter | Shift + Enter |
| Remove the active line. If the search is one line with multiple rows and not parsed into separate lines, the entire search is removed. | Ctrl + D | Command + D |
| Copy the active row and place the copy below the active row. | Alt + Shift + Down arrow | Command + Option + Down arrow |
| Copy the active row and place the copy above the active row. | Alt + Shift + Up arrow | Command + Option + Up arrow |
| Move the active row down one row. | Alt + Down arrow | Option + Down arrow |
| Move the active row up one row. | Alt + Up arrow | Option + Up arrow |
| Remove the search criteria from the cursor to the end of the row. | Alt + Delete | Control + K |
| Remove the search criteria from the cursor to the start of the row. | Alt + Backspace | Command + Delete |
| Remove the word or space to the right of the cursor. | Ctrl + Delete | fn + Option + Delete |
| Remove the word or space to the left of the cursor. | Ctrl + Backspace | Option + Delete |
Change the default Search settings for all users
Individual users can change the default Search settings for syntax highlighting, auto-formatting, and line numbering features for themselves.
The default Search settings can also be changed globally for all users.
Prerequisites
- Only users with file system access, such as system administrators, can change the default Search settings for all users. If you are using Splunk Cloud and want to change the default Search settings for your Splunk system, open a Support ticket.
- Review the steps in How to edit a configuration file in the Admin Manual.
Never change or copy the configuration files in the default directory. The files in the default directory must remain intact and in their original location. Make the changes in the local directory.
Steps
- Open the local
user-prefs.conf.spec.infile for the Search app. For example,$SPLUNK_HOME/etc/apps/<app_name>/local. - Under the [general] stanza, you can change the settings listed in the following table.
Feature Attribute syntax Default setting Syntax highlighting search_syntax_highlighting = <boolean> true Auto-formatting search_auto_format = <boolean> false Line numbering search_line_numbers = <boolean> false - Restart the Splunk instance.
| Help building searches | Search actions |
This documentation applies to the following versions of Splunk® Enterprise: 7.0.0, 7.0.1, 7.0.2, 7.0.3, 7.0.4, 7.0.5, 7.0.6, 7.0.7, 7.0.8, 7.0.9, 7.0.10, 7.0.11, 7.0.13
Feedback submitted, thanks!