Load the tutorial data
This topic walks you through downloading the tutorial data set and adding it to . You can complete this tutorial in several hours, but if you want to spread it out over a few days, download a new sample data file and add it.
Download the sample data file
This tutorial uses a fictitious game store, called Buttercup Games, that sells games and related items in an online store.
You must download the compressed data file to use with this tutorial. The compressed data file contains web access log files, secure formatted log files, and sales log files for the Buttercup Games store. The tutorialdata.zip file is updated daily and contains events that are timestamped for the previous 7 days.
Do not uncompress the file.
Add the sample data
- Log into your Splunk deployment. If you are not in Splunk Home, click the Splunk logo on the Splunk bar to go to Splunk Home.
- Under Explore Splunk Enterprise, click Add data. (Note: If your Splunk deployment is a e-commerce Splunk Cloud deployment, choose Settings and click Add Data. The Add Data option does not appear if your deployment is a managed Splunk Cloud deployment. In this case you must use forwarding to add the tutorial data.)
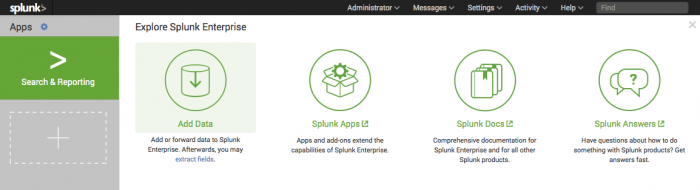
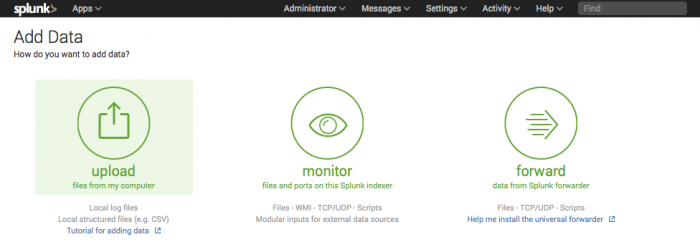
The Add Data view displays three options for adding data, lists of common data types, and add-ons you can use to extend Splunk Enterprise's capabilities to add data. - Under "How do you want to add data?", click Upload.
- Under Select Source, click Select File to browse for the tutorial data or Drop the data file into the outlined box.
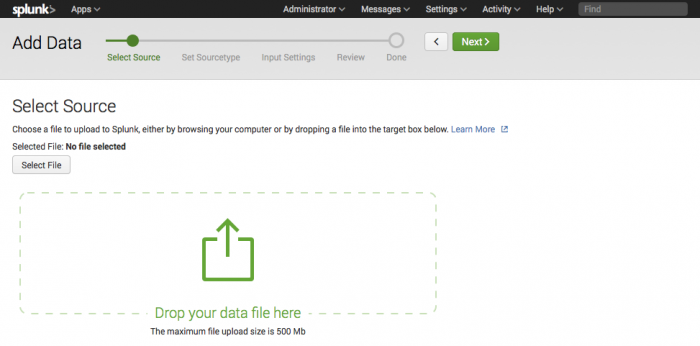
Because the tutorial data file is an archived data file, the next step in the Add Data workflow changes from Set Sourcetype to Input Settings. - Click Next to continue to Input Settings. Under Input Settings, you can override the default settings for Host, Source type, and Index.
- Modify the host settings to assign host names using a portion of the path name:
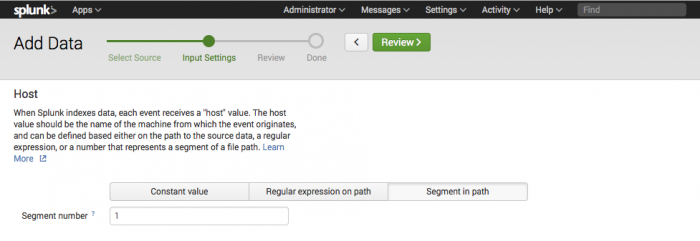
- Select Segment in path from the menu.
- Type in 1 for the segment number.
- Click Next to Review your input settings.
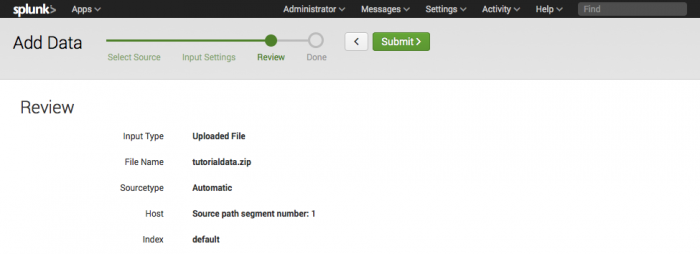
- Click Submit.
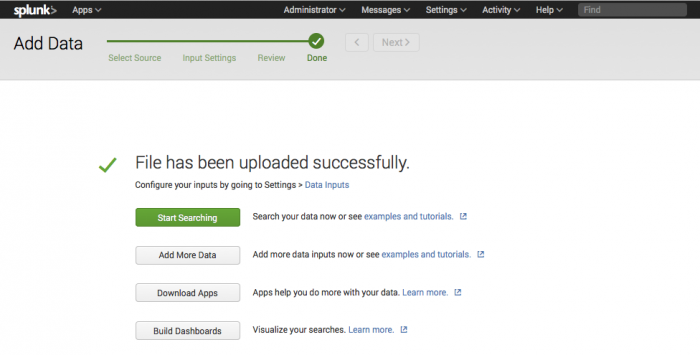
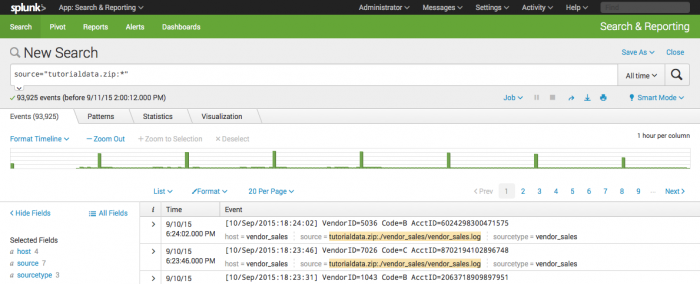
- To confirm that the data added successfully, click Start Searching.
This opens the Search view and runs a search for the tutorial data source.


Next steps
Some of the examples in this tutorial require data from external lookup tables. Now that you have added data to , the next topic walks you through adding the lookup tables.
| Navigating Splunk Web | Add lookup files |
This documentation applies to the following versions of Splunk® Enterprise: 7.0.0, 7.0.1, 7.0.2, 7.0.3, 7.0.4, 7.0.5, 7.0.6, 7.0.7, 7.0.8, 7.0.9, 7.0.10, 7.0.11, 7.0.13
Feedback submitted, thanks!