Splunk Cloud Platform Quick Start
This topic shows you the basic steps required to start using your Splunk Cloud Platform deployment, and provides a simple quick start tutorial to help you get up and running quickly.
To get started with your Splunk Cloud Platform deployment, follow these high-level steps:
- Log in
- Get data in
- Search and manage your data
Log in to Splunk Cloud Platform
To log in to your Splunk Cloud Platform deployment, you must use the dedicated Splunk Cloud Platform URL and log in credentials provided to you in the "Welcome to Splunk Cloud Platform" email you received when you opened your account.
Get data into Splunk Cloud Platform
To get data into Splunk Cloud Platform, the most common approach is to install the Splunk Universal Forwarder on the machines where your source data resides, and configure them to send data to Splunk Cloud Platform. You can also upload files, or monitor files and inputs. For more information on the options available for getting data into Splunk Cloud Platform, see Introduction to Getting Data In.
Search and manage your data
After you get your data into Splunk Cloud Platform, you can search the data to create reports, display the results using dashboards and visualizations, and set alerts that trigger when specific conditions are met. For detailed information, see the following manuals.
Quick start tutorial
If you are new to Splunk Cloud Platform and want to get started quickly, follow the steps in this brief tutorial to get some data into your Splunk Cloud Platform deployment and start searching it.
What you need
- Your Splunk Cloud Platform URL and log in credentials. See Log in to Splunk Cloud Platform.
- A standard log file to use as sample data for this exercise, such as a
/var/log/messagesfile on a Unix machine, or a text file inC:\Windows\System32\LogFileson a Windows computer.
Step 1. Log in to Splunk Cloud Platform
To log in to Splunk Cloud Platform:
- In your web browser, navigate to your Splunk Cloud Platform URL. For example,
https://mycompany.splunkcloud.comorhttps://prd-p-njqblk23gjdh.cloud.splunk.com - Enter the credentials provided to you when you opened your account.
The Splunk Web UI appears. You can now interact with your Splunk Cloud Platform deployment.
Step 2. Upload a file
In Splunk Web, follow these steps:
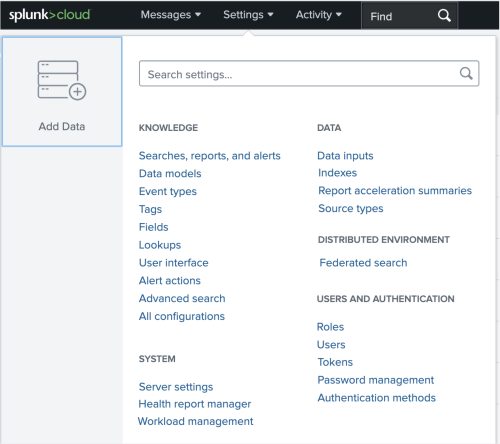
- To create a test index where you can store test data, click Settings > Indexes.
- Click New Indexes and assign the index a name. To minimize resource consumption, specify a small size and retention period.
- Select Settings > Add Data.

- Click Upload.
- Click Select File, browse to a log file on your computer, and click Open. The file is uploaded. Click Next.
- On the Set Source Type page, select the correct source type for the file you uploaded, or, if none is appropriate, specify a name for the new source type and click Next.
- On the Input Settings page, select your test index.
- Click Review and verify your settings.
- Click Submit.
After your data is uploaded, Splunk Web displays a "Success" message. You can now start searching your data.
Step 3. Search your data
On the "Success" screen, click Start searching. Splunk Web displays the data from the log file that you just uploaded, parsed into time-stamped events. If you do not see search results, verify that the time range displayed to the right of the search bar corresponds to the time range of the events in the file that you uploaded.
Step 4. (optional) Forward data
To feed data continually to your Splunk Cloud Platform deployment, you can install and configure the Splunk universal forwarder on the machine where the data resides. For information on how to install and configure forwarders, see the following platform-specific documentation:
- Get Windows Data into Splunk Cloud Platform
- Get *nix data into Splunk Cloud Platform
- Forward data from files and directories to Splunk Cloud Platform
As with the data you uploaded, you can isolate your test data from any production data by forwarding it to a test index.
Next steps
- Send data directly to your Splunk Cloud deployment using HTTP protocol. For details, see Set up and use HTTP Event Collector.
- Create users and administer their access to your Splunk Cloud Platform deployment. For more information, see Manage Splunk Cloud Platform users and roles.
| Splunk Cloud Platform deployment types | Add a global banner to your Splunk Cloud Platform deployment |
This documentation applies to the following versions of Splunk Cloud Platform™: 9.1.2312, 9.2.2403, 9.2.2406, 9.3.2408 (latest FedRAMP release), 9.3.2411

 Download manual
Feedback submitted, thanks!