Sort notables by disposition
This is the second step in the Reduce alert volumes by triaging notables scenario.
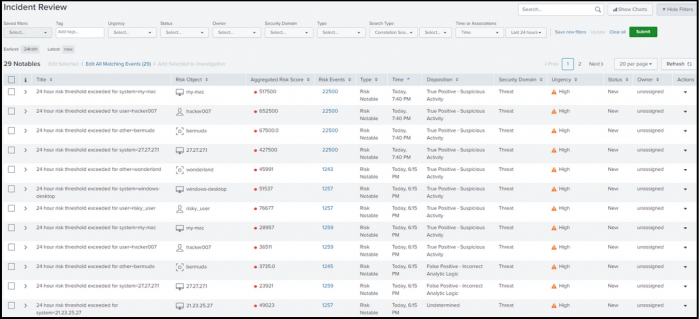
Ram now sorts the notables by disposition in the Incident Review page to drill down on the risk notables that get tagged as True Positive - Suspicious Activity and ignore the false positives as shown in the following image.

- From the Splunk Enterprise Security menu, Ram selects the Incident Review page that provides a list of notable events for the security domains.
- Ram selects Disposition in the table to sort the notables tagged as True Positive - Suspicious Activity.
The table of notable events in the Incident Review page also lists the risk events associated with the notable.
Now Ram can focus on investigating risk notables that get grouped together as True Positive - Suspicious Activity.
Next step
Investigate risk notables that represent a threat
See also
For more information on using dispositions, see the product documentation:
Triage notables on Incident Review in Splunk Enterprise Security in the Use Splunk Enterprise Security manual.
| Add dispositions to risk notables | Investigate risk notables that represent a threat |
This documentation applies to the following versions of Splunk® Enterprise Security: 7.3.2, 7.3.3
 Download manual
Feedback submitted, thanks!