Grant users access to indexes in Search Experience preview
As an admin in the Search Experience preview, you can grant other users access to indexes from your Splunk Cloud Platform deployment.
Prerequisite You must establish a connection between your current Splunk Cloud deployment and the Search Experience preview before you can permission the indexes. See Connecting your Splunk Cloud deployment to Splunk Cloud Experience.
If you want to give some users access to a set of indexes and another set of users access to a different set of indexes, see How to give different types of access to different users.
Add yourself to the tenant users group
To edit the list of users on your tenant, as an admin you must add yourself to the Tenant Users group:
- Login to the Search Experience preview as an admin.
- In the Cloud Console, click Groups, as shown in the following image:

- In the Name column, find the
Tenant Usersgroup and select the correspondingMore optionsicon .
. - Click Edit Group.
- On the Edit Users step, select your name.
- Click Next.
- On the Review and Confirm step, verify the group name and your name and click Save and Close.

To share access to your indexes, you must complete the following tasks:
- Create an access role
- Create a group
- Assign roles to the group
- Add users to the
tenant name.usersgroup - Invite users to the tenant
The steps for these tasks are described in the following sections.
If you plan to grant different types of access to different users, read How to give different types of access to different users before completing these steps.
Create an access role for each index
You need to create an access role for each index that you have made available from your Splunk Cloud Platform deployment:
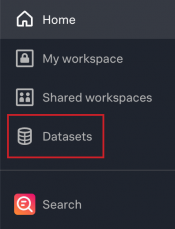
- In the Splunk Cloud Console, click Home to access the Home page in the Search Experience preview.
- Click Datasets and select an index that you want to share.
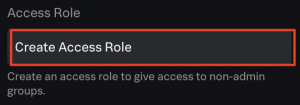
- Click Create Access Role, which creates a role for the selected index.
- Under Access Role, click the Copy to clipboard icon.
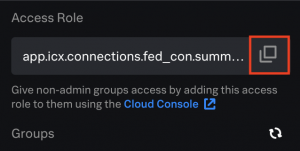
To grant access to other indexes, you must create a separate access role for each index. You might want to paste the Access Role information into a notepad to keep track of the roles you create.


Create a new user group
Create one or more user groups. Groups control which users have access to each index. A user can be part of more than one group.
- Click the Settings icon
 and select Cloud Console. The Cloud Console opens in a new browser tab.
 - In the Cloud Console, click Groups.
- Click + New Group.

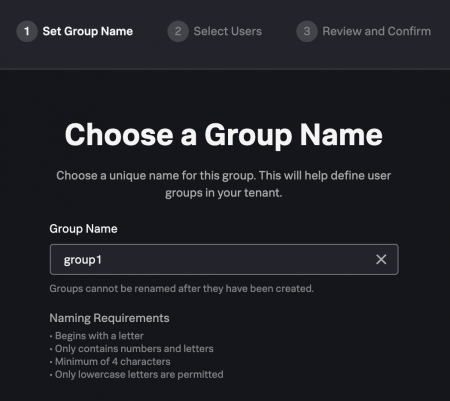
- On the Set Group Name step, specify a unique name for the Group Name.
Use a name that it is similar to the index that you plan to share. This name can't be changed later.
- Click Next.
- On the Select Users step, at this point in the setup there are no other users on the tenant. You will assign users to the group in a later step. Your name is already selected. Click Next.
- On the Review and Confirm step, verify the group name and your name, and click Create.

Assign a group to an access role
Assign a user groups to the access role for an index.
- In the Cloud Console, click Roles.
- Click Manage Assignments.
- Check the user group that you created and click Next.
- Assign the group to one or more access roles. These are the access roles that you copied to the clipboard in an earlier step. Check the access roles that you created for the indexes. For example, if you want this group to have access to three indexes, check those three access roles.
- Click Save.
- To manage role assignments for a different group, click Manage Assignments again and repeat the assignment steps until you have assigned all the groups that you created to an access role.
Invite users to the tenant
After you manage the role assignments, you are ready to invite users to the Search Experience preview.
When you invite users to the tenant, you specify which group you want the users to have access to. For example, if you want userA to have access to group1 and group2, you must invite userA once for group1 and again for group2
In addition to adding users to the groups you created, you must add users to the group for your specific tenant which is the <tenant name>.users. The name of the tenant users group is the same as the name of the Cloud stack in Splunk Cloud Platform deployment. For example, if the name of your Cloud stack is splk_test_icx_01, the name of the tenant users group is splk_test_icx_01.users.
- In the Cloud Console, click Users.
- Click + Invite User.
- Type the email address for the first user and press Enter. Type the email address for the next user and and press Enter. Continue to add users until all of the users that you want to invite for a specific group are added.
- In the Available groups list, check the groups that you want to invite these users to:
- Select the group that you created for the role
- Select the
<tenant name>.usersgroup
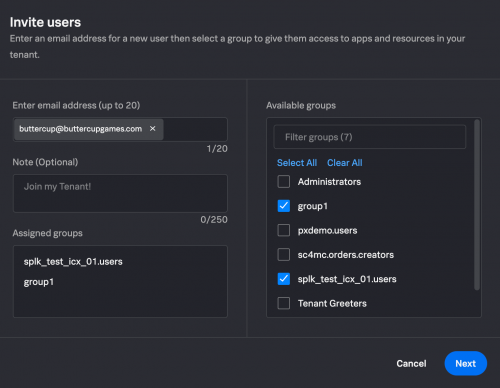
- Optional. Type a note to the users that explains why they are receiving this email invitation.
- Click Next.
- Confirm the email addresses and click Send Invite.
- If you created multiple groups for different users, you need to repeat these steps for each group that you want to assign users to.

Modify access to the indexes
After the initial setup, you can make create new groups and adjust user access.
Verify a user has access to the tenant
- In the Cloud Console, click Users.
- Use the Search for users box tot look for the user name.
- If the user name does not appear in the list, see Invite users to the tenant.
Add existing users to a different group
If a user is already invited to the tenant, they have access to at least one group. You can add the user to a different group:
- In the Cloud Console, click Groups.
- Next to the group you want to modify, select the
More optionsicon. - Click Edit Group.
- On the Edit Users step, select the users that you want to add to the group.
- Click Next.
- On the Review and Confirm step, verify the group name and user names and click Save and Close.
Do not add users to the Tenant Admins, Tenant Users, or EC Admin. groups. These are groups only for admins.
How to give different types of access to different users
There might be situations, such as for security reasons, where you need to give different types of access to the indexes on your current Splunk Cloud deployment to your users.
The following scenario describes how you accomplish this when you grant permissions in the Search Experience preview.
Setting up the connection to the Splunk Cloud Platform deployment indexes
Suppose that when you set up the connection, you shared three indexes from your current Splunk Cloud deployment with your service account (service_acct_scp). Those indexes are:
- index_a
- index_b
- index_d
The following table shows your security requirements:
| User | Access |
|---|---|
| userA | Is authorized to access index_a and index_b |
| userB | Is authorized to access index_b |
| userC | Is not authorized to access any of the indexes |
Permissioning your indexes in the Search Experience preview
You follow the detailed steps in the section Sharing one or more indexes with a group section, with the following adjustments:
- You create three separate roles. Use the Create access role button on the Datasets page for each of the three indexes.
- You create two groups,
group1andgroup2by creating the appropriate groups in the Cloud Console:- The
group1group contains the roles forindex_aandindex_b. - The
group2group contains the role forindex_b.
- The
- Give your users access to the indexes:
userAneeds view access to bothindex_aandindex_band is added togroup1.userBneeds view access toindex_bis added togroup2.userCdoes not need access to any index and is not added to any group.
The following diagram illustrates these settings:

Next step
Now that you have granted permission to your deployment indexes, you can:
- Install a set of sample data that you and your users can use to explore the new UI and learn SPL2. See Install and refresh the sample data.
- Get started using the Search Experience preview. See Getting started.
|
PREVIOUS Connecting your Splunk Cloud deployment to Search Experience preview |
NEXT Install and refresh the sample data |
This documentation applies to the following versions of Splunk Cloud Platform™: search2preview
Feedback submitted, thanks!