Create a setup page
If your add-on requires general setup parameters, you can create a setup page that is displayed to users the first time they run your add-on.
Use a setup page for your add-on when:
- You need to authenticate users with a username and password, for example to authenticate a third-party API for a modular input.
- You need the user to provide proxy information, for example when you need to use a proxy to make outbound API calls from the add-on.
By including a setup page in your add-on, the user provides the information to run your add-on without having to edit a configuration file directly. You can use the following predefined setup options.
| Setup option | Usage |
|---|---|
| Add Proxy | Adds a Proxy Settings section to the setup page that allows the user to specify a proxy host, port, username, password, and type. |
| Add Account | Adds a Credentials Settings section to the setup page that allows the user to configure multiple accounts, such as one account for production and one for development. For details, see Read user credentials from multiple accounts below. If your add-on does not require multiple accounts, we recommend you do not select Add Account. Instead, add a username and password to your setup form manually as Text Field and Password field types. This manual method provides more flexibility in that you can name fields as you want, while also eliminating the complexity in Python code that is added by enabling multiple accounts. |
| Add Logging | Displays a list on the setup page that allows users to select the internal logging level to use for the add-on (INFO, DEBUG, ERROR). |
You can also add custom setup parameters for your add-on by dragging and dropping text, password, and checkbox fields to the form yourself.
Password fields are automatically encrypted using the storage password endpoint.
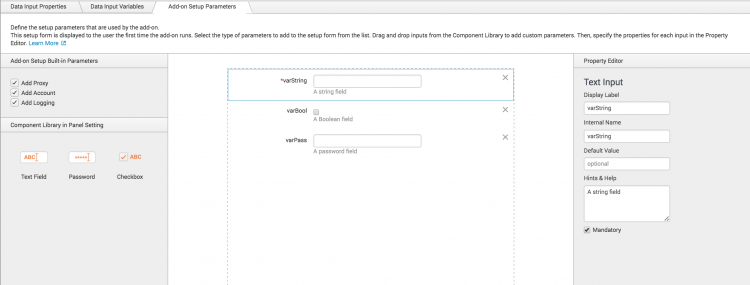
Here's an example setup page configuration in the Add-on Builder:
If your add-on is visible, the setup page is displayed the first time the user runs the add-on. The "is_configured" setting in the $SPLUNK_HOME/etc/apps/TA_add-on_name/local/apps.conf file indicates whether the add-on has been configured for that user's installation.
Users can also open the setup page in Splunk Web by clicking the Manage Apps gear icon, then clicking Set up under the actions for your add-on.
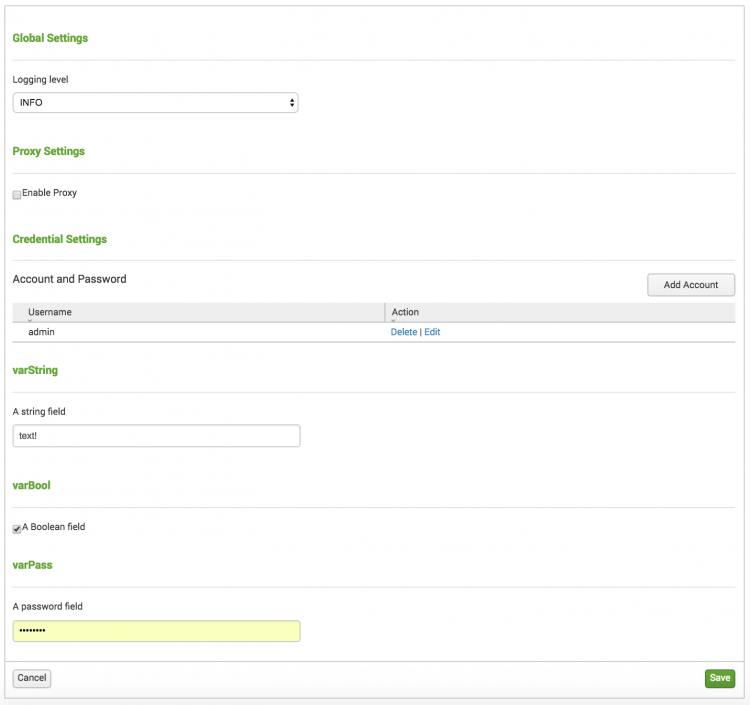
Here's the resulting setup page that is displayed to the end user of the add-on:
Create a setup page
You create a setup page or modify the existing one at the same time you create a data input or an alert action. These workflow wizards include an Add-on Setup Parameters tab where you create or edit the setup page for the current add-on. For detailed procedures, see:
You can test the setup page while building your add-on by entering sample values in the last step of these wizards. To access the production version of an add-on's setup page, in Splunk Web click the Manage Apps gear icon, then click Set up under the actions for your add-on.
Read user credentials from multiple accounts
When you have data inputs or alert actions that require different user credentials for different accounts, such as one account for production and one for development, you can set up your data inputs and alert actions to read specific user credentials from the setup page.
The following workflow shows one way to read multiple credentials of a setup page, which you create while configuring a data input by writing your own code or while creating an alert action.
- Create a data input or alert action.
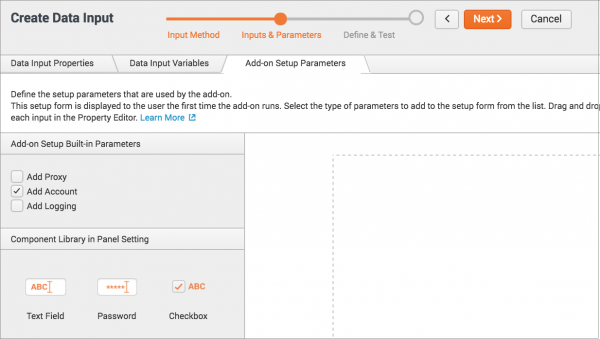
- When creating a setup page on the Add-on Setup Page Parameters tab in the Create Data Input or Create Alert Action wizard, select Add Account to prompt users to add credentials for one or more accounts.
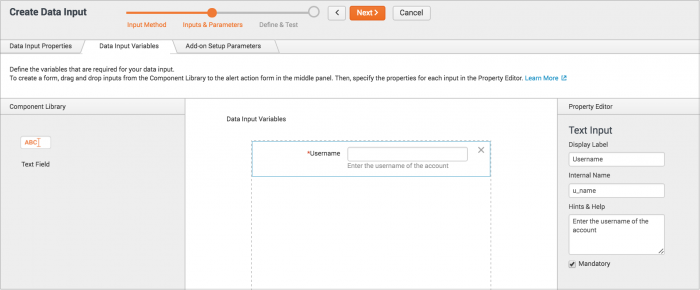
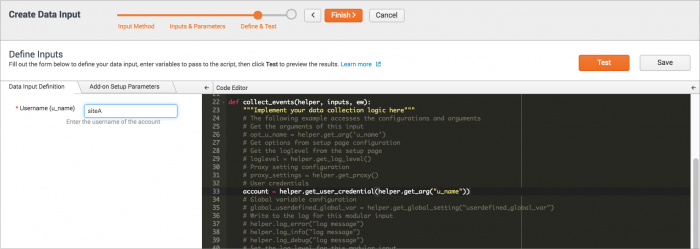
- When defining the input variables for the data input or alert action, add a text field that prompts for the username of an account. The value of this text field acts as a dictionary key to look up the corresponding credentials from the setup page.
- When defining the code for the data input or alert action, use the following code to retrieve a username and password from the setup page.
- Save your data input or alert action, then restart Splunk Enterprise.
Use the same internal name (replace "internal_name" below) that you used for the text field from the previous step:
account = helper.get_user_credential(helper.get_arg("internal_name"))
The data returned by the helper.get_user_credential function is a JSON dictionary, so retrieve the username and password from the account dictionary as follows:
username = account["username"]
password = account["password"]
Now you can view how the add-on will appear to users. First, view the production version of the setup page. In Splunk Web, click the Manage Apps gear icon, then click Set up under the actions for your add-on. The setup page allows users to set up one or more accounts:
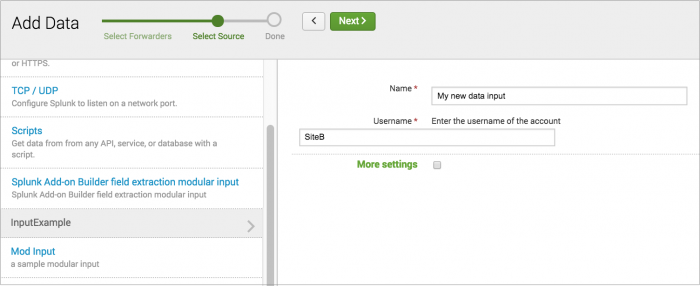
If you configured a data input, test it in Splunk Web by going to Settings > Data inputs, then clicking Add new under the actions for your data input. The Add Data wizard prompts you for an account username:
You can view alert actions in Splunk Web under Settings > Alert actions.
| Configure data collection | Add sample data |
This documentation applies to the following versions of Splunk® Add-on Builder: 2.0.0

 Download manual
Feedback submitted, thanks!