Identify data exfiltration by a suspicious user or device
You can use Splunk UBA to detect suspicious behavior by an insider, such as a current employee. Different combinations of anomalies can trigger the same threat in your environment. Review the threat and anomaly details to determine whether to take action in response to the identified behavior.
In the following example, review the anomalies that created the Data Exfiltration by Compromised Account threat.
Review current threats in your environment
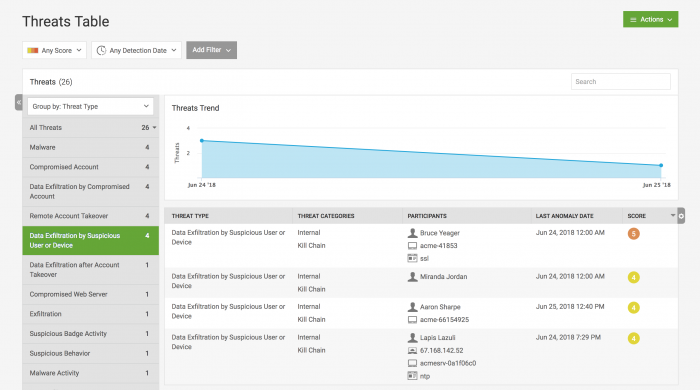
Review the Threats Table to see the current makeup of threats in your environment:
- From the Splunk UBA home page, select Threats.
- Select the Data Exfiltration by Suspicious User or Device from in the list of threats on the left.

- Review the first threat in the list of threats because it has the highest risk score. This opens the Threat Details page.

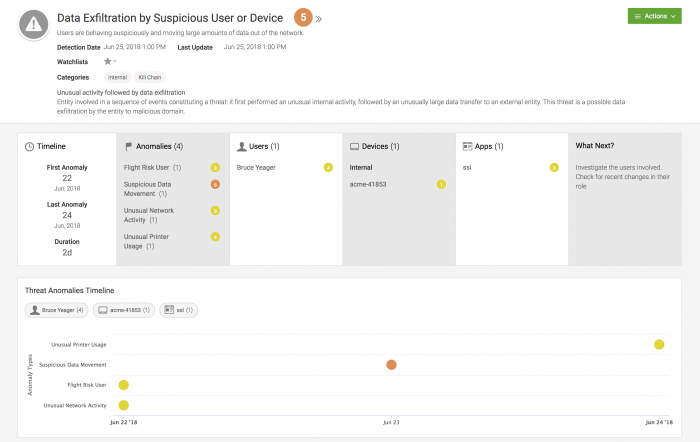
For more details on what this page includes, see Threats Details. - In this case several anomalies caused Splunk UBA to identify this user account as a threat.
- Flight Risk User
- Suspicious Data Movement
- Unusual Network Activity
- Unusual Printer Usage
Gather threat details
Use the Threat Details page to better understand this threat.
- Review the timeline to see how long this threat has been active, and on what date it started. This specific threat has been active for 2 days (2d).
- View the specific anomalies that led Splunk UBA to identify this user account as an insider threat of suspicious behavior. The anomalies display on a timeline so that you can easily identify the sequence of anomalies that make up this threat. You can click an anomaly to learn more about it. See Anomaly Details.
- Select the Suspicious Data Movement anomaly. In this case, a file containing sensitive data or intellectual property was suspiciously accessed and renamed, triggering the anomaly.

- Return to the threat details to continue your information gathering.
- Identify the users and devices participating in the threat activity. In this case, the primary user account accessed files on a single internal device, identified by its host name.
- View the recommended next steps.
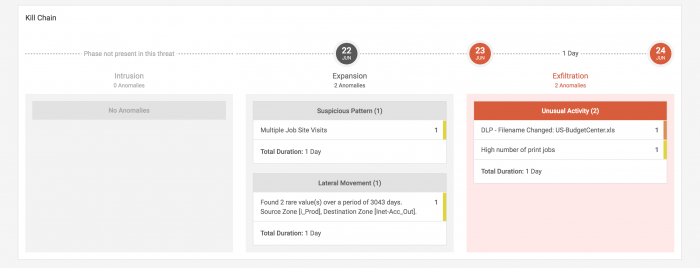
- Review the steps in the kill chain that exist for this threat to understand how large of a threat these activities pose to your environment.

- Review the map of the accessed devices to determine if suspicious behavior involved locations unaffiliated with your organization. Splunk UBA uses the IP addresses and directory information on assets in your environment to locate the devices.
- Compare the location of the user's main device with the locations of the accessed devices.
At this point, you can stop your investigation if you have found enough information to take action. If the user account is already known to your team, you may want to freeze their account or take other action immediately. If it is a new account or person, you might want to investigate further.
Investigate the threat further
If the user account associated with the threat is a newly suspicious user, you can investigate their activities in greater detail:
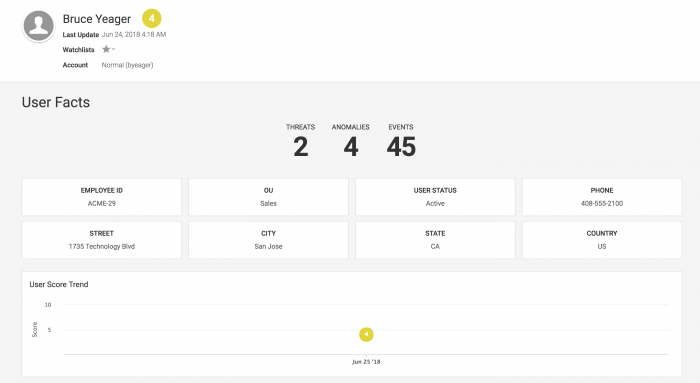
- On the Threat Details page, select the username of the person to learn more about them and their recent activities. This opens the User Facts page.

- Review the threats associated with their account to determine if more threats are associated with their user account.
- Review recent data transfer and HTTP transfer events to determine whether data is being sent out of your organization.
- Review the User Activities Baseline to determine the sequence of activities that the user typically performs.
- Use the User Graph to determine which anomalies are associated with which device IP addresses. Click the device that has the most anomalies associated with it.
- Select Watchlists to add the user to a watchlist to monitor their actions more closely.
- Review the device details to determine whether additional threats, anomalies, or user accounts have been recently associated with this machine.
- Identify the risk levels of the user accounts and other Device Relations.
- Review the Device Score Trend to see if the device is historically associated with high-risk threats.
- Use the Device IP Information to learn more about an IP address external to your organization.
In isolation, these anomalies could represent typical user behavior, but in sequence, Splunk UBA identified them as comprising an Insider threat of Suspicious Behavior. With the information gathered in your investigation, you can take action to contain the threat.
| Investigate Splunk UBA entities using Watchlists |
This documentation applies to the following versions of Splunk® User Behavior Analytics: 5.1.0, 5.1.0.1, 5.2.0, 5.2.1, 5.3.0, 5.4.0, 5.4.1, 5.4.1.1, 5.4.2, 5.4.3
 Download manual
Feedback submitted, thanks!