Configure Single Sign-On for Splunk On-Call using Google Apps 🔗
To configure SSO for Splunk On-Call using Google Apps complete the following steps.
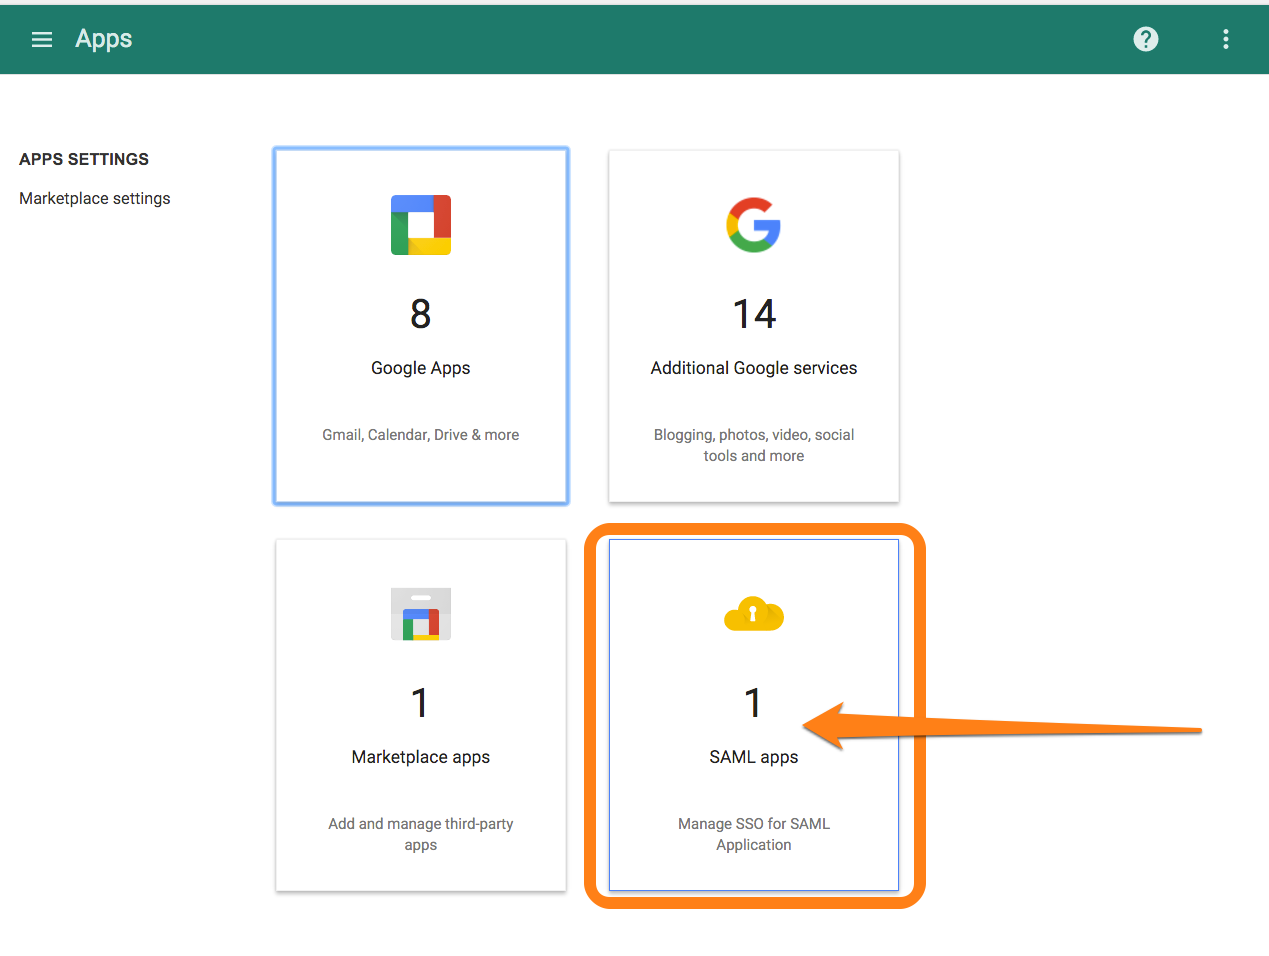
Access the Admin portal for Google Apps and navigate to Apps then SAML Apps.
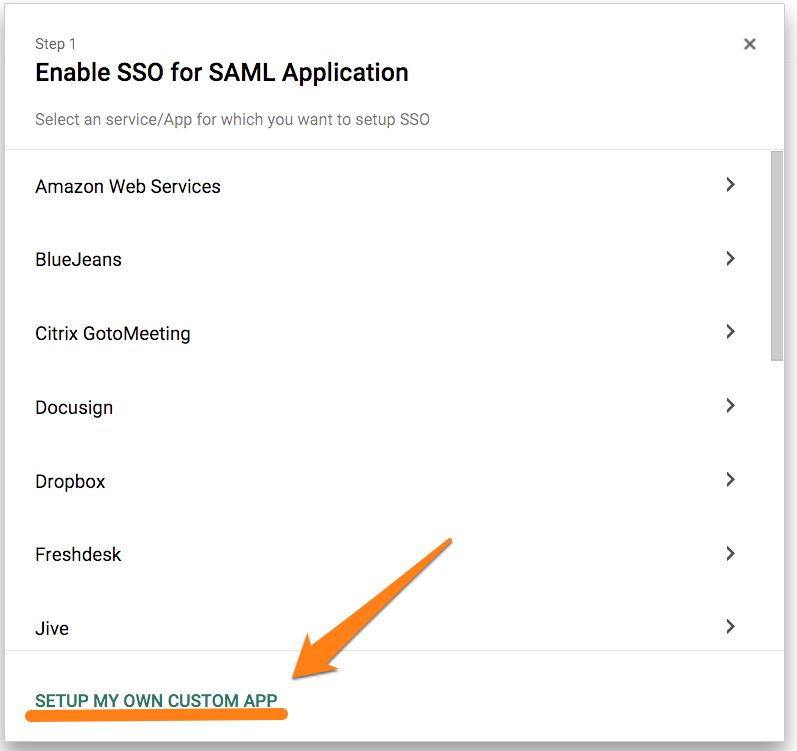
Select Set up my own custom app.
From step 2 of the guided setup, select Option 2 to download IDP metadata in XML format. Attach and send the downloaded .xml file to Splunk On-Call Support.

Save the Splunk On-Call logo file found HERE.
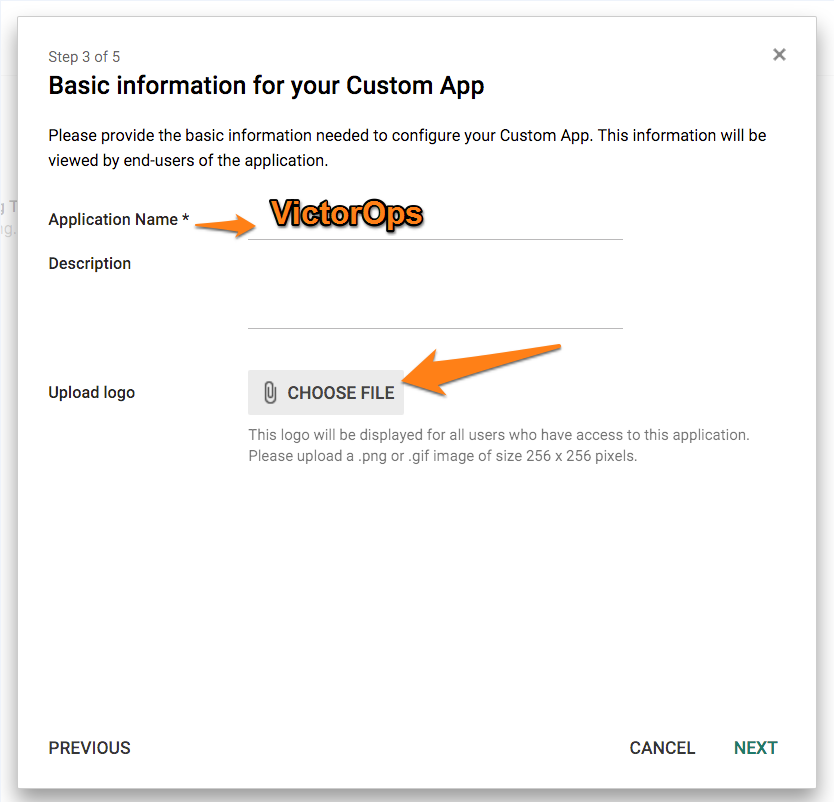
Enter a name for the application (Splunk On-Call) and upload the logo file.
In the Service Provider Details step, enter the following values: - In the ACS URL field:
https://sso.victorops.com:443/sp/ACS.saml2- In the Entity ID field:victorops.com- In the Start URL field, enter the following with the correct Organization Slug at the end:https://portal.victorops.com/auth/sso/<<org-slug-here>>.Skip the attribute mapping step and select Finish.