iOS for mobile Splunk On-Call 🔗
This topic will help iOS users understand the features and capabilities that are specific to the iOS version of the Splunk On-Call mobile application.
Add Splunk On-Call contact numbers 🔗
Splunk On-Call uses a total of six source phone numbers for delivery of phone call and SMS notifications in the US. For the full list of numbers, see Get started with the mobile app. This is part of a load balancing strategy that helps us ensure timely delivery of notifications. You do not need to manually create a contact and add these numbers. There is a feature within the app that will do this for you.
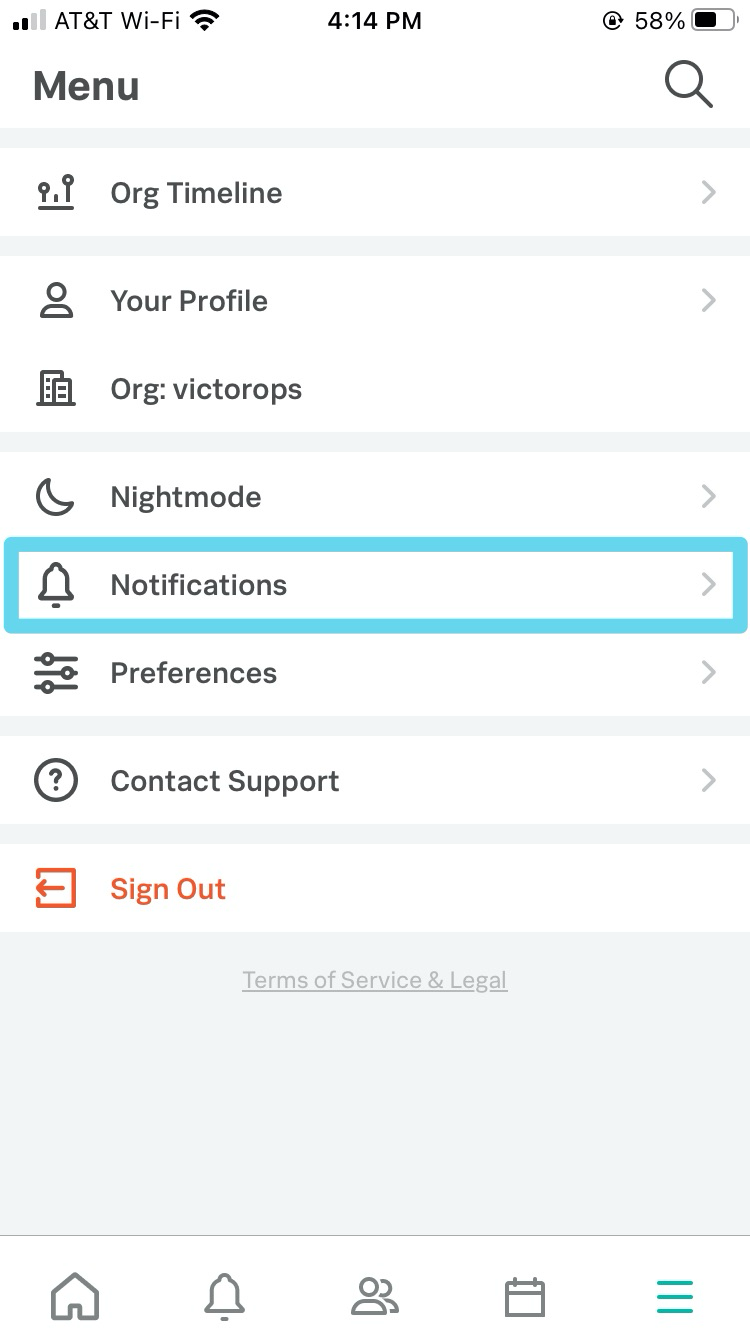
Select the Settings menu in the bottom right corner of the application, select the Notifications button, then choose Add Splunk On-Call to Your Contacts.
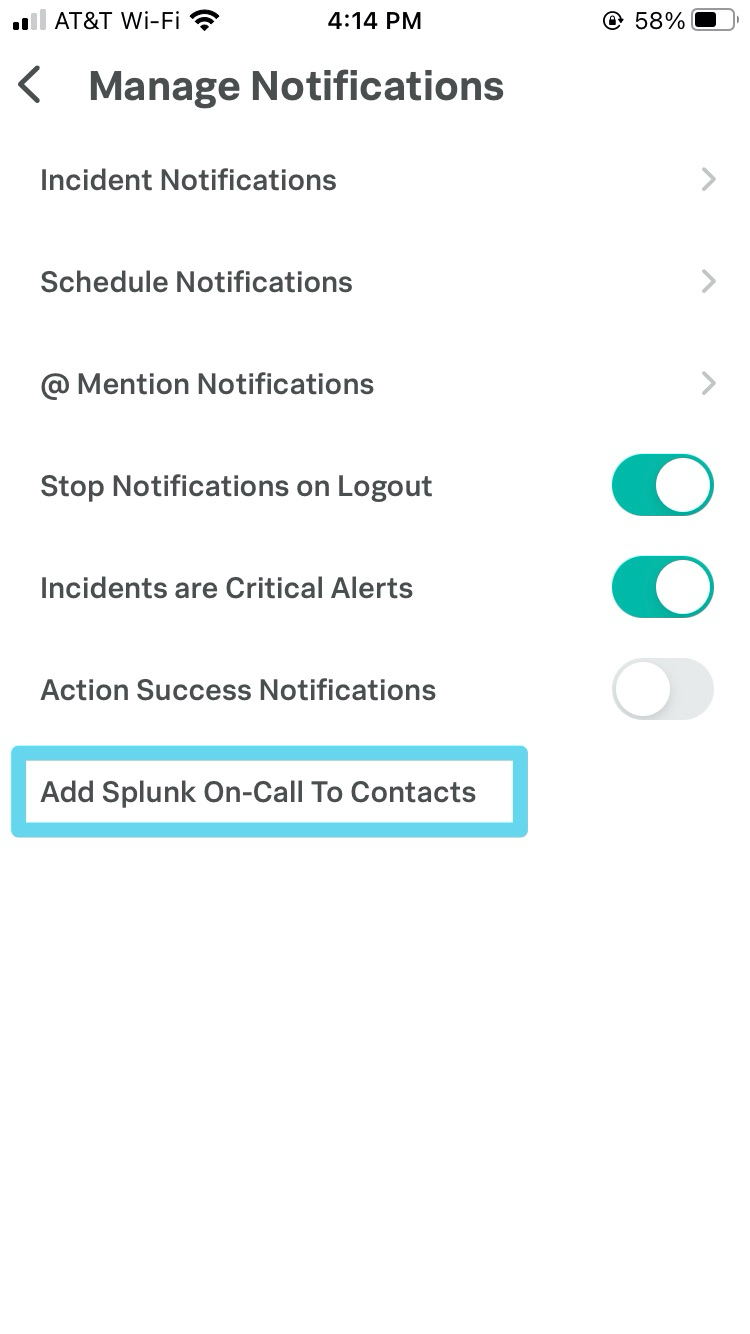
This will automatically create a new contact with all of the Splunk On-Call numbers already included.
This will give you the ability to add Splunk On-Call to your Favorites, in order to ensure that calls from Splunk On-Call are able to override Do Not Disturb mode. It also allows you to give the Splunk On-Call contact Emergency Bypass capabilities, ensuring that you will always get your phone and SMS notifications regardless of the state of your phone provided it is turned on.
iOS App Permission Settings 🔗
Having the appropriate permissions and settings on your device is crucial to ensuring that you receive all of your Splunk On-Call notifications.
Below are permissions settings we highly recommend for your iOS device.
General App Permissions 🔗
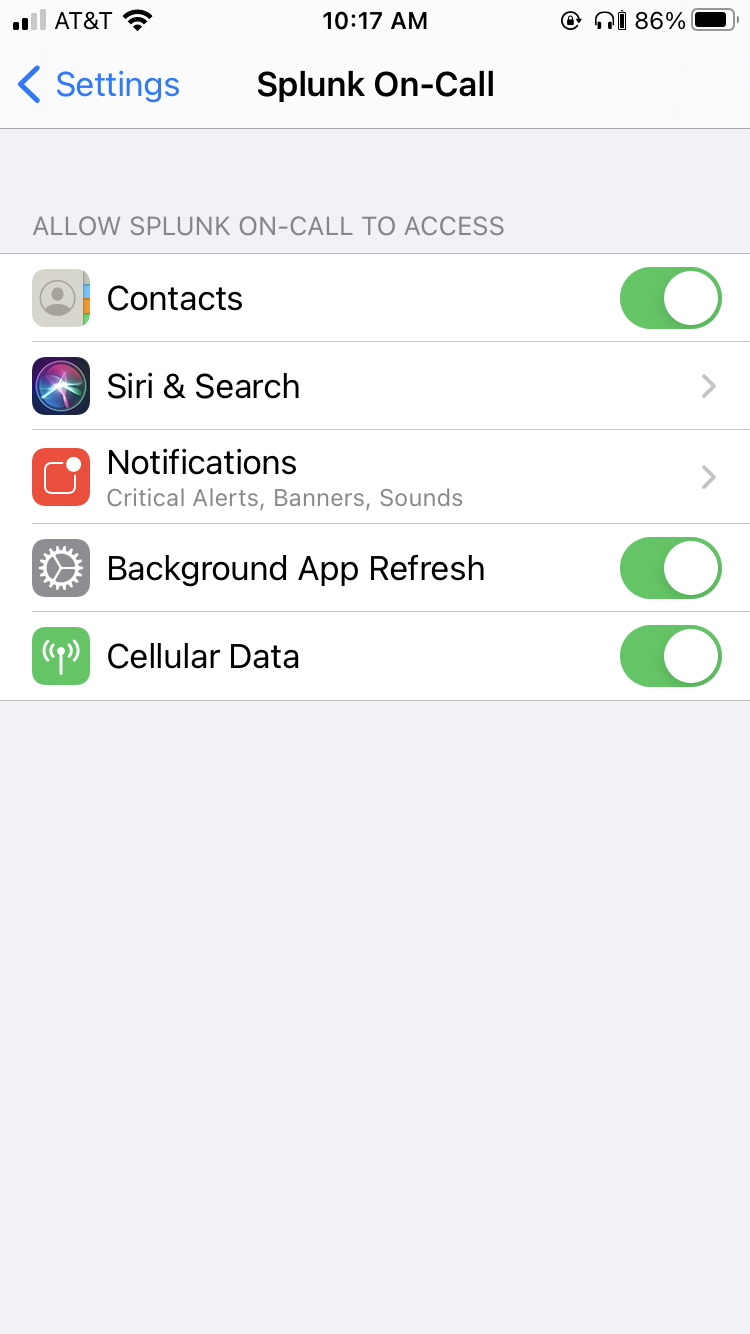
Navigate to your iOS Settings. Scroll down to the application settings and select Splunk On-Call.
In the Splunk On-Call settings, make sure Cellular Data is On.
Make sure Push Notifications permissions are On.
..note:: If Push Notification permissions are not granted to the Splunk On-Call app, the device will not register with Splunk On-Call and hence will not appear in your user profile.
Navigate to Notifications (Badges, Sounds, Banners) and make sure that all settings are turned On.
Do Not Disturb Mode 🔗
Push Notifications 🔗
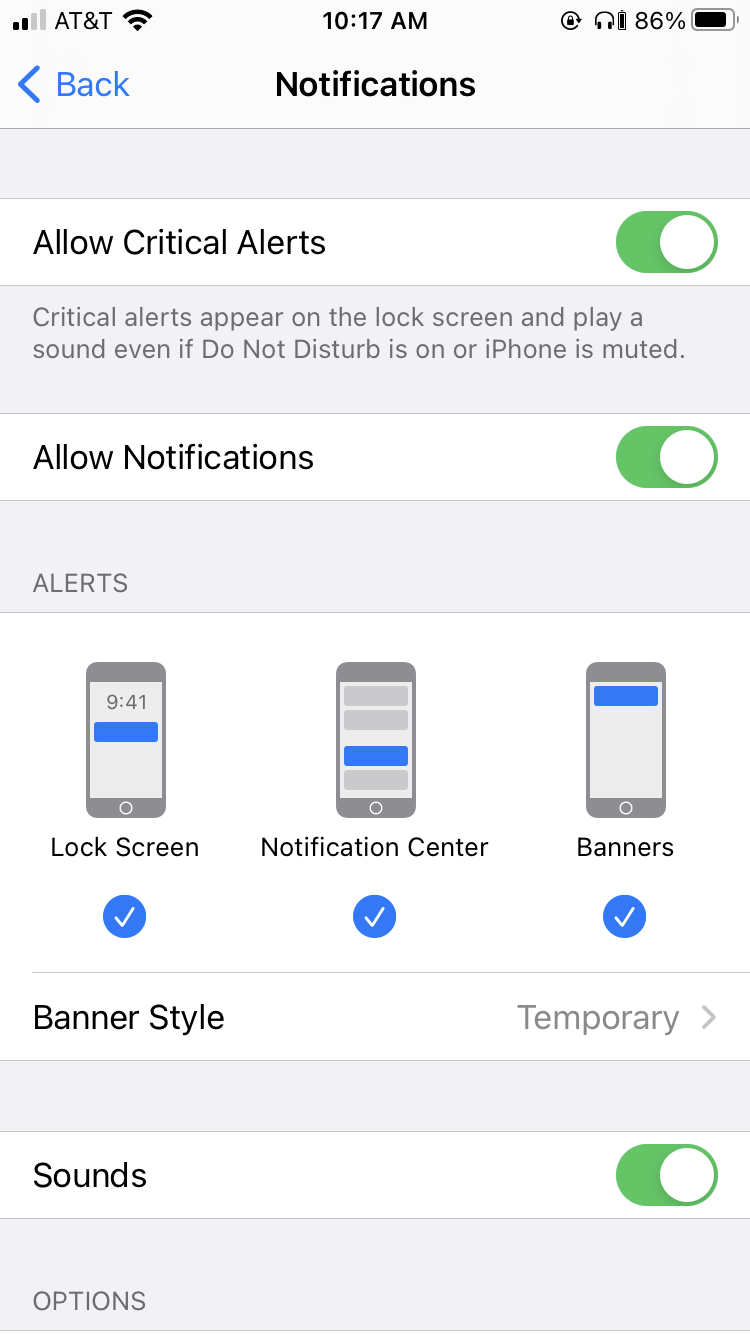
To override Do Not Disturb mode for paging Push notifications, ensure that the Allow Critical Alerts toggle is enabled as defined in the preceding section.
Next, navigate to the Settings section of the app, then Notifications.
Enable the toggle for Incidents are Critical Alerts
SMS or Phone Calls 🔗
Splunk On-Call must be added as a contact.
Then add Splunk On-Call as a favorite in your contacts list.
To add Splunk On-Call as a favorite, you will want to go to your Contacts, then Splunk On-Call Contacts, and then select Add to Favorites.
Be sure to have the proper Do Not Disturb settings enabled. To do so, select Settings, the Do Not Disturb, and then select Allow Calls from Favorites.
This will allow you to receive calls and SMS messages when you are in Do Not Disturb.
Emergency Bypass 🔗
You have the option to set Splunk On-Call as an Emergency Bypass contact. This will allow the Splunk On-Call contact to contact you when you’re in Do Not Disturb, without adding the contact as a favorite.
To add Splunk On-Call as an Emergency Bypass contact, go to Contacts, then your Splunk On-Call Contact, then select Text Tone. Turn on Toggle Emergency Bypass.
Notification settings in the Splunk On-Call app 🔗
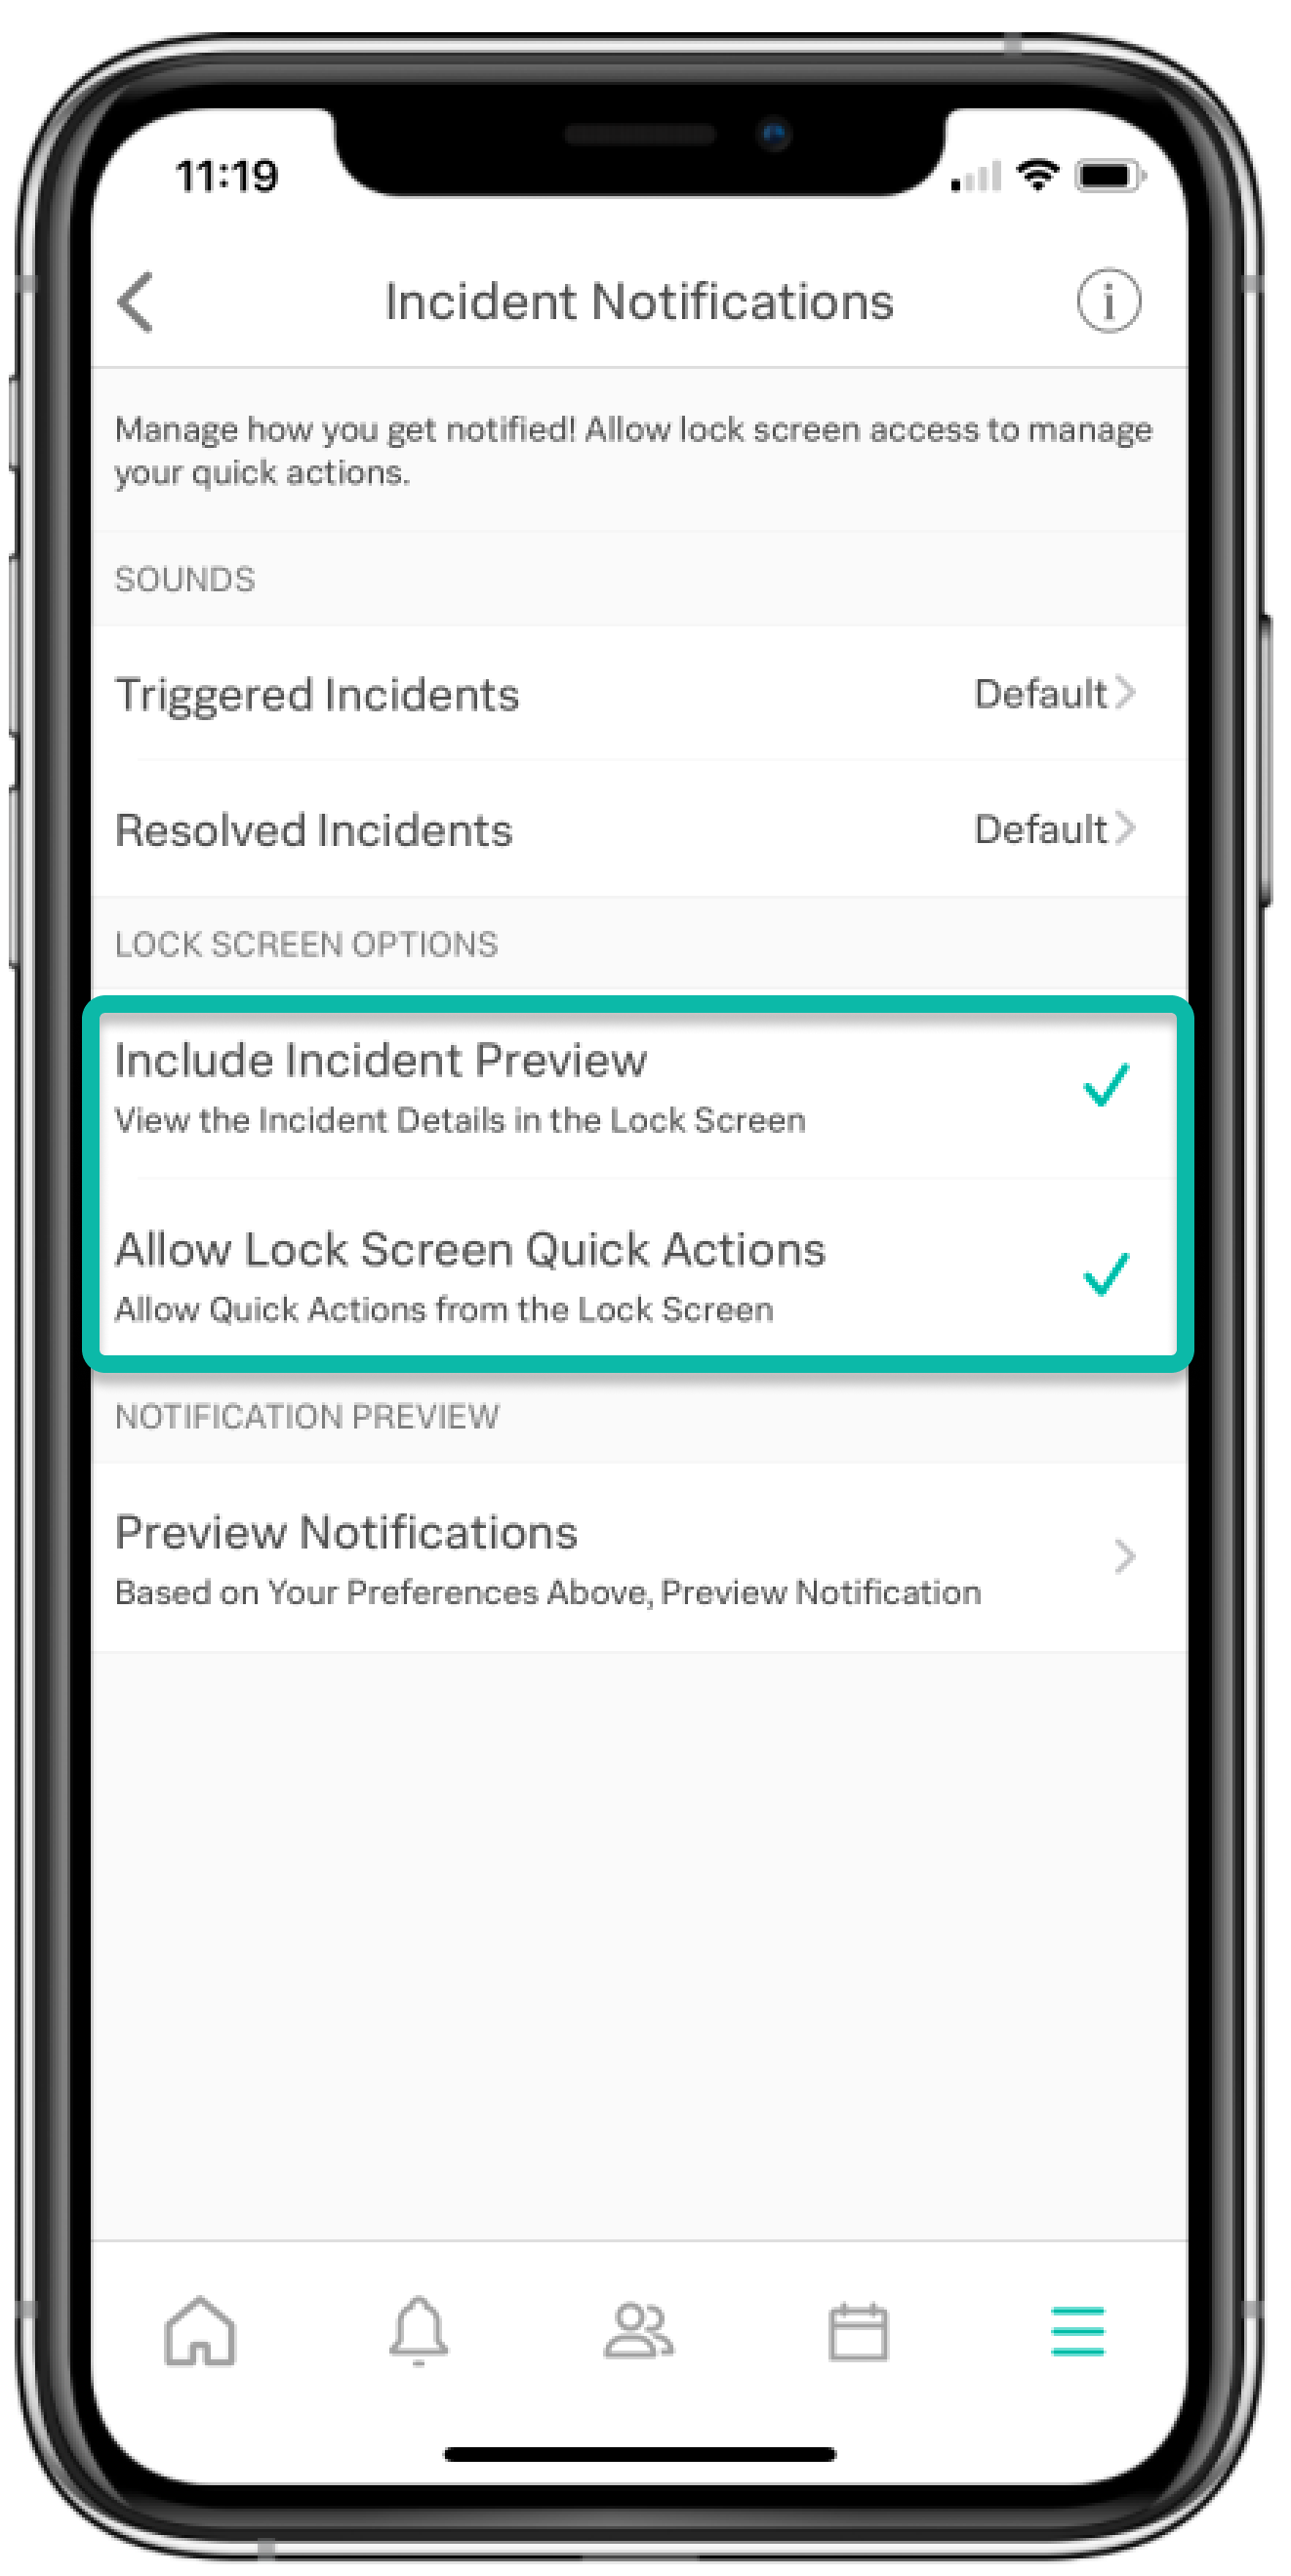
Within your Splunk On-Call Settings Menu, you can edit your Notification sounds preferences.
Select Incident Notifications, then Sounds.
Customize sound settings for Triggered or Resolved Incidents.
Here you will also find your lock screen options for Incident Previews and Incident Quick Actions, these are automatically set to On.
Ack From Lock Screen 🔗
One of the Splunk On-Call notification options is a push notification to your iOS device. When being notified via PUSH notification while your phone locked, you have the convenience to acknowledge the alert directly from the lock-screen.
By Swiping to the left, you will see Manage | View | Clear to select from
For iPhone 6s and later, press hard to activate the 3D touch feature and reveal all of the actions and options you can take
After you have acknowledged an incident, you’ll receive a success notification confirming that your acknowledgment was successful
iOS App Troubleshooting 🔗
How to submit a swipe report 🔗
Swipe across the screen from right to left with two fingers
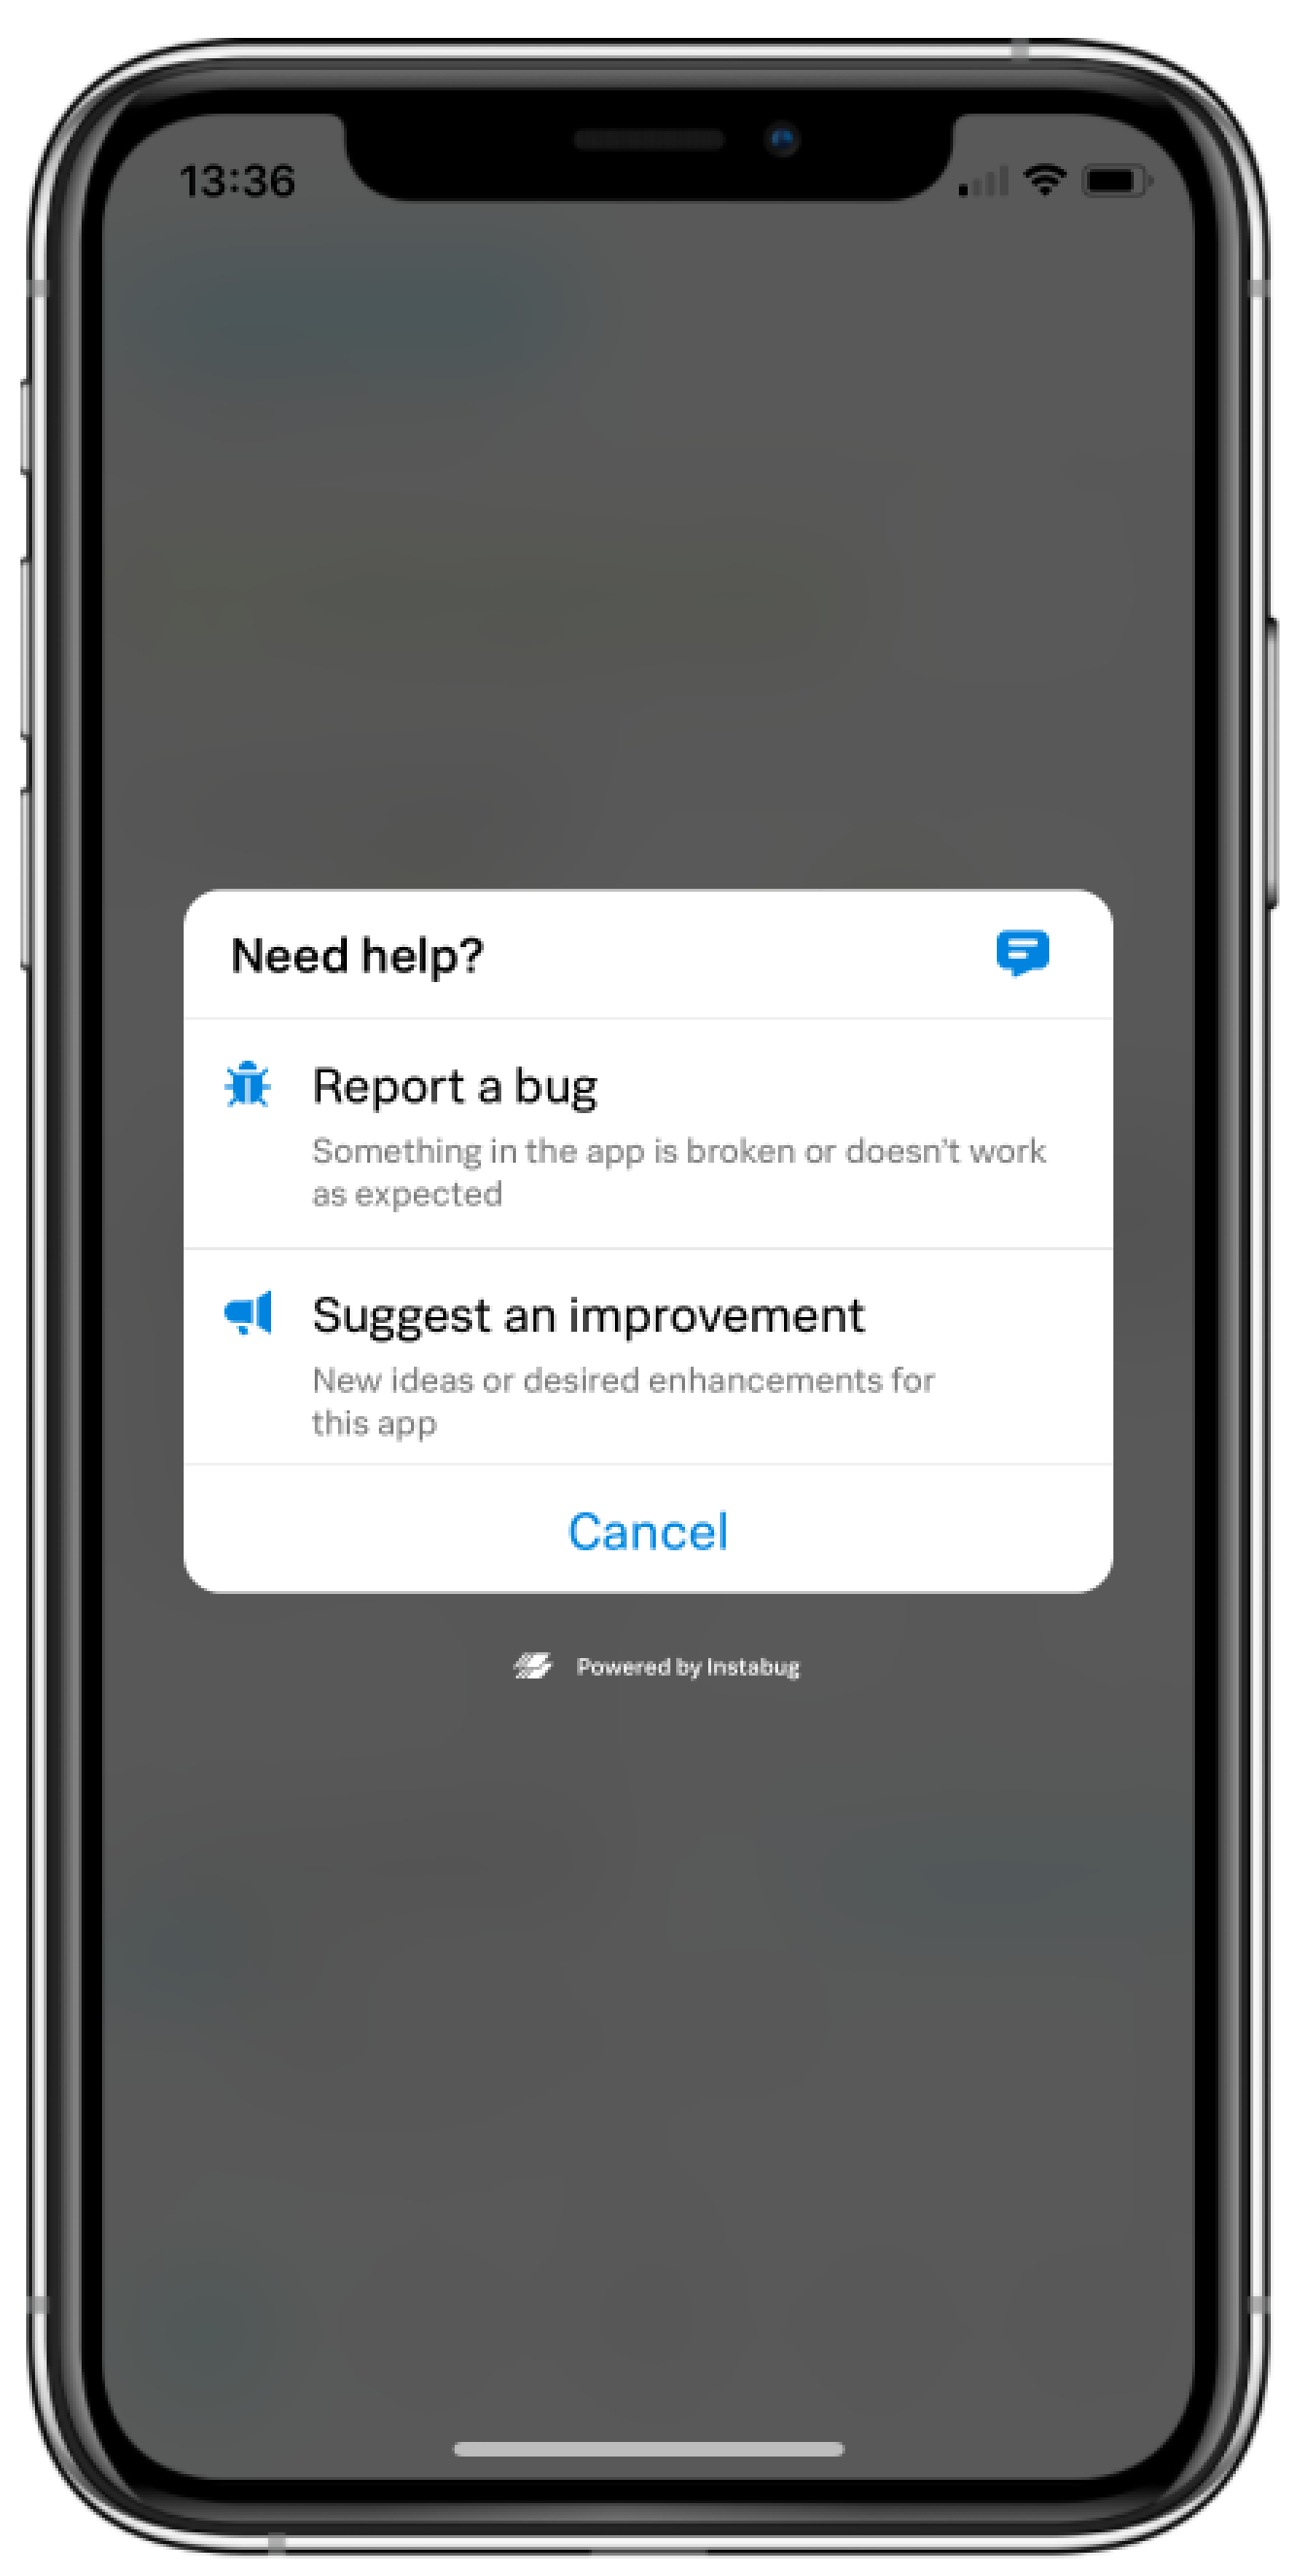
Swipe from right to left with two fingers and this window will appear
Select Report a Bug or Suggest an Improvement
From there you will be prompted in another screen where you can add more information to your report, take a screen recording, screenshot, or attach a screenshot from your camera roll.
Reset your mobile device in Splunk On-Call:
From your mobile device: #. Log out of the mobile app by selecting the settings icon (gear). #. Delete the mobile app from your device entirely.
From the webUI:
#. Log in to your account and access your personal profile by selecting your username in the top right corner. Select “Your profile” #. Delete the device from your contact methods. You do not need to remove any phone numbers associated with the device, just the device itself.
From the mobile device:
Re-install the Splunk On-Call Mobile app.
Log in to the Splunk On-Call app.
This process will redo the device association process and often clears up any issues with the app.