Splunk Observability Cloud free trial and guided onboarding 🔗
The trial guides you through the steps to create your Splunk Observability Cloud trial environment. As part of the trial, Hipster shop - the Splunk Observability Cloud trial shop - is deployed to a local minikube cluster as a set of Docker containers that provide metrics and traces. To set up your minikube cluster and OpenTelemetry collector you also need Helm and the gnu-sed editor installed for the automation to configure the cluster.
You can try out Splunk Observability Cloud for 14 days, absolutely free. You can explore the trial in 2 ways:
Use the sample data in a pre-instrumented environment (Hipster shop).
Use your own data by instrumenting your applications with OpenTelemetry.
For an introduction to Splunk Observability Cloud products, see Splunk Observability Cloud overview.
For information about how to use these products together to address real-life scenarios, see Scenario: Kai troubleshoots an issue from the browser to the back end using Splunk Observability Cloud.
If this is your first experience with Splunk Observability Cloud, here’s how you can sign up for your free trial.
- Navigate to 1 of the following URLs:
For AWS regions, see https://www.splunk.com/en_us/download/o11y-cloud-free-trial.html.
For GCP regions, see https://www.splunk.com/en_us/download/observability-for-google-cloud-environments.html
In the free trial sign-up window, select the location closest to the region you are in. Options include: United States, Europe, Asia Pacific (Australia), Asia Pacific (Japan). Select Next.
- Enter your contact information. Note:
The name and email address is used to create the first user on the system and is granted the admin role automatically.
The company name is used to name the organization. Select a name which describes your account as well as its function. For example, Acme Dev platform.
Agree to the terms and conditions and select Start Free Trial.
- You will receive an email with a link to log in to your org. If this takes longer than ten minutes, check your spam folder.
In the email, select Verify or paste the link into your browser.
Create your password and select Sign in Now.

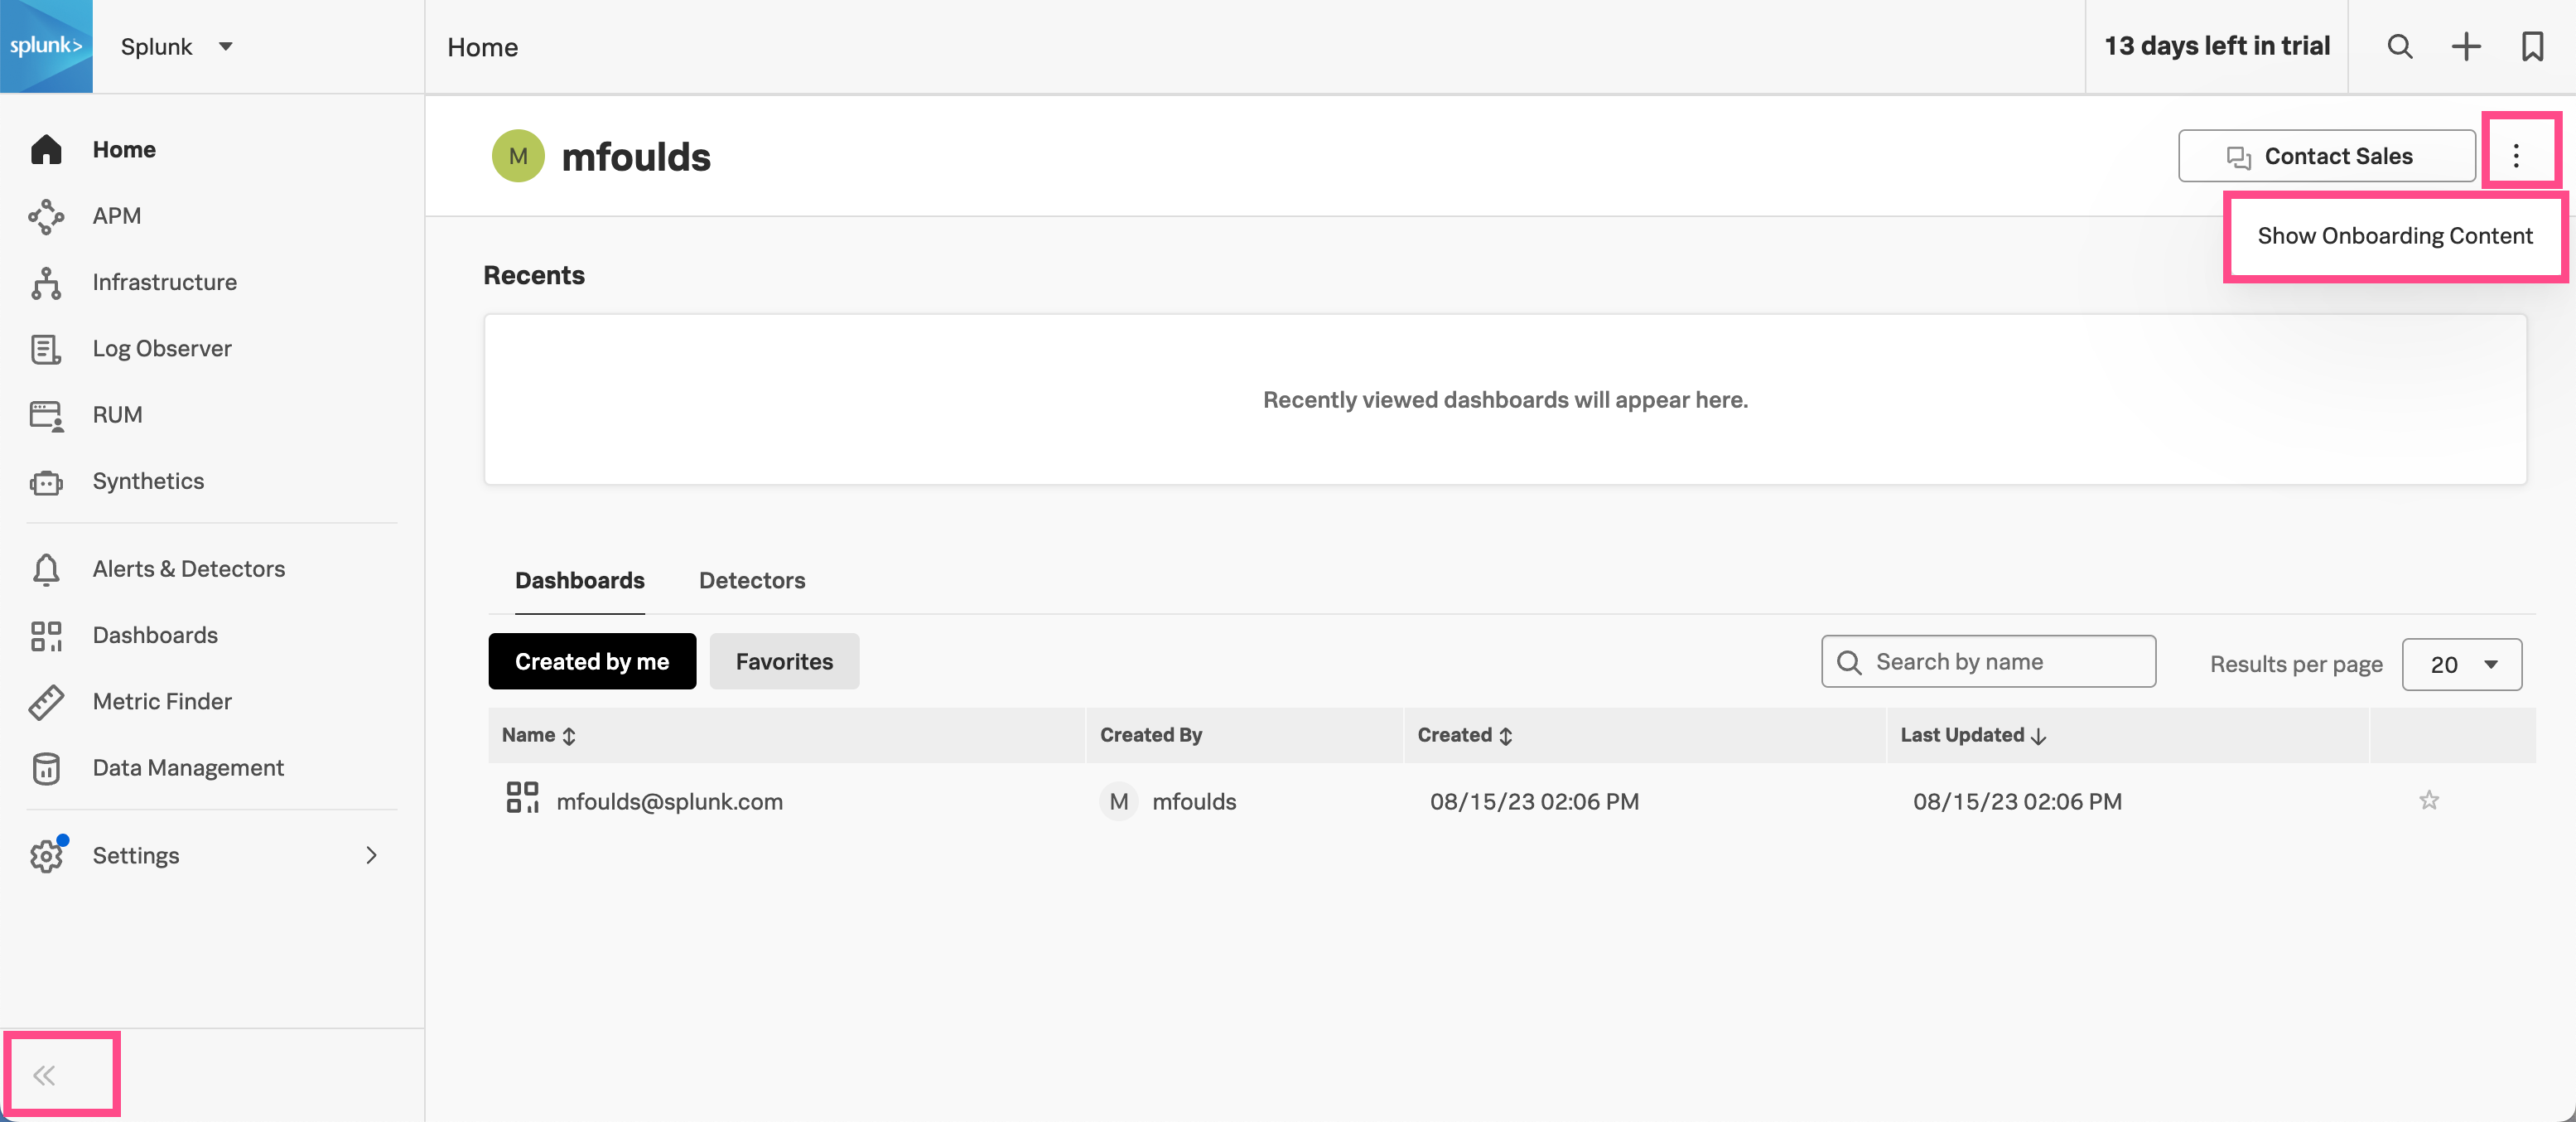
When you first log in, you see your Home page. You can show onboarding content by selecting the action menu (⋯) in the upper right-hand corner. This displays helpful videos and links on most pages to help you get started.
You can also expand the navigation menu to show the full names of the sections instead of the icons only, by selecting the double angle brackets in the bottom corner.

There are 5 steps to the guided onboarding. The UI guides you through each of the steps, providing the commands and links you require.
Preparing the prerequisites.
Install OpenTelemetry.
Install the Hipster Shop into your local cluster.
Create traffic by exploring the Hipster Shop. Clicking around the Hipster Shop site generates traces and metrics for you to view in Splunk Observability Cloud.
Explore the results in Application Performance Monitoring (APM).
The first step is to set up some prerequisites for the demo environment. The trial UI guides you through this and link to the resources you need.
To run the demo environment, install and have functioning versions of:
Docker: Install Docker if needed. See https://docs.docker.com/engine/install
minikube: Install and configure minikube. See https://minikube.sigs.k8s.io/docs/start
Helm: Install Helm version 3.0 or higher. See https://helm.sh/docs/intro/install/
GSED: GNU implementations of the stream editor. gnu-sed is used in the configuration script for the kubernetes manifests. - See https://formulae.brew.sh/formula/gnu-sed.
The Hipster Shop cluster requires a minimum 4 GB of memory.
To install the OpenTelemetry collector, you need to know:
Your Splunk Observability Cloud realm. To locate your realm, see View your realm and org info .
Your Splunk Observability Cloud access token. For details, see Create and manage organization access tokens using Splunk Observability Cloud.
Use the Hipster Shop to generate sample data. To install the Hipster shop demo locally, you need your Real User Management (RUM) token. For instructions, see Generate your RUM access token in Splunk Observability Cloud.
Once you have installed and configured the Hipster Shop environment, you can generate traffic and explore the results in your Splunk Observability Cloud trial organization.