Create Routing Keys in Splunk On-Call 🔗
Alert routing gives you the precision required to assign specific types of alerts to specific groups. When the objective is to quickly and accurately target specific team members to deal with a particular incident without unnecessarily notifyingyour entire team, Routing Keys are the tool to use.
Note
Routing keys are case insensitive and should only be composed of letters, numbers, hyphens, and underscores.
Global and Alert Admins can create and manage Routing Keys by navigating to Settings, then Routing Keys. Team Admins and Users will only be able to view them.
Creating Routing Keys in Splunk On-Call 🔗
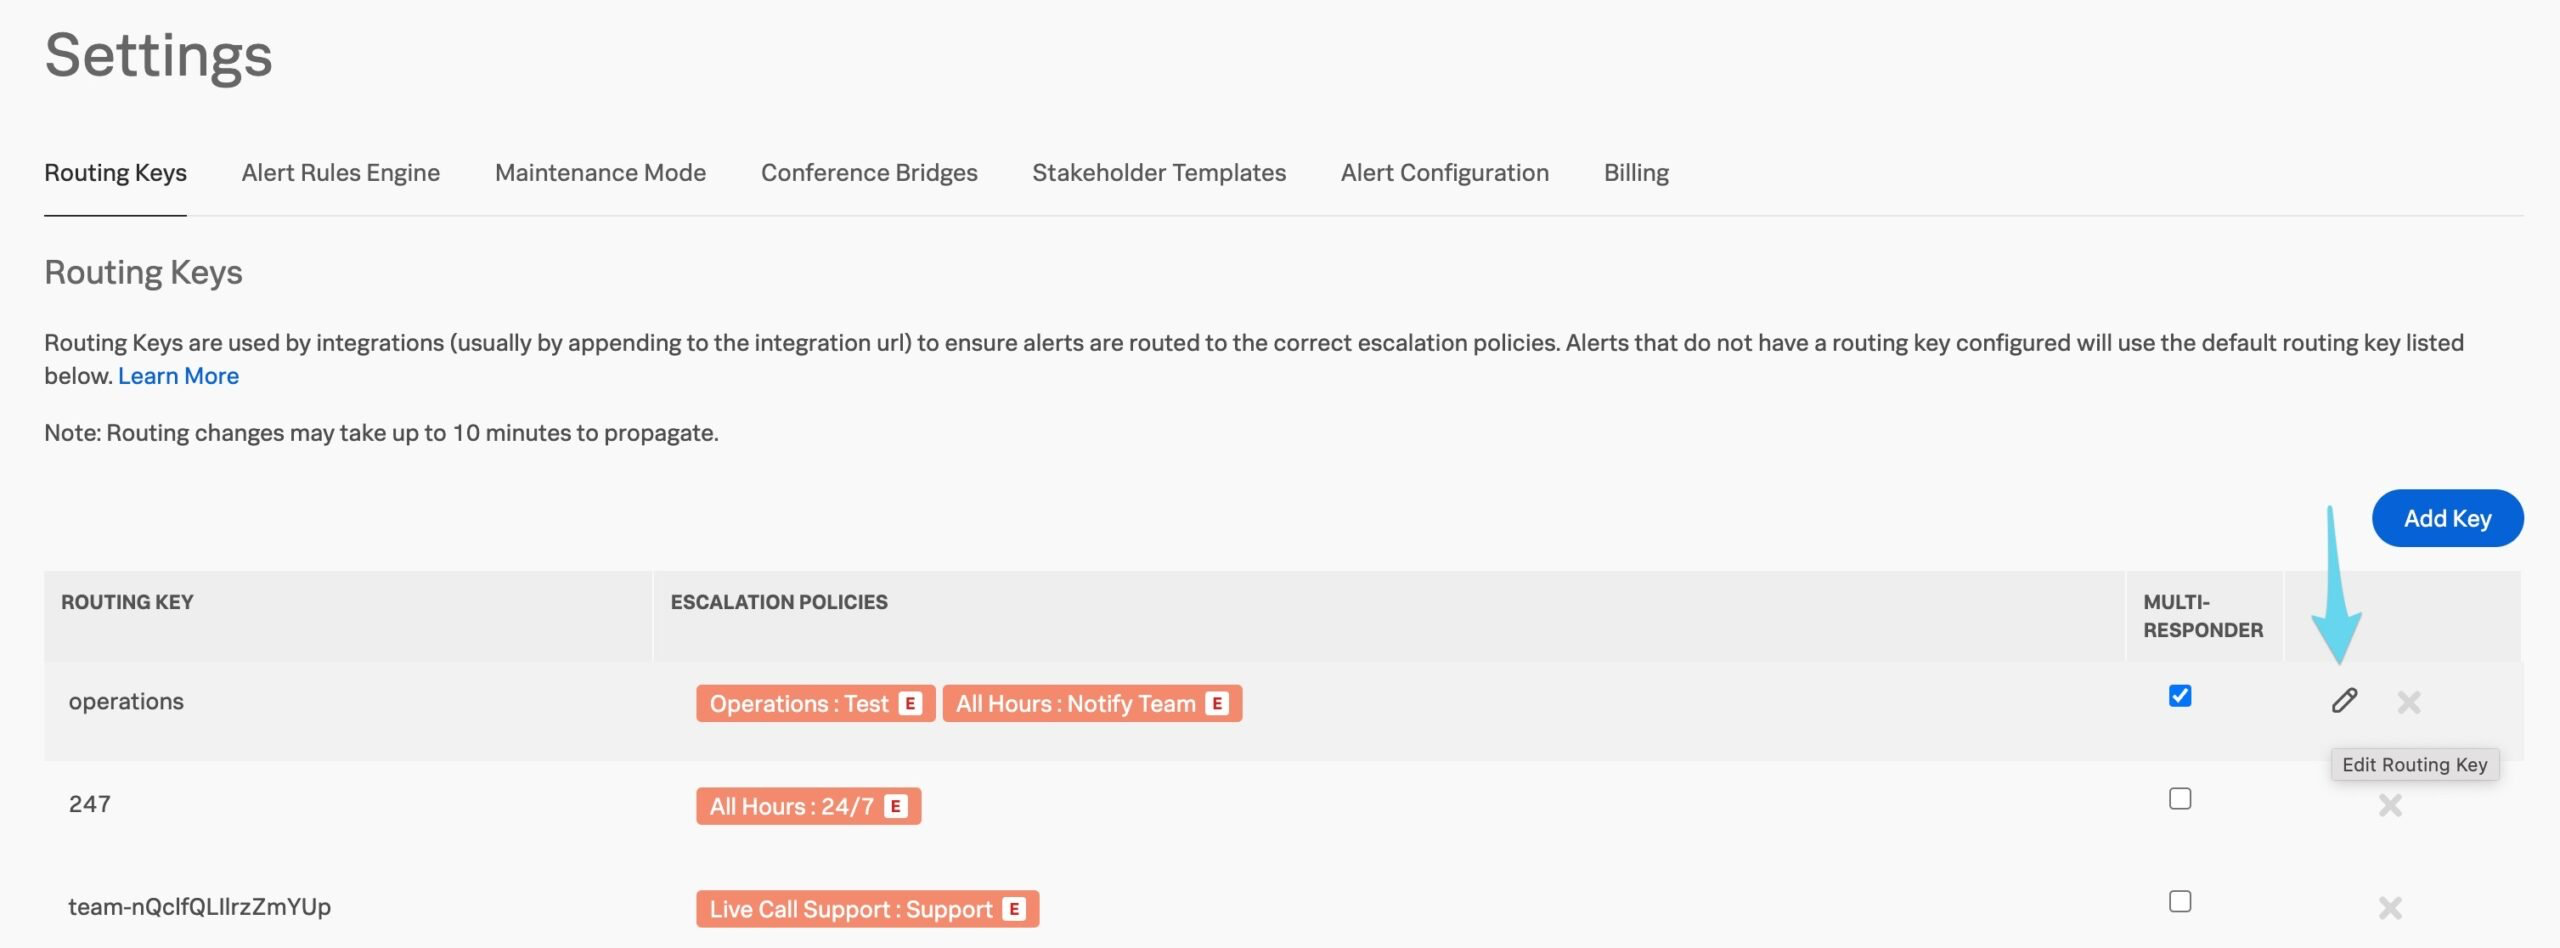
After navigating to Settings, then Routing Keys, you can create a new routing key by selecting the Add key button. Give the Routing Key a name, specify if it should invoke Multi-Responder functionality, and then assign the Routing Key to at least one Escalation Policy.
Multi-Responder incident response 🔗
Routing keys offer the ability to define whether a single acknowledgement will fully acknowledge the incident or if a member of each defined escalation policy needs to acknowledge it first.
If the Multi-Responder box is checked for a routing key, an acknowledgement will be required from a member of each defined escalation policy before the incident becomes fully acknowledged. To enable this on existing routing keys, hover your mouse over the routing key’s row and click on the pencil icon that appears. You can now check the multi-responder box and then the checkmark to save your changes.

Routing Rules in Splunk On-Call 🔗
When an alert is delivered to Splunk On-Call, your routing rules (as indicated in the table at Settings, then Routing Keys) determine which team(s) an alert or incident will be routed to. When an incident is routed to a particular escalation policy, that escalation policy determines who to notify, and who to escalate to if the incident stays unacknowledged. Routing Keys for alerts are specified in your monitoring tool configuration for the integration, and as such can be determined from within integration configurations.
Find the Routing Key for an Alert 🔗
All types of alerts have a routing key assigned to them by the user who configured the integration for the monitoring tool that sent the alert. This is the key used to map an alert to an escalation policy (as described immediately above). To find the routing key for an alert, click into the alert details for the alert in question. You will see the routing key in the list of key/values under the VictorOps Fields section.
Routing Key Tips & Tricks 🔗
Each team should have one routing key that is not shared with any other teams. Naming of the routing keys after the respective team name will also reduce confusion.
Keep the names of routing keys simple. Naming keys intuitively will obviously indicate which team or teams the key associates with.
A well-made set of routing keys will make filtering the timeline a breeze A filtered timeline is the easiest way to hone in on exclusively the events that are important to you.
If it’s important that multiple groups acknowledge incidents for a certain routing key, make sure to select the Multi-Responder option on the routing key’s row. An acknowledgement will then be required from each defined escalation policy.