Android mobile devices for Splunk On-Call 🔗
Requirements 🔗
Android devices running Android 6 or newer. Splunk On-Call no longer supports the mobile app for Android versions 5 and below.
Note
Using custom ROMs (or those provided by the device manufacturer) can alter the settings and functionality described herein. If your device utilizes a custom/manufacturer-furnished ROM, please refer to the owner’s manual (or other applicable literature) provided by the ROM developer.
Best Practices 🔗
If you are unable to download the Splunk On-Call app from your playstore, please download it here .
Here are the things you can do to minimize your risk of missing a notification from Splunk On-Call:
Use a diverse set of notification types in your personal paging policy (Call, SMS, push) to avoid a single point of failure.
Test your configuration in various modes (do not disturb, vibrate only, and so on) using a manual incident before you go on-call.
If using Do Not Disturb, set the Splunk On-Call contact to a favorite and allow Favorites to bypass DND.
Notification Delivery 🔗
There are a number of different settings on the Android platform that affect the delivery of Splunk On-Call notifications to your device. Due to the critical nature of Splunk On-Call notifications, it is imperative that you correctly configure your settings in Android and test those notifications before you go on call. This article describes how to ensure that Splunk On-Call can reach you despite the current state of your phone (unless it is turned off).
First, Add Splunk On-Call to your phone contacts from the bottom of the Setting page in the app, then under Notifications. If you are planning on using Do Not Disturb mode, please favorite the Splunk On-Call contact.
Android Configuration Guides 🔗
Android 11 🔗
After you make sure you have added the Splunk On-Call contact to your phone and added it as a favorite, you want to then make sure you do these steps for Setting Up the Volume Override.
You first want to open the Splunk On-Call app on your phone.
Once opened, go to your Settings icon.
Then go to the Notifications tab.
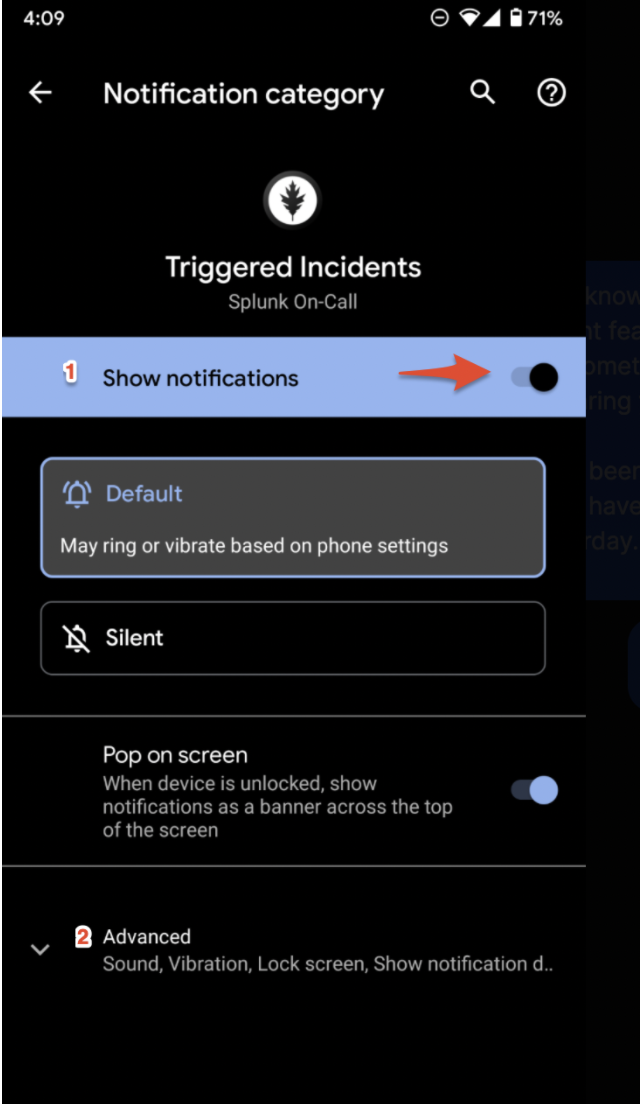
Once in the Notifications section you want to select Incident Notifications. Then, select Triggered Incidents.
In the Triggered Incidents section, you want to do a couple of things:
Change the Notification Sound there to something of your liking.
Make sure you toggle and turn on the option for Override System Notification Volume.
Finally, go to Manage Channel Settings.
In the Channel Settings now, you will want to do two things:
Make sure the Show Notifications toggle is enabled.
Expand the Advanced settings, in there change the Sound setting to None. This is to avoid double sounds or ringtones.
Android settings to check 🔗
Now that you have made sure we configured the Splunk On-Call app to truly receive notifications, you want to double-check one last thing on the Android Settings.
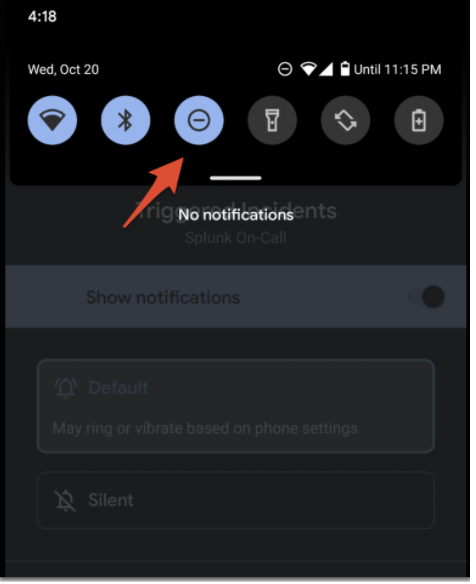
First, you want to go to the Do Not Disturb (DND) settings on our phone. You can get there a couple of ways.
You can try pulling down your System Tray, once you see the icons in the top, you should be able to see a DND icon. Press that icon for 2 seconds, and it should redirect you to the settings.
You can open your Android Settings and search for Do No Disturb.
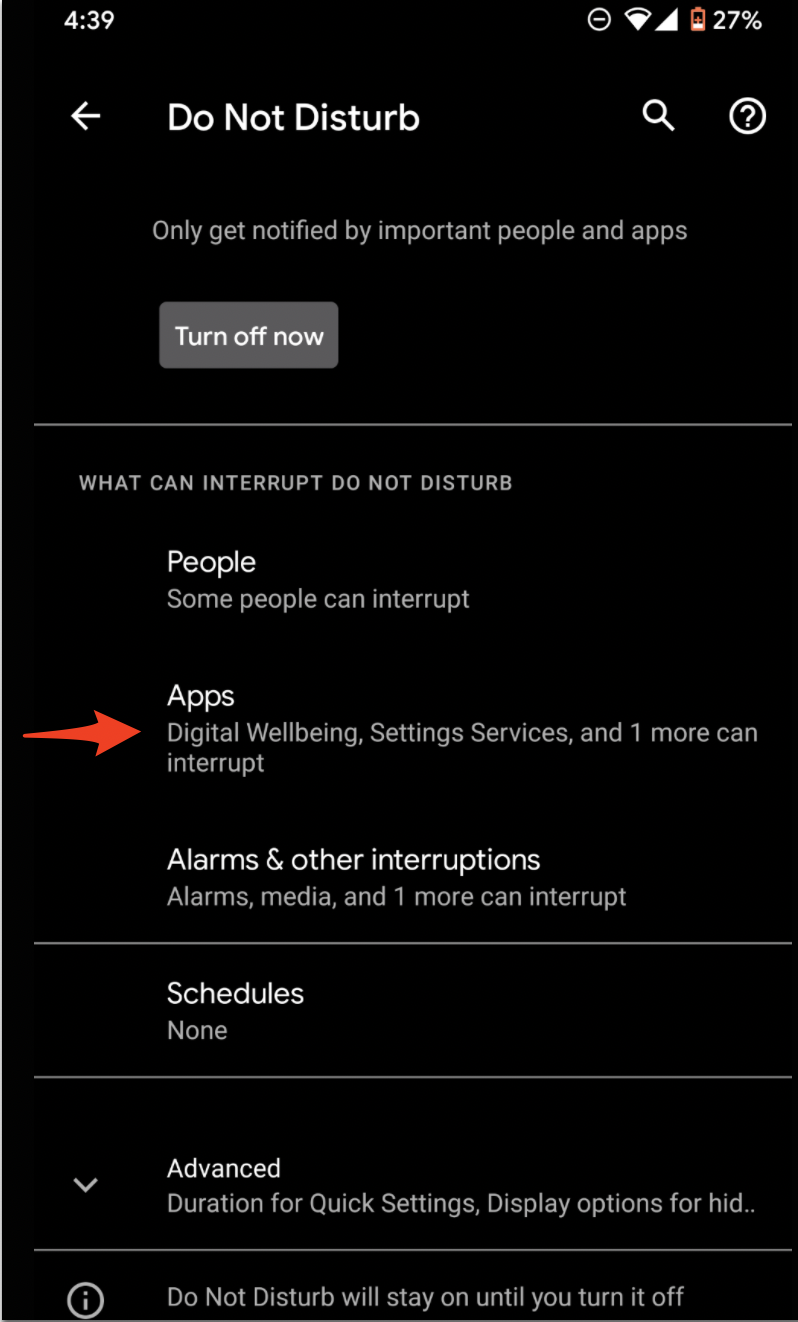
Once you open the DND Settings, you will want to check one thing:
First, you will see the section . You can select Apps there. Then, make sure you see Splunk On-Cal there. If you don’t see it, press Add Apps, and find Splunk On-Call there.
Other features 🔗
Ack from Locked Screen 🔗
One of the Splunk On-Call notification options is a push notification to the user’s Android device. When a user is notified in this fashion, while their phone is idle in lock-screen, they will have the option to acknowledge the alert directly from the lock-screen notification without requiring that they unlock the phone and access the application first.
After you have acknowledged an incident, you will receive a success notification confirming that your acknowledgment was successful.
Acknowledgment through push notification may fail because performing the acknowledgment action requires that your phone is able to contact our servers over HTTP. If an acknowledgment action fails, you will receive a subsequent push notification indicating that the acknowledgment failed and providing an opportunity to try again.
Alternate Push Service 🔗
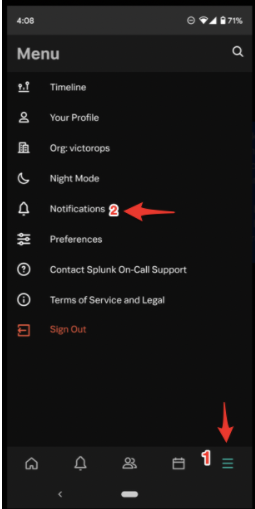
The Alternate Push Service allows users who are unable to receive notifications from Google Cloud Messenger to reliably receive push notifications. In the Android App, navigate to the Settings page by clicking the three-slider icon in the far bottom-right corner.
Once here, scroll down to the Notification Sound & Behavior section. Find the option for Use Alternate Push Service and toggle it on.
Your device will prompt you for access to the associated permissions. Select Allow