Configure Single Sign-On for Okta and Splunk On-Call 🔗
Requirements 🔗
This integration is compatible with the following versions of Splunk On-Call:
Full-Stack
To enable single sign-on (SSO) for your organization, you will need to provide an updated metadata file and your IDP. If you are interested in setting up SSO, please contact Splunk On-Call Support.
Configure SSO for Okta 🔗
To configure SSO for Okta complete the following steps.
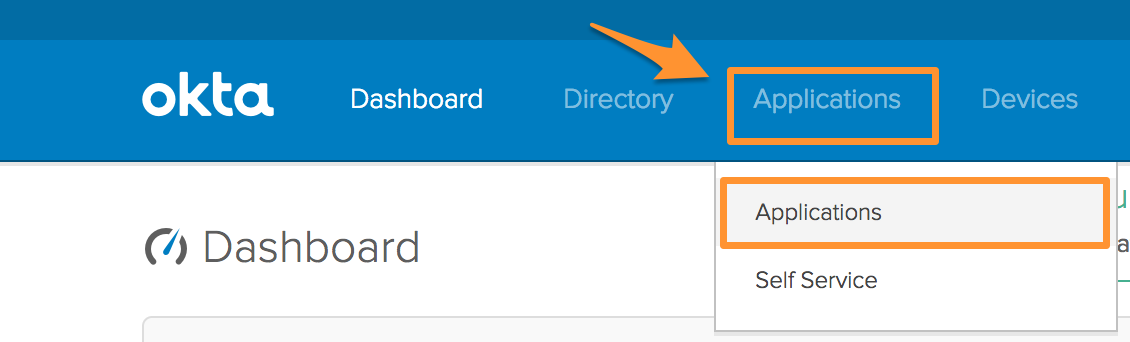
From the Okta user homepage, select Admin to access the Okta Admin dashboard.

#. From the Okta Admin Dashboard, Select Applications, then select Applications from the drop-down.
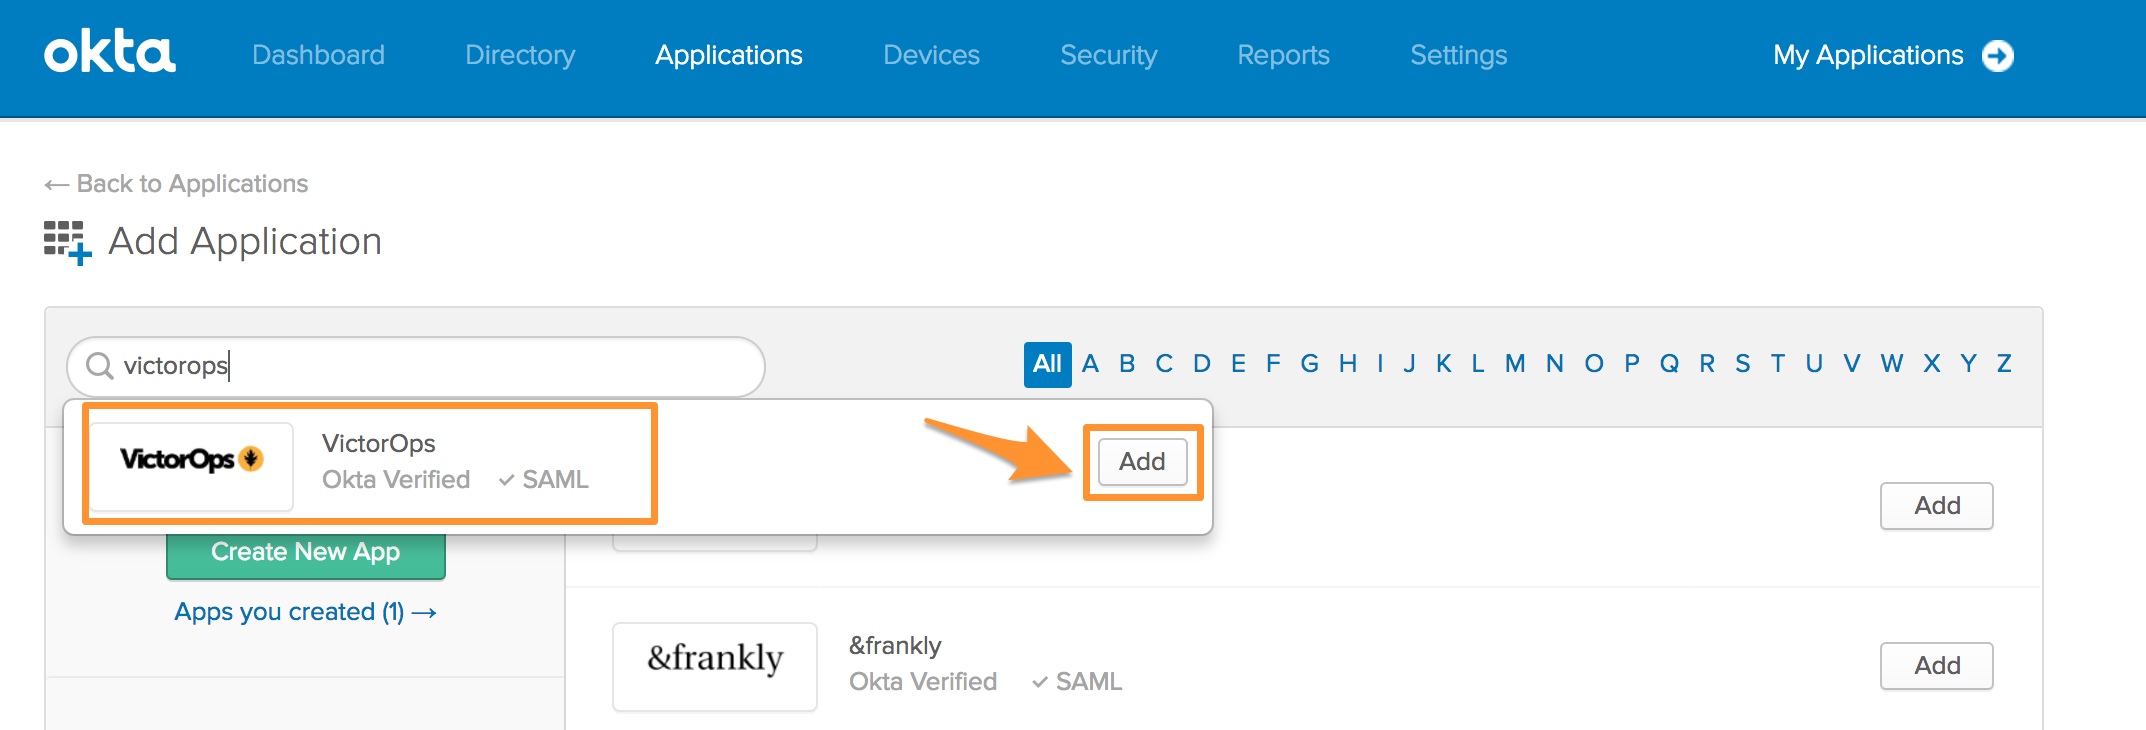
Within Applications, select Add Application.

Begin entering Splunk On-Call in the search bar. When Splunk On-Call appears, select Add.
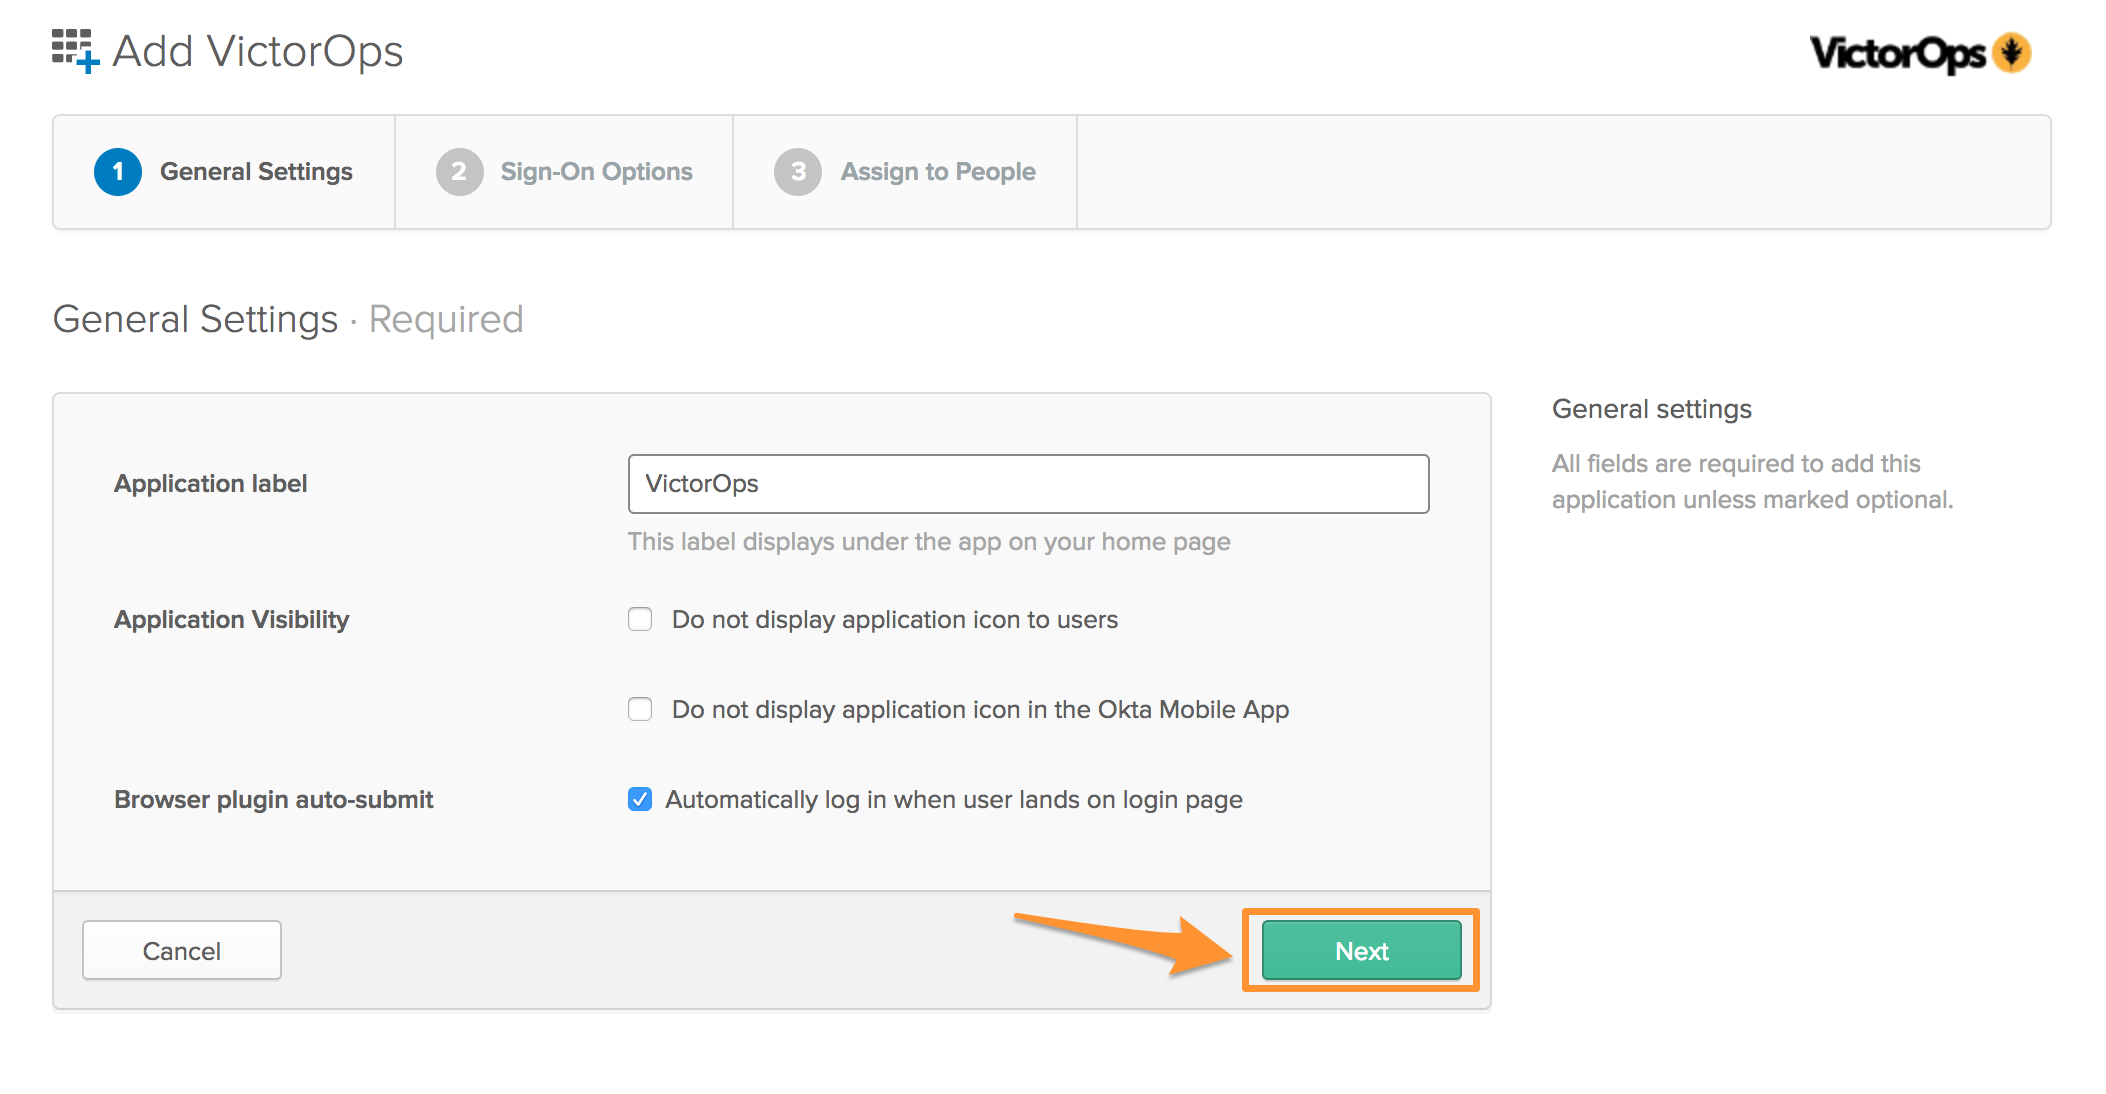
The Application label, or name, should auto-populate with the name Splunk On-Call, but you can re-name this label. The Browser plugin auto-submit should be auto-populated as well. Verify that this setting is selected and select Next.
On the Sign-On Options tab, in the Default Relay State field enter the following URL:
Default Relay State: https://portal.victorops.com/auth/sso/<your-org-slug>
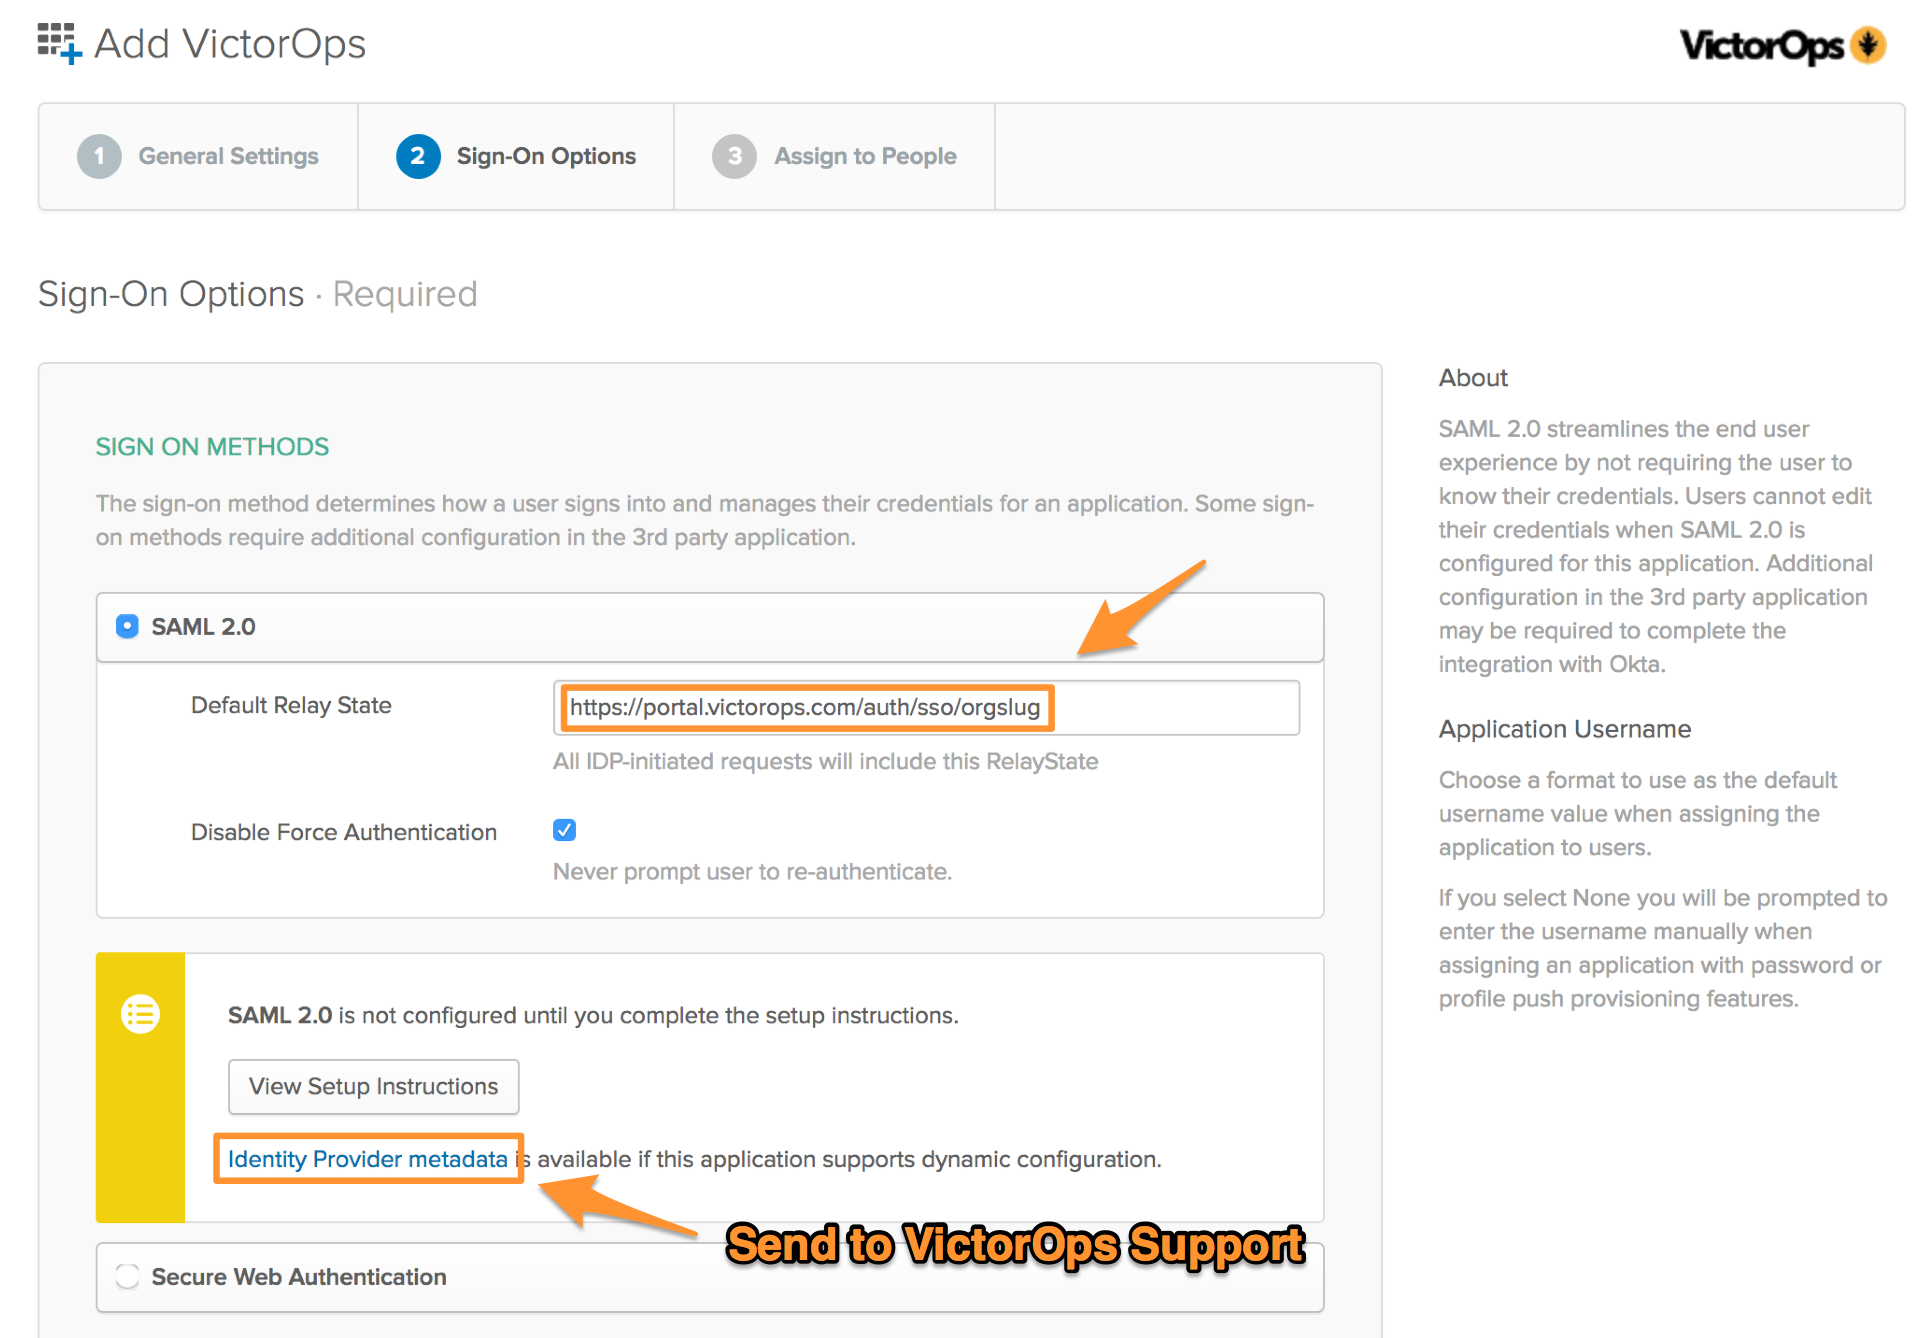
Once the URL has been added, select Identity Provider metadata to download the metadata file. Splunk On-Call requires this file to complete the SSO configuration. Email this file to Splunk On-Call Support.
After downloading the file, select Next.
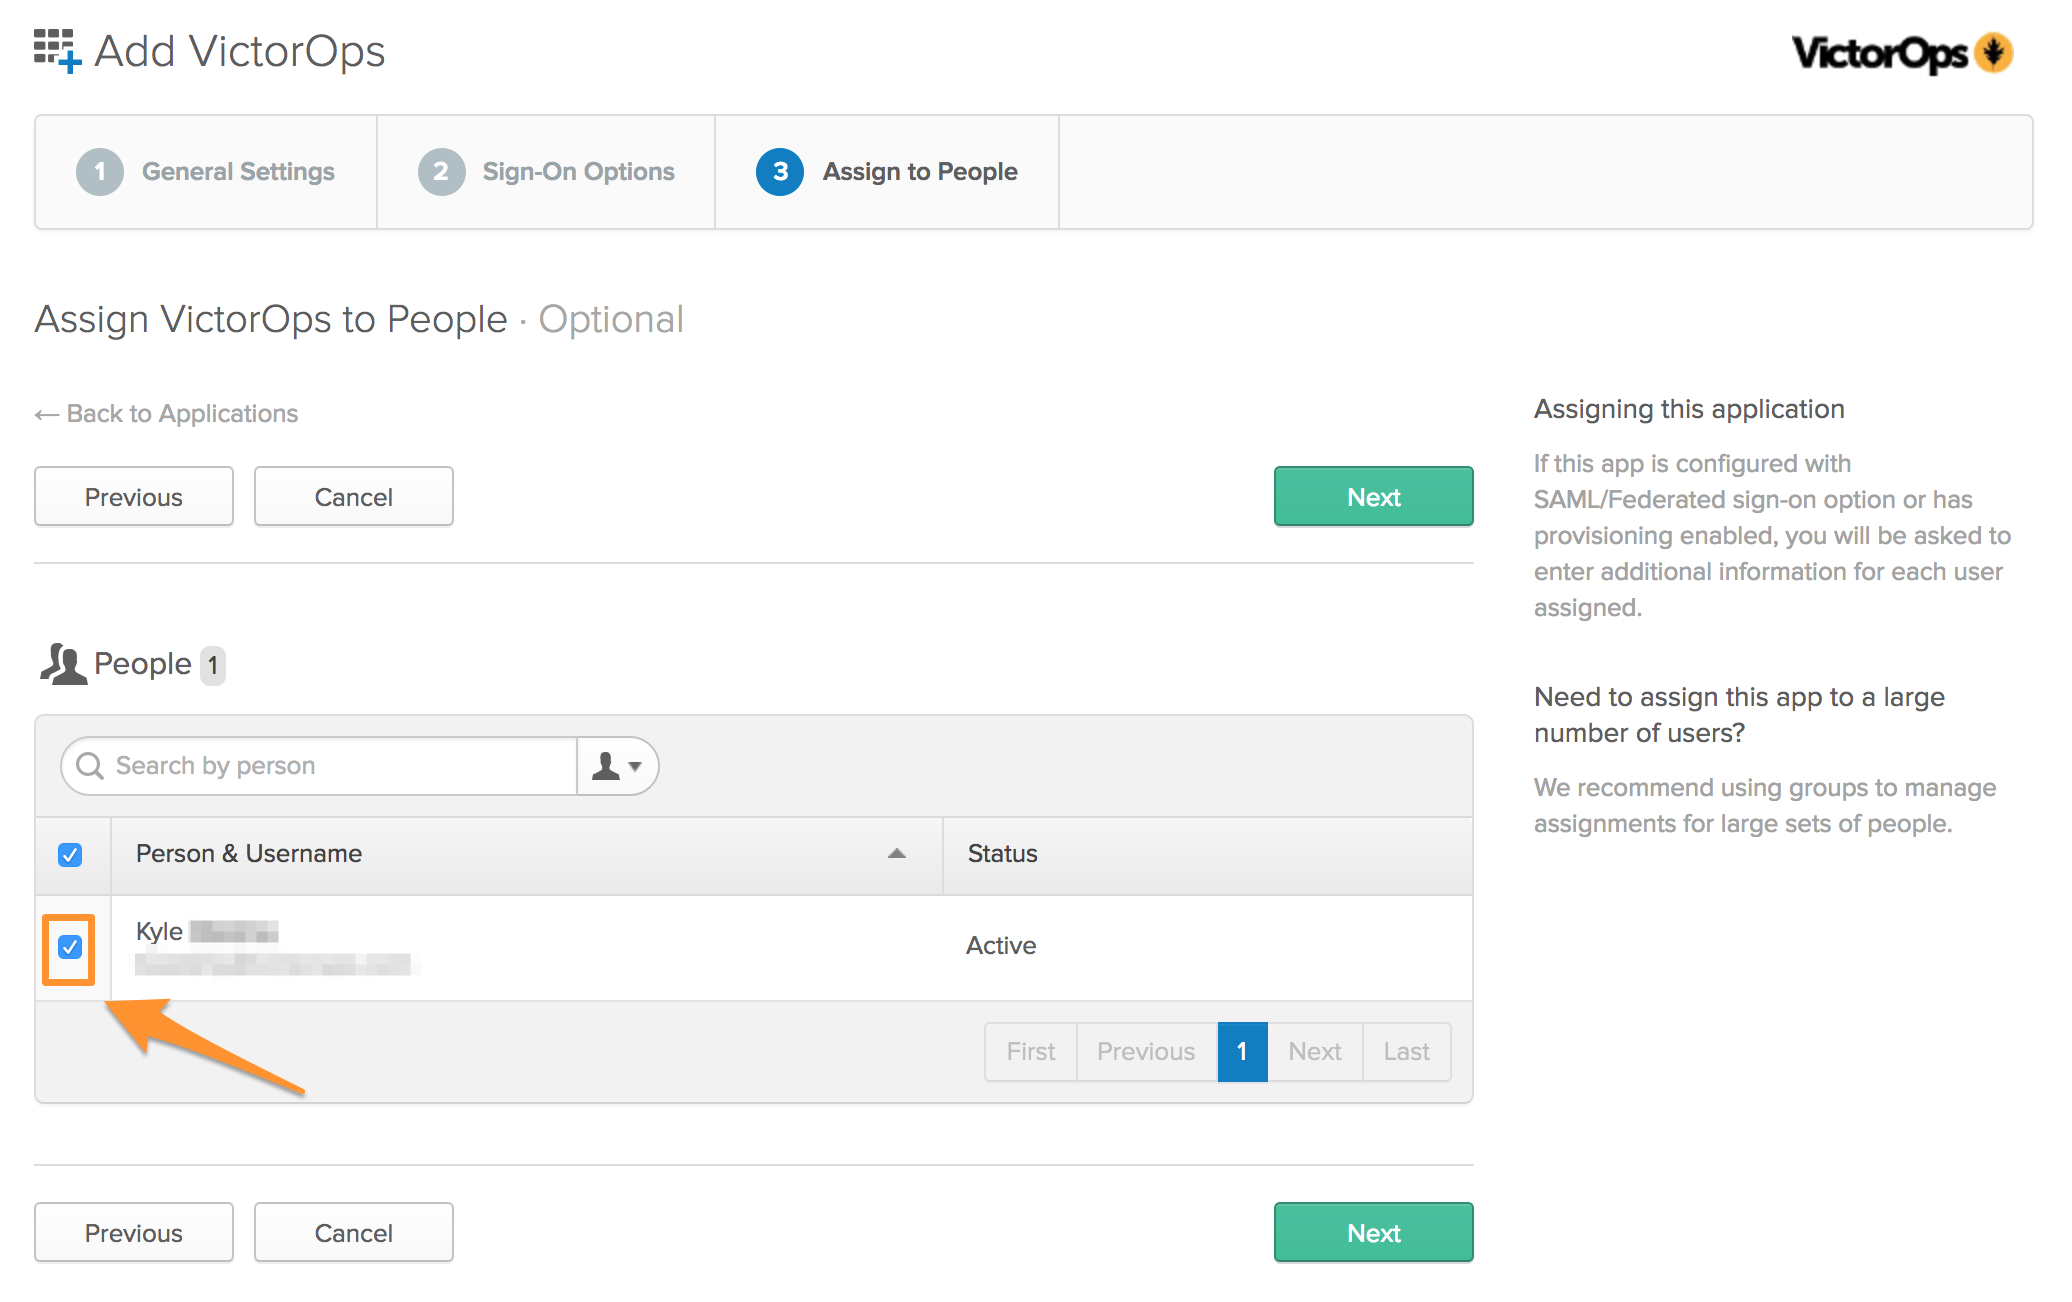
Select the users that should have access to add the Splunk On-Call app to their Okta homepage and log in to Splunk On-Call through SSO. Once all of the users have been listed, select Next.
Select Done.
Once the users have added the app they will be directed to a one-time linking process to connect their Splunk On-Call credentials to Okta. To conduct the one-time linking process outside of the Okta Homepage, see First-time SSO log in.