Mute alert notifications 🔗
Muting is helpful when you need to stop sending alert notifications during situations known to trigger alerts, such as maintenance windows or tests. Muting lets you reduce noise and focus on what matters.
You can stop sending, or mute, alert notifications based on certain conditions you can specify. You can mute notifications for a specified period of time or indefinitely, although alerts and events are still generated, and appear in Splunk Observability Cloud.
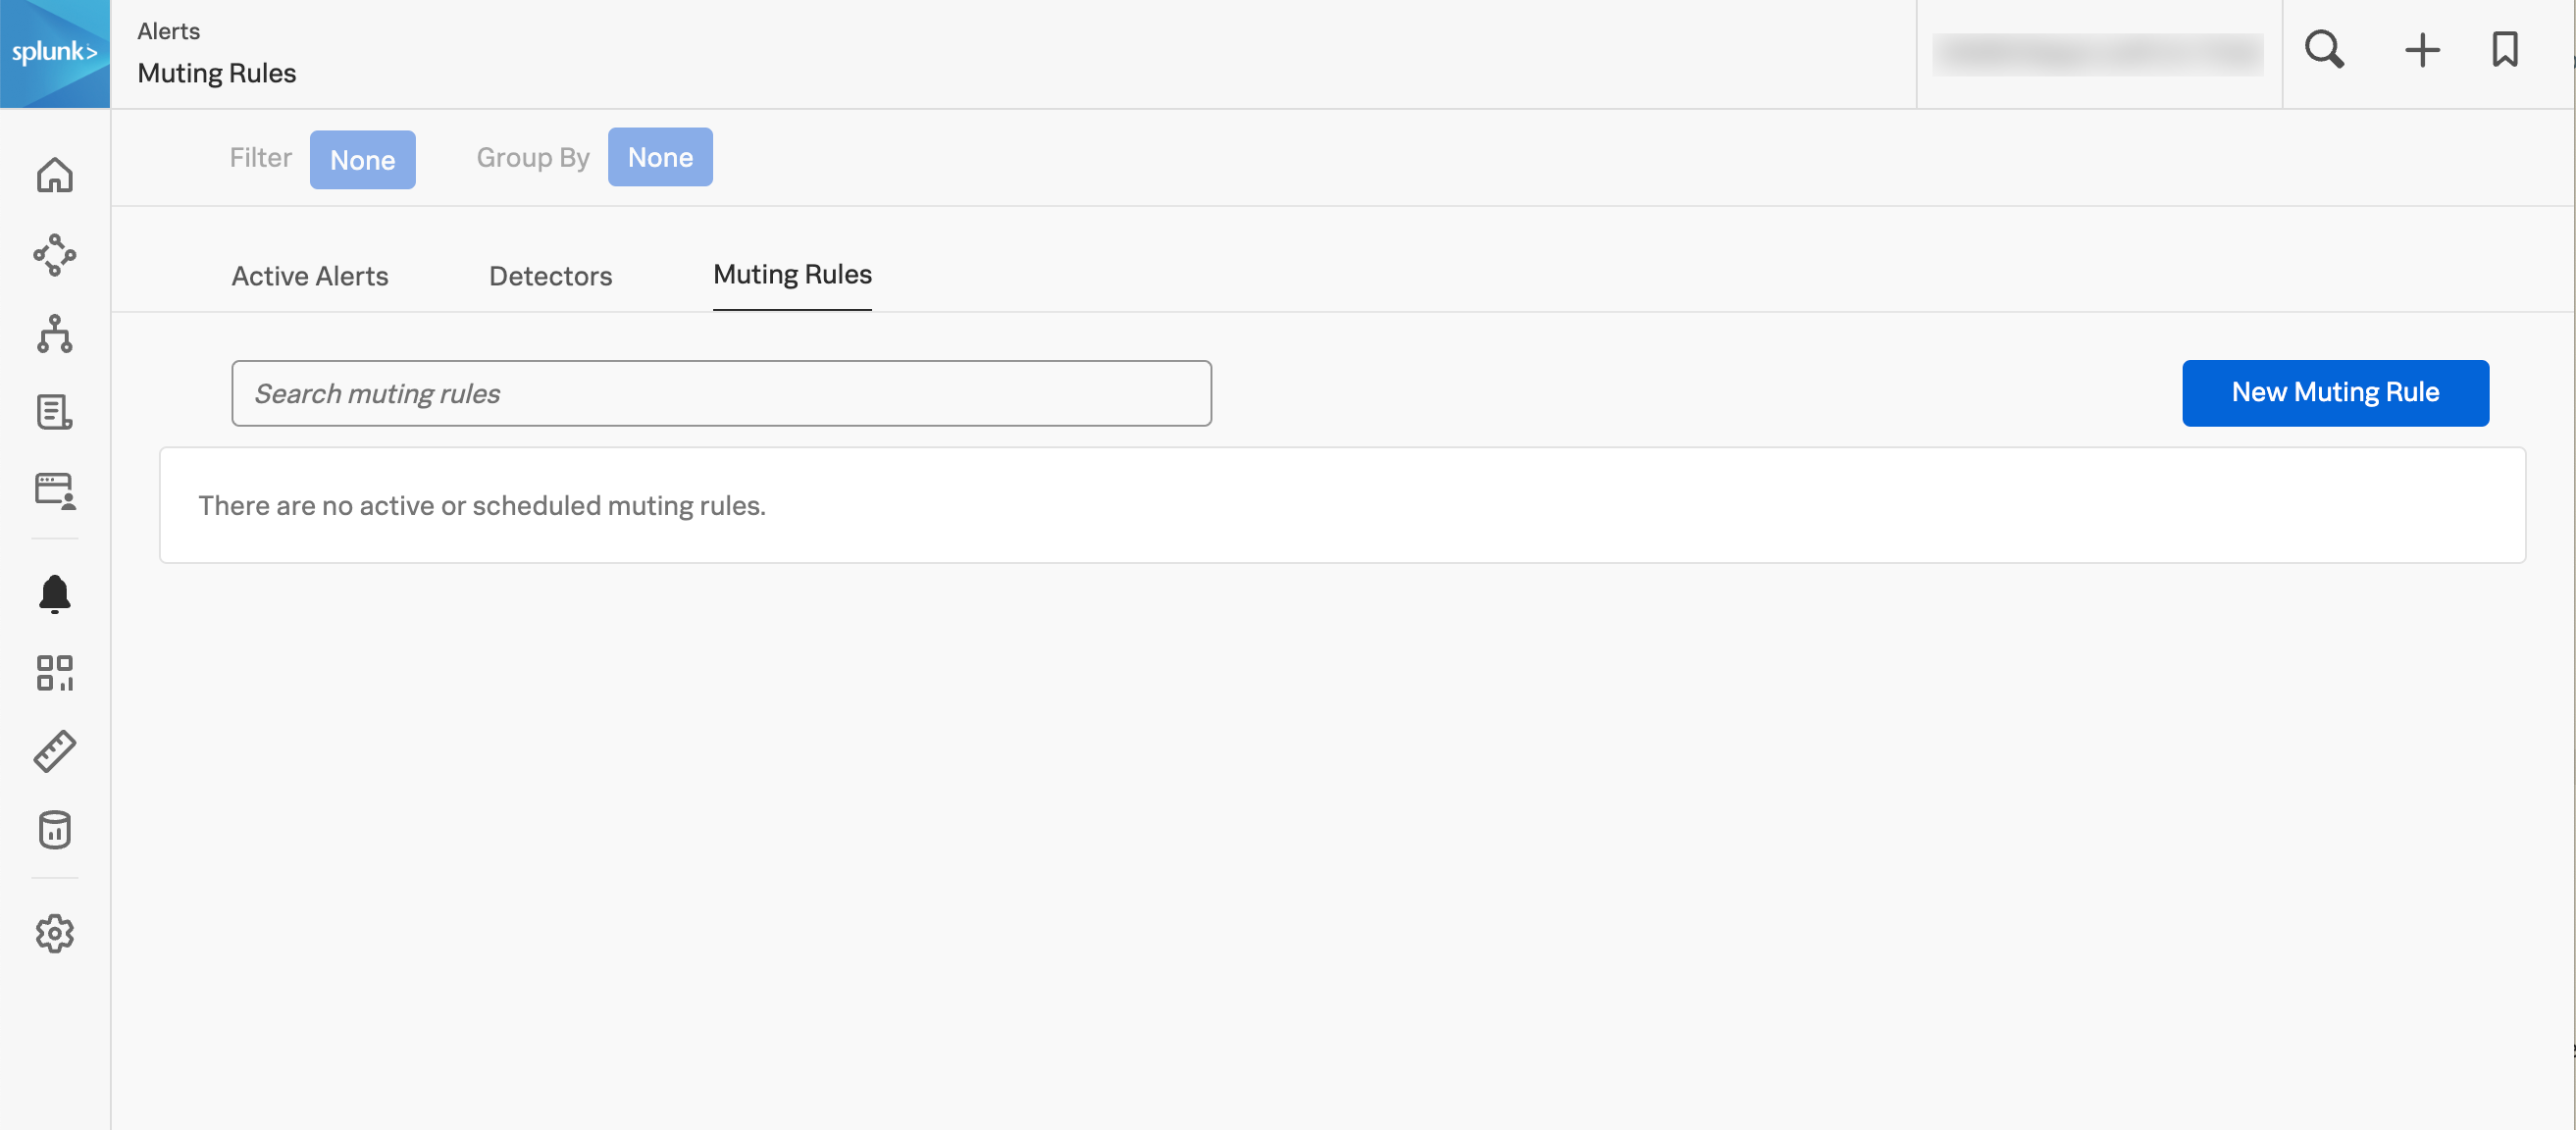
To see your existing muting rules or create new ones, go to Detectors & SLOs, then select the Muting rules tab.

How muting works 🔗
Alert notifications are muted according to muting rules, which include a schedule that sets the muting period. During the muting period, notifications that match the rule aren’t sent to subscribers. The only exception are clear notifications for alerts that were active before the muting period started.
After the muting period ends, Splunk Observability Cloud restarts sending to subscribers notifications for alerts that are still active, or for alerts triggered within the last 90 days of the muting period. To turn off sending alert notifications after the muting period has ended, edit the muting rule configuration.
Note
Muting rules only affect notifications: When a muting rule is active, alerts and events that are muted by the rule are still generated.
Create muting rules 🔗
To create a muting rule, you can do one of the following:
Mute specific detectors or alerts 🔗
Creating muting rules from existing detectors or alerts is the fastest way of muting notifications.
To mute a specific detector or alert:
Open Detectors & SLOs, then select either the Active alerts or Detectors tab.
Select the more icon (⋯) next to the detector or alert, and select .
Note
To mute a detector while you’re editing it, select from the detector’s action menu (⋯).
Create muting rules based on group-by dimensions 🔗
Muting rules automatically include dimensions specified in Group By, so that you can mute notifications from multiple detectors with a single muting rule.
To create muting rules based on group-by dimensions:
Open Detectors & SLOs, then select either the Active alerts or Detectors tab.
Specify the grouping dimensions by selecting the Group By button.
Select the more button (⋯) next any grouped item, and select .
Note
Achieve greater precision in your muting rules by using built-in dimensions instead of metadata collected asynchronously, such as AWS tags.
Create muting rules from scratch 🔗
To create a new muting rule from scratch:
Open Detectors & SLOs, then select the Muting rules tab.
Configure your muting rule 🔗
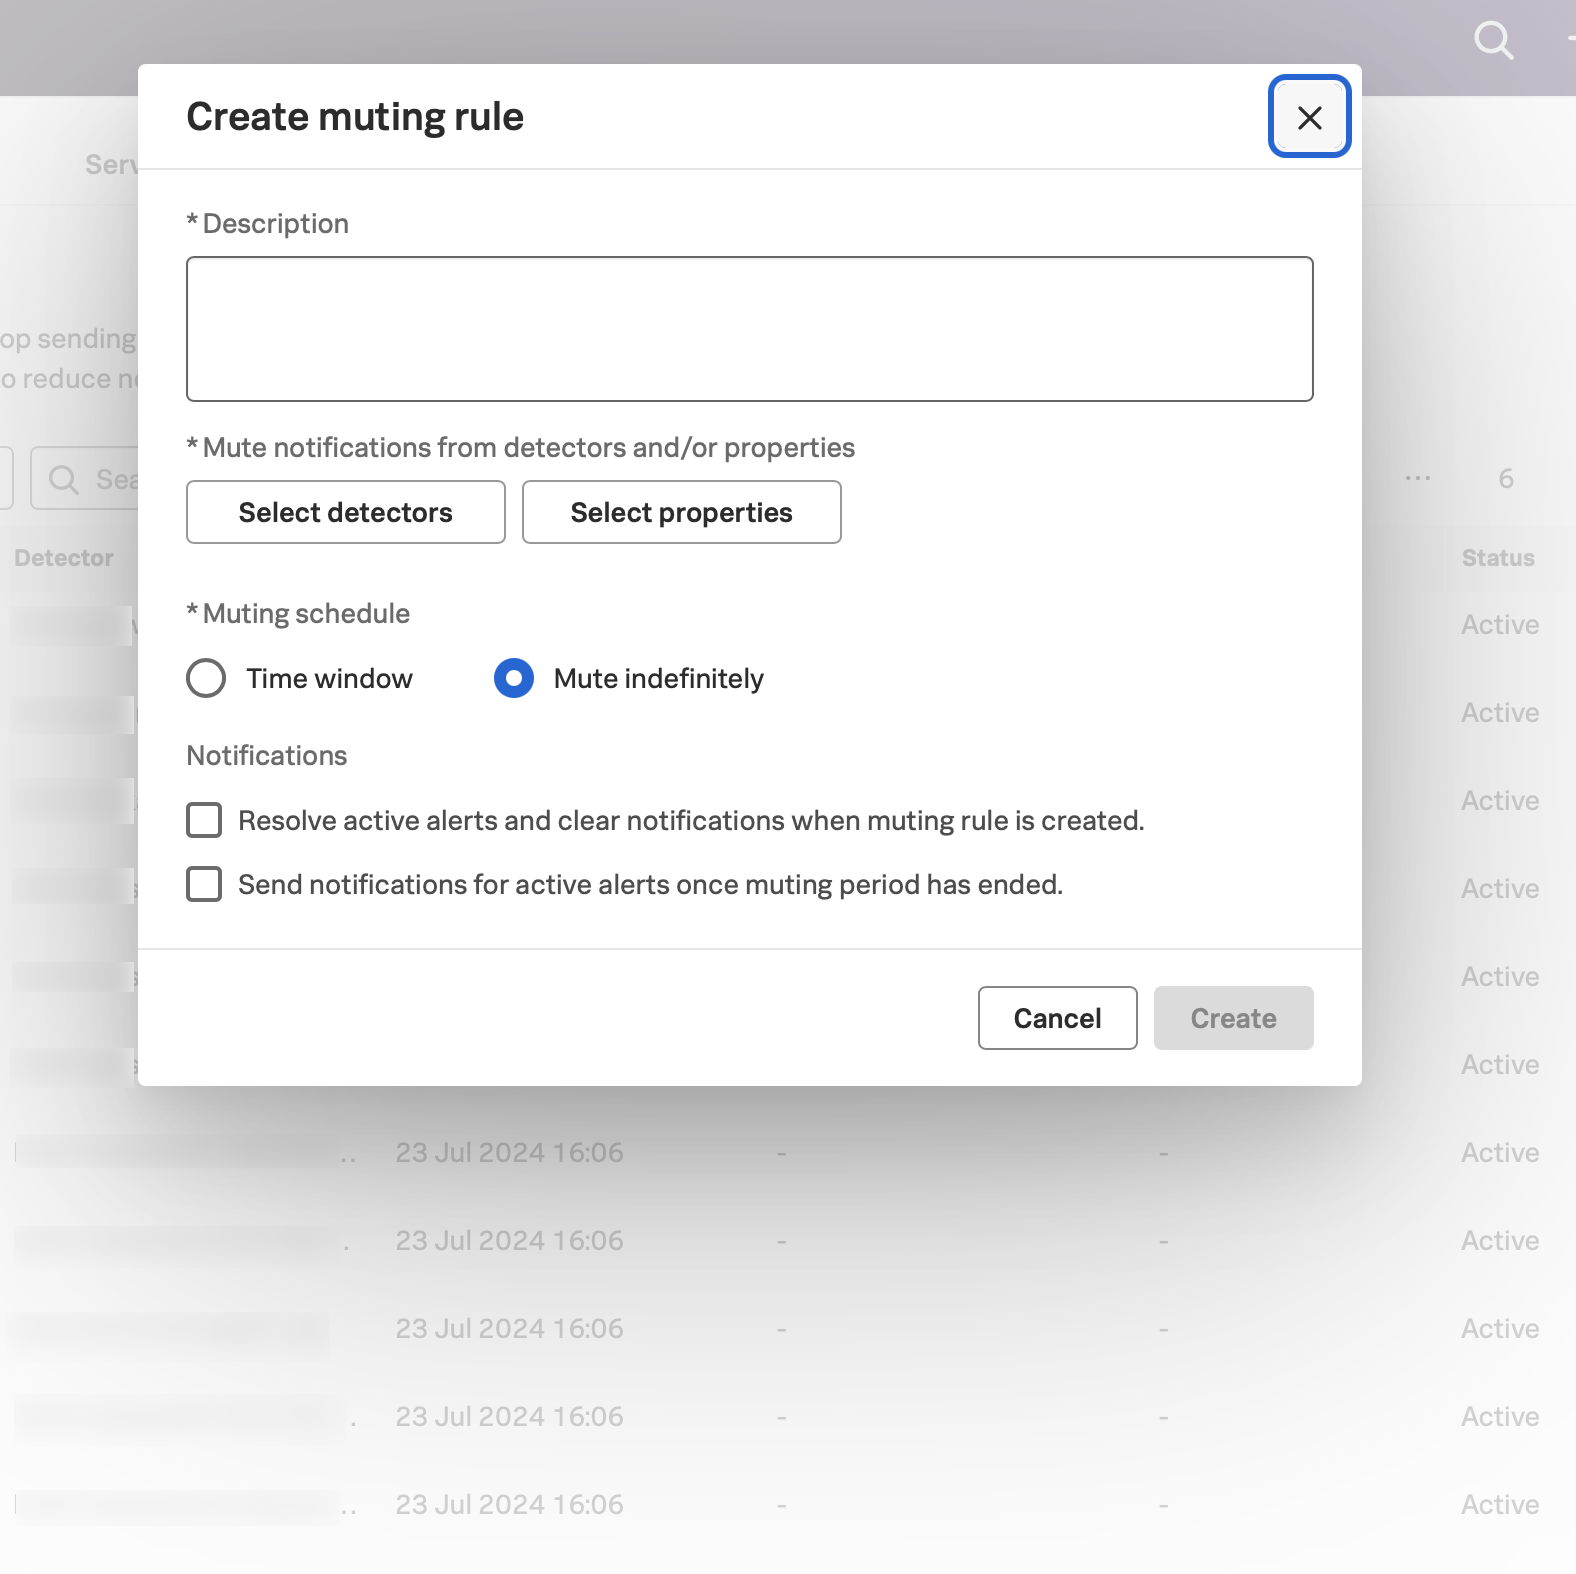
The following screenshot shows the muting rule dialog box:

To configure a new muting rule, follow these steps:
Include a Description for the muting rule. The text you enter in this field displays as the name of the muting rule in the Muting rules tab.
Use Select detectors and Select properties to add one or more detectors and properties for which you want to mute notifications. If using groups, you can also type sf_tags to find a list of tags. When you add more than one detector or property, the muting rule interprets the detectors and properties using the AND logical operator.
Specify the Muting schedule during which notifications are muted (muting period) using the predefined periods or by creating a custom period. You can also mute indefinitely.
(Optional) If the rule follows a schedule, you can set a Time window and a Recurrence period for the muting rule. When scheduling a muting rule, the rule repeats after a set number of days, starting with the start time of the original rule. The daily and weekly options set that number to
1and7respectively. The option lets you set the number of days or set a number of weeks. To learn more about setting a time window, see Select time range with the time range selector.Select whether you want to clear any existing alerts that match the conditions you have set. If you’re muting certain alerts to address a known problem, you might want to clear existing alerts so you are starting from a clean slate. Clearing these alerts also notifies downstream systems, such as Splunk On-Call, OpsGenie, and PagerDuty.
Select whether you want to receive notifications for alerts that are still active when the muting period ends.
Select Create to activate the muting rule. It can take up to a minute before a new muting rule goes into effect.
Note
Splunk Observability Cloud allows a maximum of 9,500 muting rules.
Search and view muting rules 🔗
You can search muting rules and view their details at any time, as well as browse muted notifications.
Muting rules 🔗
To find muting rules, use the search field in the Muting rules tab on the Detectors & SLOs page.
You can also view information about muting rules from different places on the Detectors & SLOs page.
On the Muting rules tab, by default, you can view a list of all active and scheduled muting rules.
Use the Status filter to view different lists of muting rules. You can filter muting rules by Active and Scheduled, Active, Scheduled, Expired, or Any.
Select the arrow next to a muting rule name to expand the row and see more details about the muting rule.
On the Active alerts tab, you can view a list of muted alerts by selecting the All alerts filter and changing it to Only muted alerts. Select the Notifications muted label next to the duration to view and edit muting rules for the associated alert.
On the Detectors tab, you can view a list of muted detectors by selecting the All detectors filter and changing it to Only muted detectors. Select the Muted label next to the detector name to view and edit muting rules for the associated detector.
Note
If you select Muted or Notifications muted and the Muting rules tab displays an empty page, then the muting rule was created based on properties instead of created for a detector.
Muted notifications 🔗
If a notification is muted, an indicator is displayed wherever the event might send the notification, such as on the Active alerts tab or in an event feed.
To see events related to past muting rules, you can use the Events sidebar or the Event overlay. Events are generated when the rule becomes active (notifications stop) and when the rule becomes inactive (notifications resume).
To find muting events in the Events sidebar, search for sf_eventType:alertMuting.
To overlay muting events on a dashboard, search for alertMuting in the Event Overlay search box.
Edit muting rules 🔗
You can only edit active and scheduled muting rules. Expired muting rules are read-only.
To edit a muting rule:
Open Detectors & SLOs, then select the Muting rules tab.
Select the more icon (⋯), then select .
Make any edits you want to your muting rule.
Note
For active muting rules, you can’t change the detector and property filters as well as the muting start date.
Select Save.
Cancel or delete muting rules 🔗
Canceling an active muting rule and resuming notifications for an alert or detector are the same thing. A canceled muting rules is deleted from Splunk Observability Cloud before it expires. Scheduled muting rules that are not yet active can also be deleted before they start.
To cancel an active muting rule or delete a scheduled muting rule from Detectors & SLOs:
Select the Muting rules tab, and locate the muting rule you want to cancel or delete.
Select the more icon (⋯) next to the muting rule and select or .
You can also cancel muting rules from a muted alert or detector:
On the Active alerts or the Detectors tab, select the Muted or the Notifications muted label.
For a detector, select the muting rule, then select .
For an active alert, select the more icon (⋯), then select .
If there are multiple rules, select the rule for which you want to resume notifications. In each case, you can confirm that you want to resume sending notifications.