Salesforce integration for Splunk On-Call 🔗
Requirements 🔗
This integration is compatible with the following versions of Splunk On-Call:
Starter
Essential
Full-Stack
This integration is for Salesforce service cloud users with access to the developer tools. The integration triggers an incident in VictorOps upon the creation of a case in Salesforce and then resolves it when the case is closed. The following is a step-by-step walkthrough of how to configure the integration.
Configuration in Splunk On-Call 🔗
In Splunk On-Call, navigate to Integrations and select the Salesforce icon from the list of available integrations.
On the resulting page, select Enable Integration. This reveals
the Service API Endpoint. Copy this endpoint and replace $routing_key with the appropriate routing key that you intend to use for this integration.
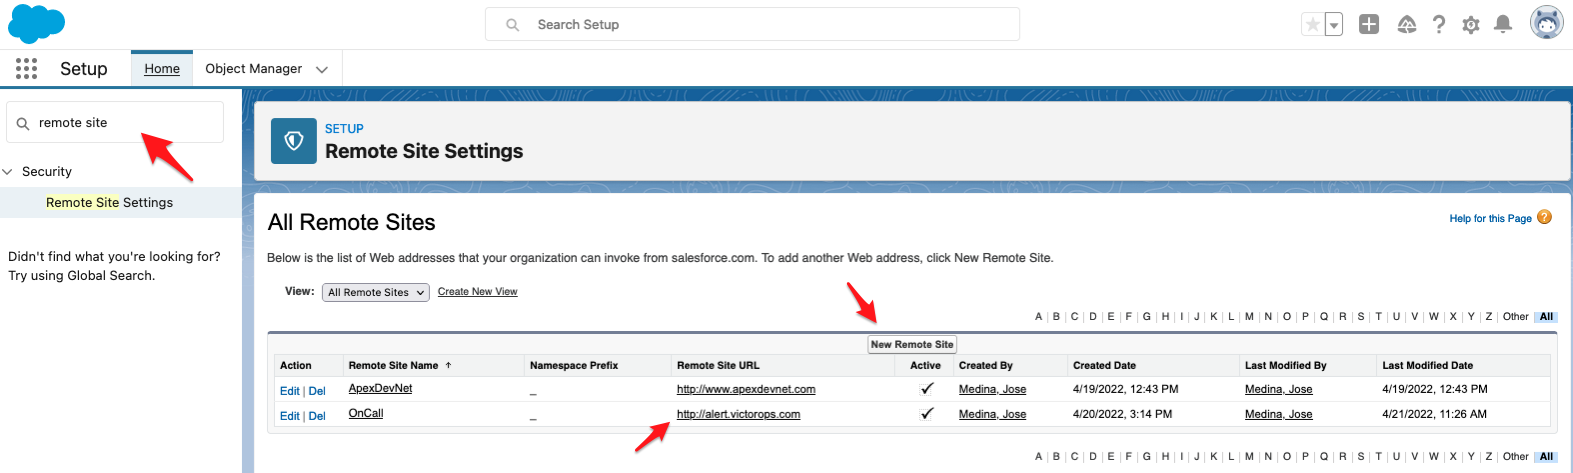
Configuration in Salesforce 🔗
To make a POST request to a remote site from Salesforce, you
need to add http://alert.victorops.com as a remote site. On the left
side toolbar of the Admin page, look for Security, then Remote Site Settings, then New Remote Site.
You can also use the Quick Find search tool to search for Remote Site Settings.
The Apex Code 🔗
There are five blocks of Apex code utilized to accomplish this integration, all of which are in this GitHub Repository .
The VictorOpsTimeLine class contains the logic to both parse the JSON and make the HTTP POST request. There are also two triggers (one for CRITICAL alerts and one for RECOVERY), and both require a test class before you push them to production.
Configuration 🔗
Before adding the code to Salesforce, retrieve your api_key and appropriate routing_key to the POST request endpoint URL found in the VictorOpsTimeLine class on line 14. To add any custom fields to the code, include them as an additional data.put in the VictorOpsTimeLine class and in all instances of VictorOpsTimeLine.caseToVictor, which is in every class and trigger.
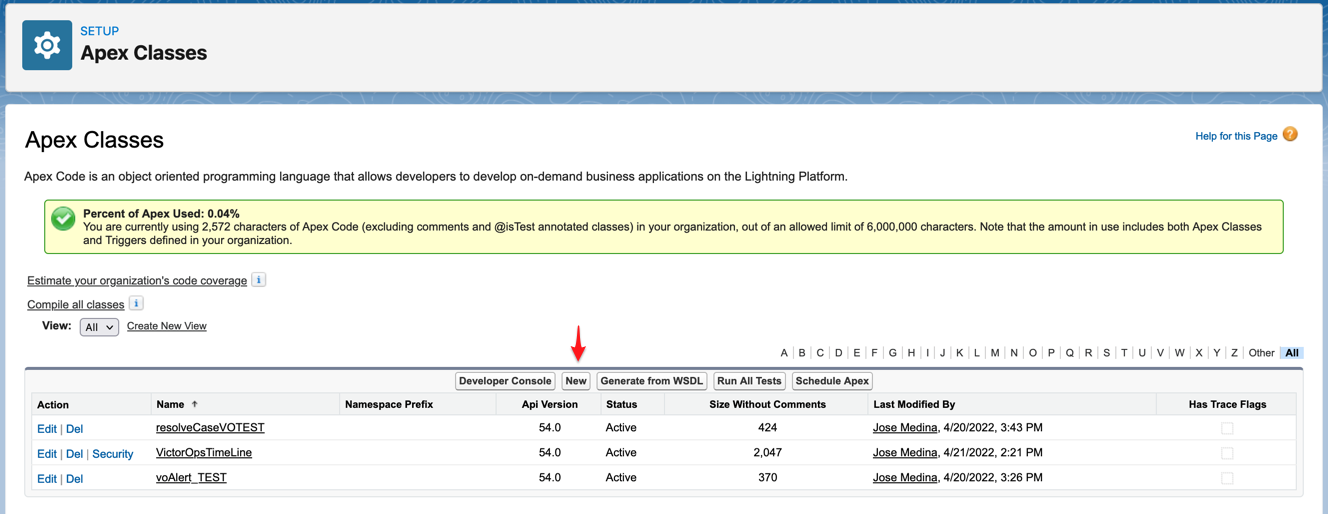
Add Apex classes 🔗
In the navigation bar, look for Custom Code, then Apex Classes. You can also search for Apex Classes in the Quick Find tool.
Once on the Apex Classes page, use the New button to add each of the classes.
Add the following classes, in order:
Add triggers 🔗
Add the Triggers.
Look for the Object Manager tab next to the Home tab. Select it to go to the page.
Once in the Object Manager Page look for the Case object.
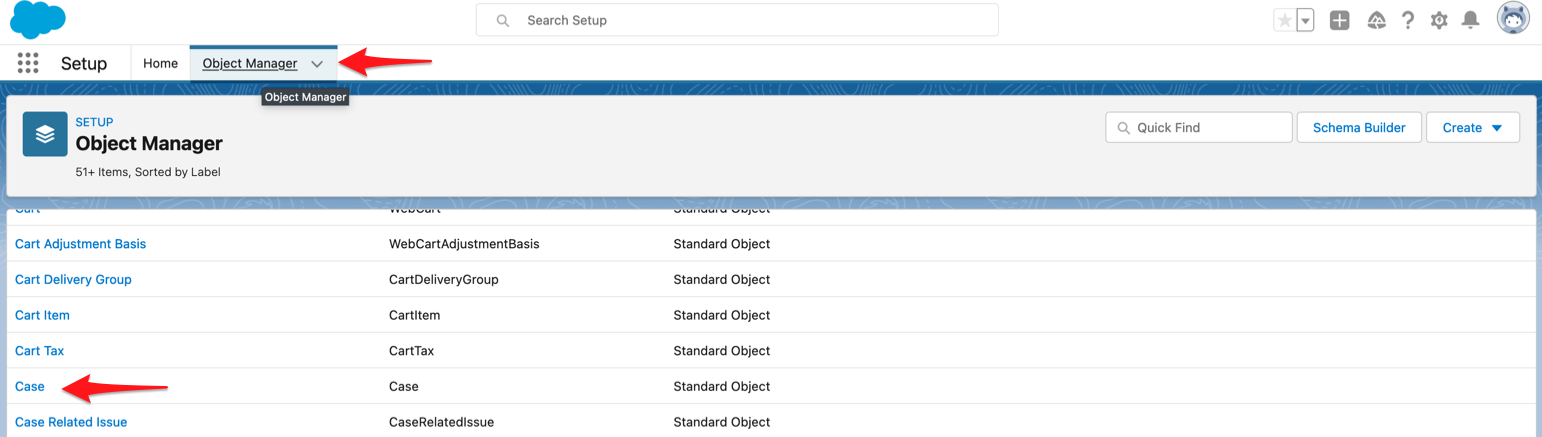
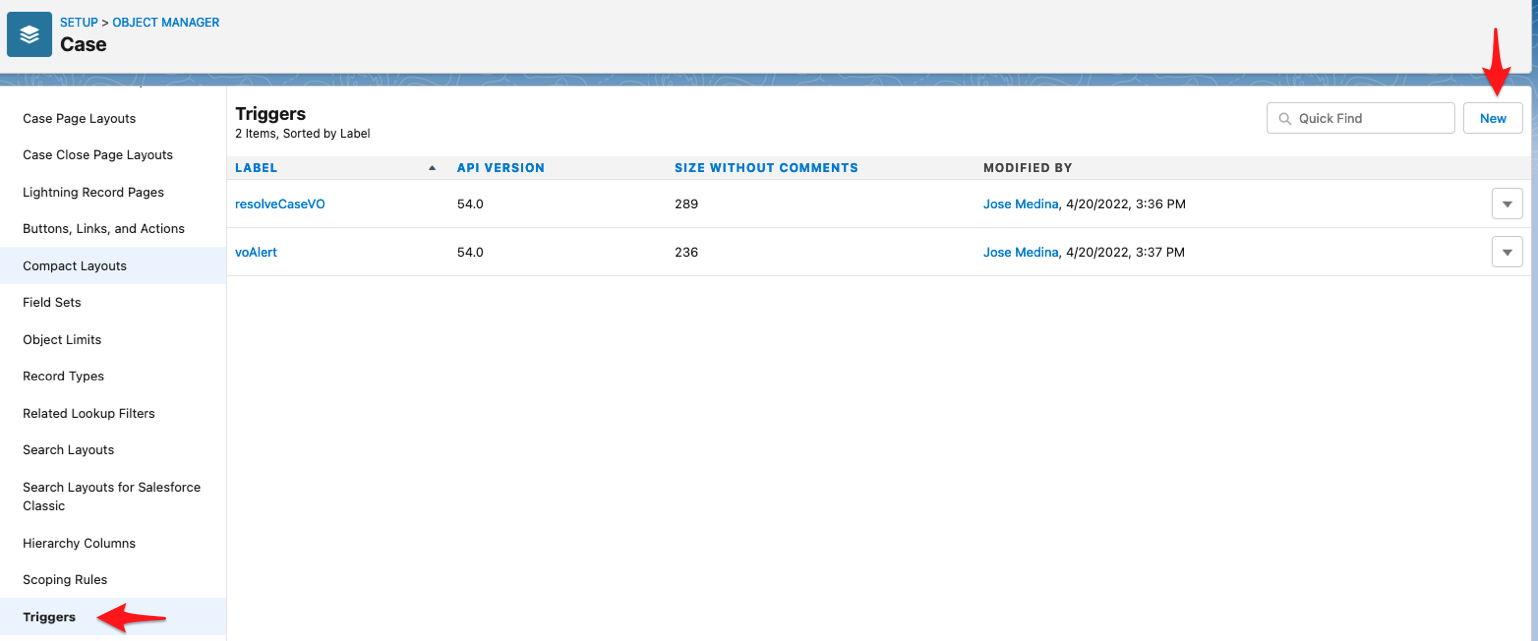
Once you open the Case Object page, select for Triggers.
Open the Triggers page and look for the New button. Add the code from the Github page. Make sure you delete any code that was there before when you first open it. Add the following code:
Once you add all the Apex Classes and Triggers into your Salesforce Sandbox you can deploy it as a ‘change set’ or use the Force IDE. You can find more information regarding deploying Apex code to production can in the Salesforce documentation .