Coralogix integration for Splunk On-Call 🔗
You can integrate Coralogix with Splunk On-Call following these steps.
Requirements 🔗
This integration is compatible with the following versions of Splunk On-Call:
Starter
Growth
Enterprise
Splunk On-Call configuration 🔗
Follow these steps in Splunk On-Call to set up the integration:
From the main timeline, select Integrations, 3rd Party Integrations, . If the integration hasn’t been enabled, select Enable Integration.
Copy the value of the URL to notify field to your clipboard.
#. After you’ve copied the URL, select Settings, Routing Keys to find your routing key configuration.
Decide which routing key you want to use with the integration and make sure it’s associated to the correct escalation policies. For more information on routing keys or instructions on creating a new one, see Create Routing Keys in Splunk On-Call.
Coralogix configuration 🔗
Follow these steps in Coralogix to set up the integration.
Create a webhook 🔗
From the main dashboard, select the username symbol in the upper right corner and select Settings.
Navigate to Webhooks and select the blue + button on the righthand side of the screen.
Provide an alias for the webhook and change the type from Slack to WebHook.
Paste the URL that you previously copied from Splunk On-Call.
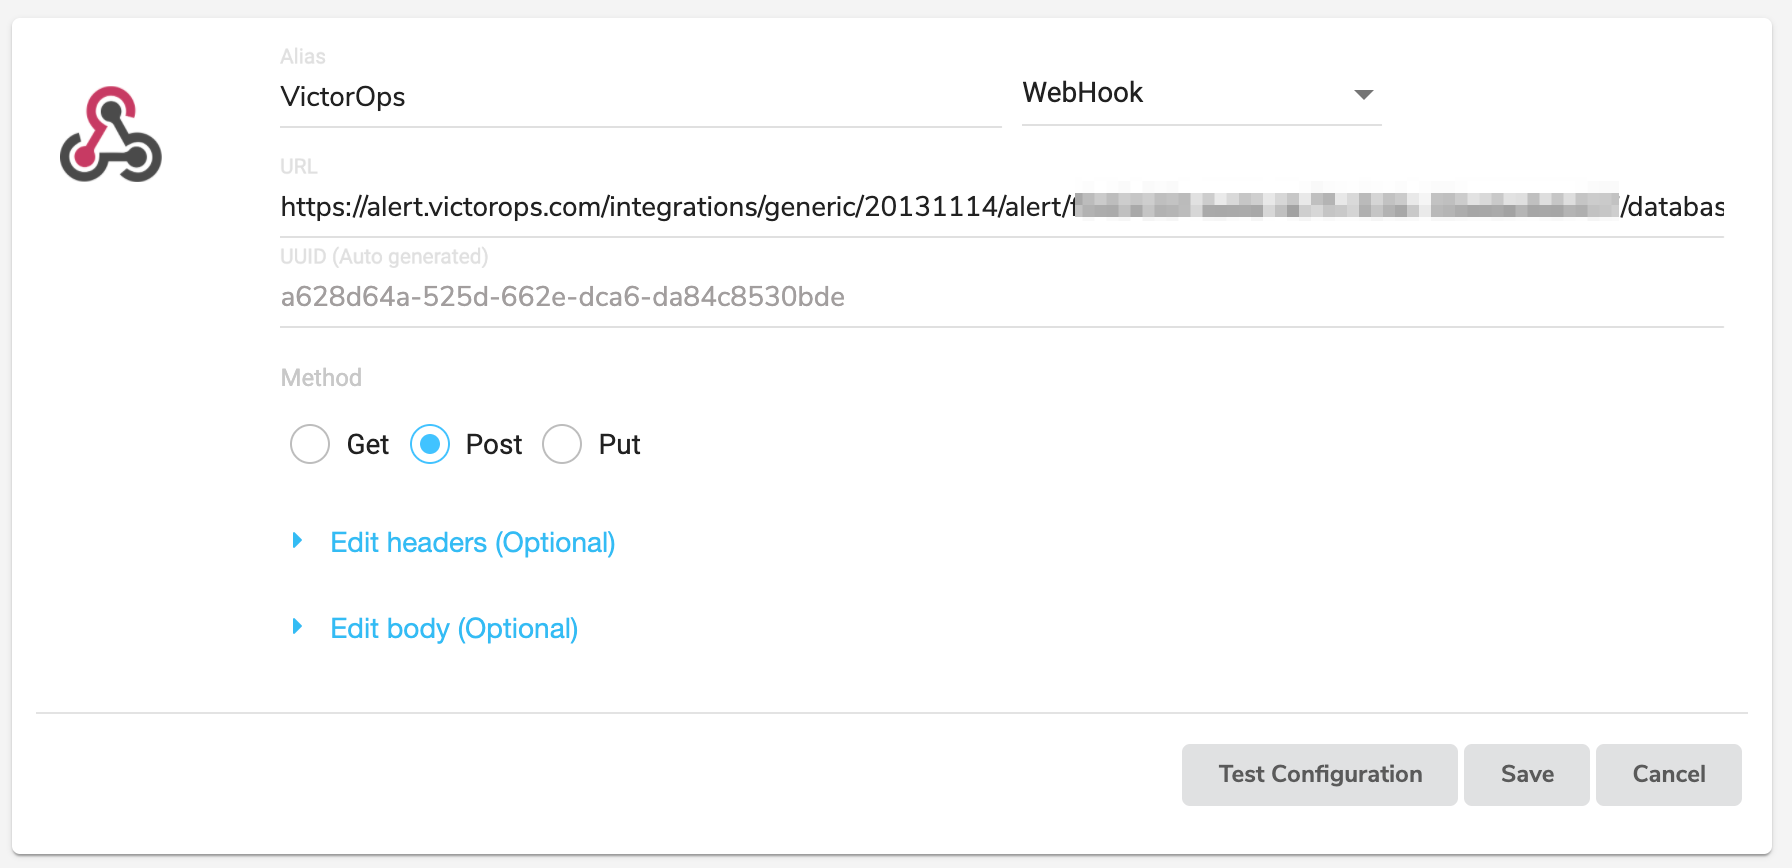
Paste the following payload inside Edit body:
{ "message_type": "CRITICAL", "entity_id": "$ALERT_ID",
"entity_display_name": "$ALERT_NAME",
"alert_severity": "$EVENT_SEVERITY",
"state_message": "$LOG_TEXT",
"description": "$ALERT_DESCRIPTION",
"alert_action": "$ALERT_ACTION", "alert_url": "$ALERT_URL",
"log_url": "$LOG_URL", "monitoring_tool": "Coralogix",
"team": "$TEAM_NAME", "application": "$APPLICATION_NAME",
"subsystem": "$SUBSYSTEM_NAME", "ipAddress": "$IP_ADDRESS",
"timestamp": "$EVENT_TIMESTAMP", "hitCount": "$HIT_COUNT" }
The value of
message_typehelps identify the type of alert. Valid values are:CRITICALWARNINGACKNOWLEDGEMENTINFORECOVERY
You might have to create multiple webhooks, tied to different alerts in Coralogix, to properly send alerts with the desired criticality to Splunk On-Call. Make sure that entity_id value, drawn from the ALERT_ID field in Coralogix when following the default payload, remains consistent across alerts with varying criticality.
For more information on custom alert webhooks, see the official Coralogix documentation.
Test the webhook 🔗
After filling out the payload for a webhook, test the configuration in Coralogix.
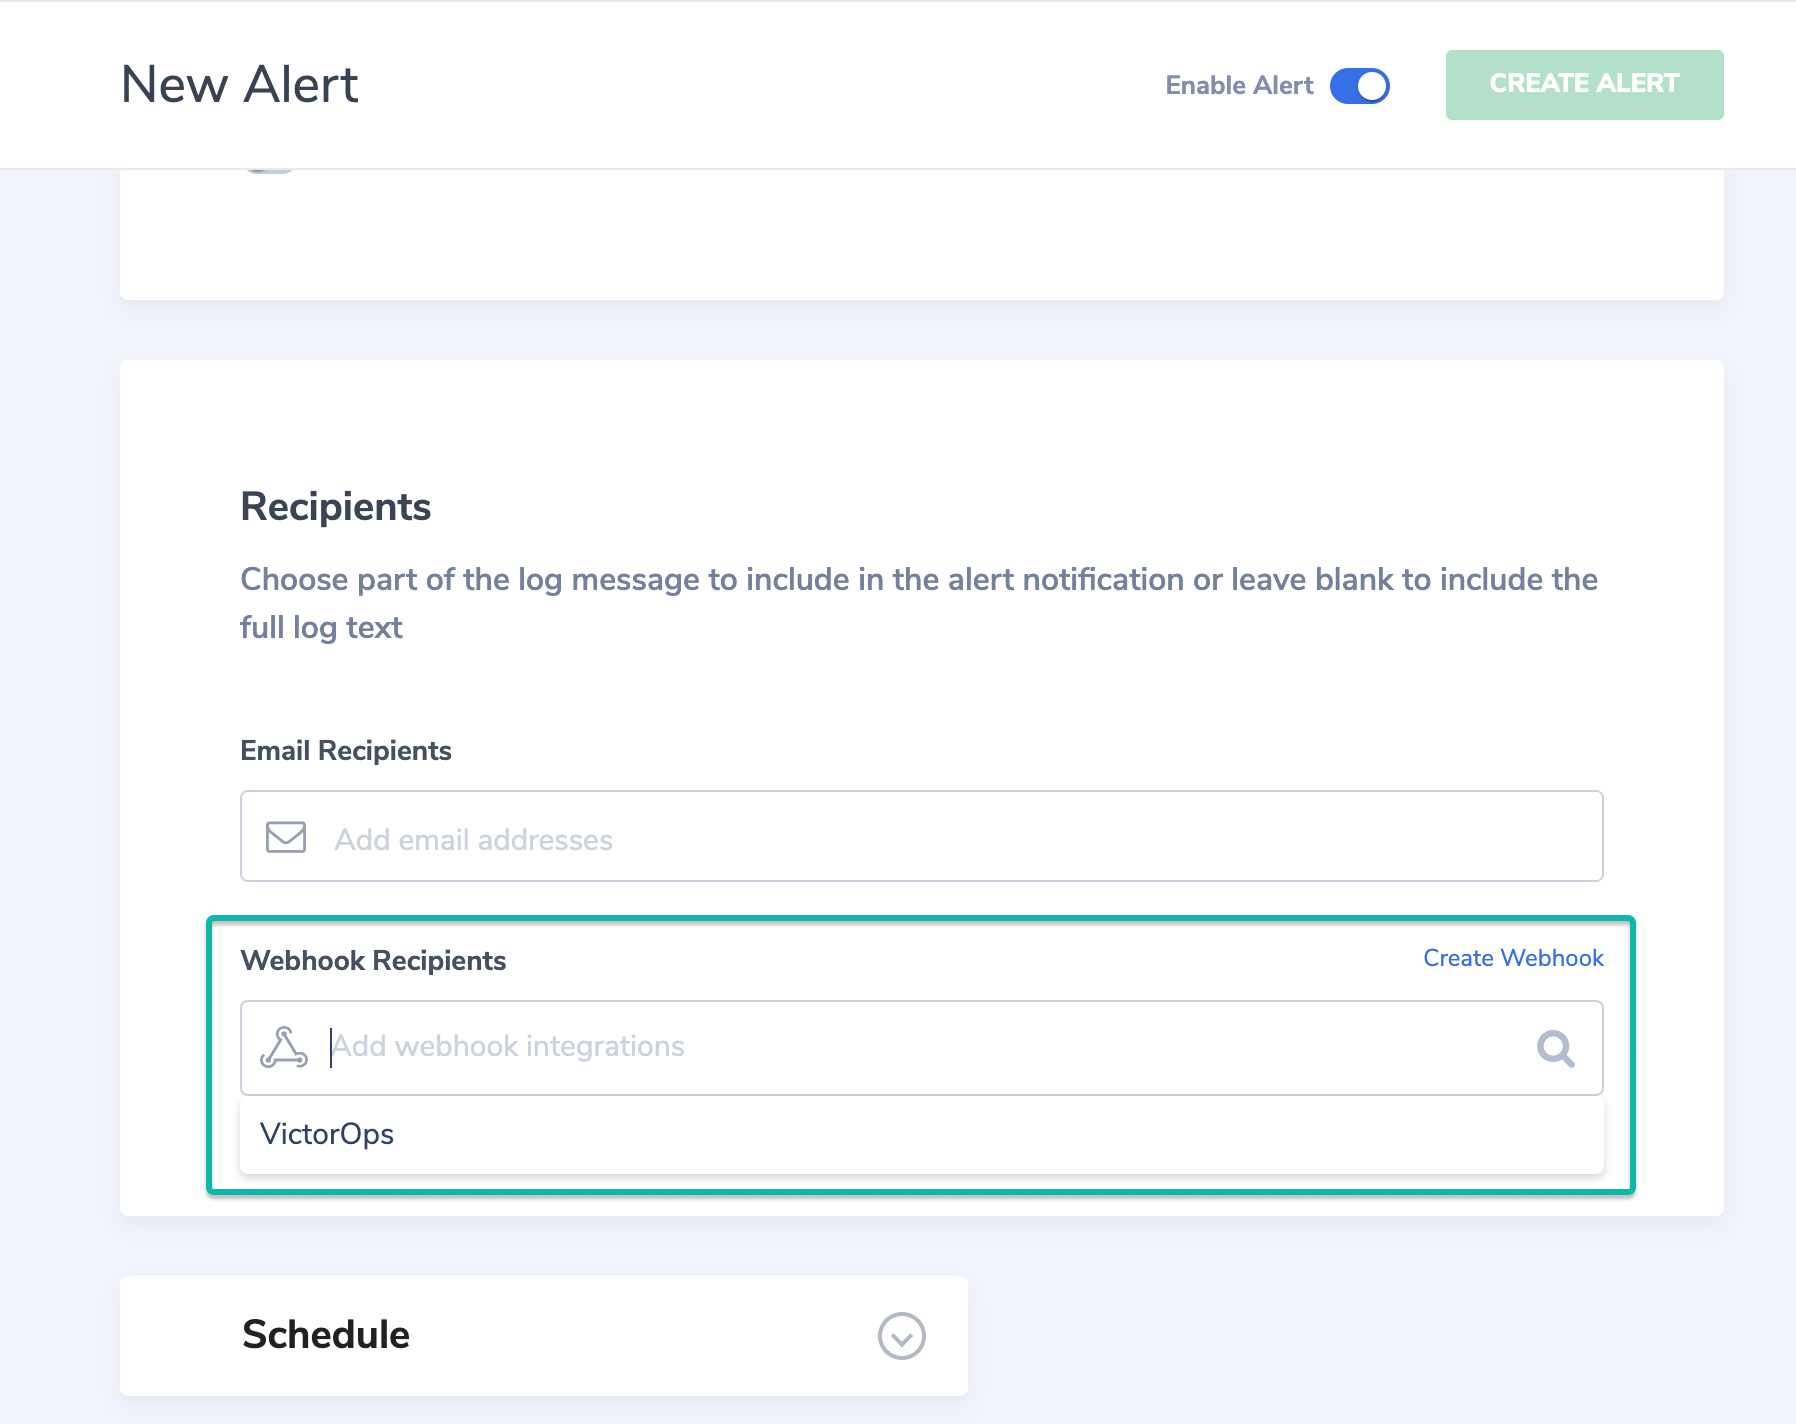
Assign an alert to a webhook 🔗
After you’ve created a webhook that points to Splunk On-Call, assign it to a Coralogix Alert so that the webhook triggers on the proper events:
In Coralogix, navigate to Alerts and select an existing alert, or select New Alert.
Apply your intended alert settings and scroll down to the recipients section.
Select the Splunk On-Call webhook that you previously created.
Save the alert.