Hubot integration for Splunk On-Call 🔗
Hubot is your company’s robot. Install it in your Splunk On-Call timeline to improve employee efficiency.
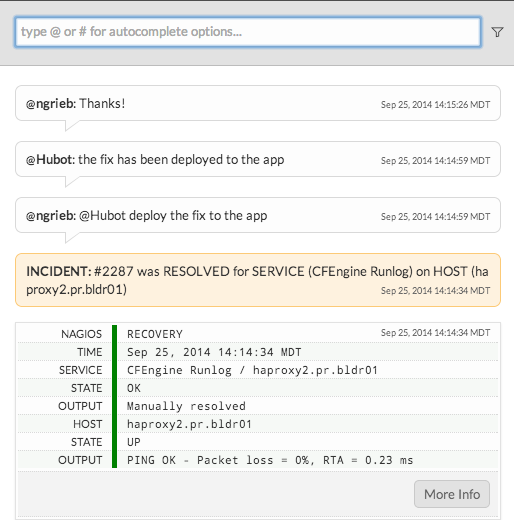
The Hubot - Splunk On-Call Adapter allows your Hubot to join your Splunk On-Call timeline. You can then address Hubot with timeline chat messages in the usual way. After giving your Hubot instance a name (“Hubot” in the example), you can then address it from the timeline with or without an @.

Configuration 🔗
In Splunk On-Call, select Integrations, then Hubot.
If the integration isn’t active, select the Enable Integration button to generate your endpoint URL. Replace the
$routing_keysection with the actual routing key you intend to use. To view or configure route keys in Splunk On-Call, select Alert Behavior, then Route Keys.
If you have not already, install Hubot according to these instructions: https://hubot.github.com/docs/.
Install the Splunk On-Call adapter directly from github:
npm install git://github.com/victorops/hubot-victorops.git
Your Hubot requires a login key to connect to Splunk On-Call. Your Hubot key is available at the “Hubot” link of your Splunk On-Call Integrations page in step 1. To configure the key, set the following environment variable:
export HUBOT_VICTOROPS_KEY=xxxxxxxx-xxxx-xxxx-xxxx-xxxxxxxxxxxx
Add the Splunk On-Call adapter to your Hubot’s dependencies in package.json:
...
"dependencies": {
  "hubot-victorops": ">=0.0.2",
  ...
}
...
Run Hubot with the Splunk On-Call adapter:
bin/hubot --adapter victorops
You might have to remove the empty hubot-scripts.json file and add a coffee-script dependency. To do so, see . Additionally, you can remove the “hubot-heroku-keepalive” line from both external-scripts.json and dependencies in package.json to avoid an aesthetic error message.
Hubot and the Rules Engine 🔗
You can annotate Hubot commands directly to take automated actions.
To accomplish this, you need an additional Hubot script from GitHub .
Add an annotation with the name “HUBOT COMMAND” to call Hubot in your program.
