Zendesk integration for Splunk On-Call 🔗
Use the Zendesk integration for Splunk On-Call to automatically trigger, acknowledge, and resolve incidents in Splunk On-Call. You can also, use the integration to have the acknowledgement of an incident on the Splunk On-Call side trigger a status change in Zendesk.
Requirements 🔗
The Zendesk integration is compatible with the Enterprise version of Splunk On-Call.
This optional acknowledge back steps make use of outbound webhooks.
Enable the Zendesk integration in Splunk On-Call 🔗
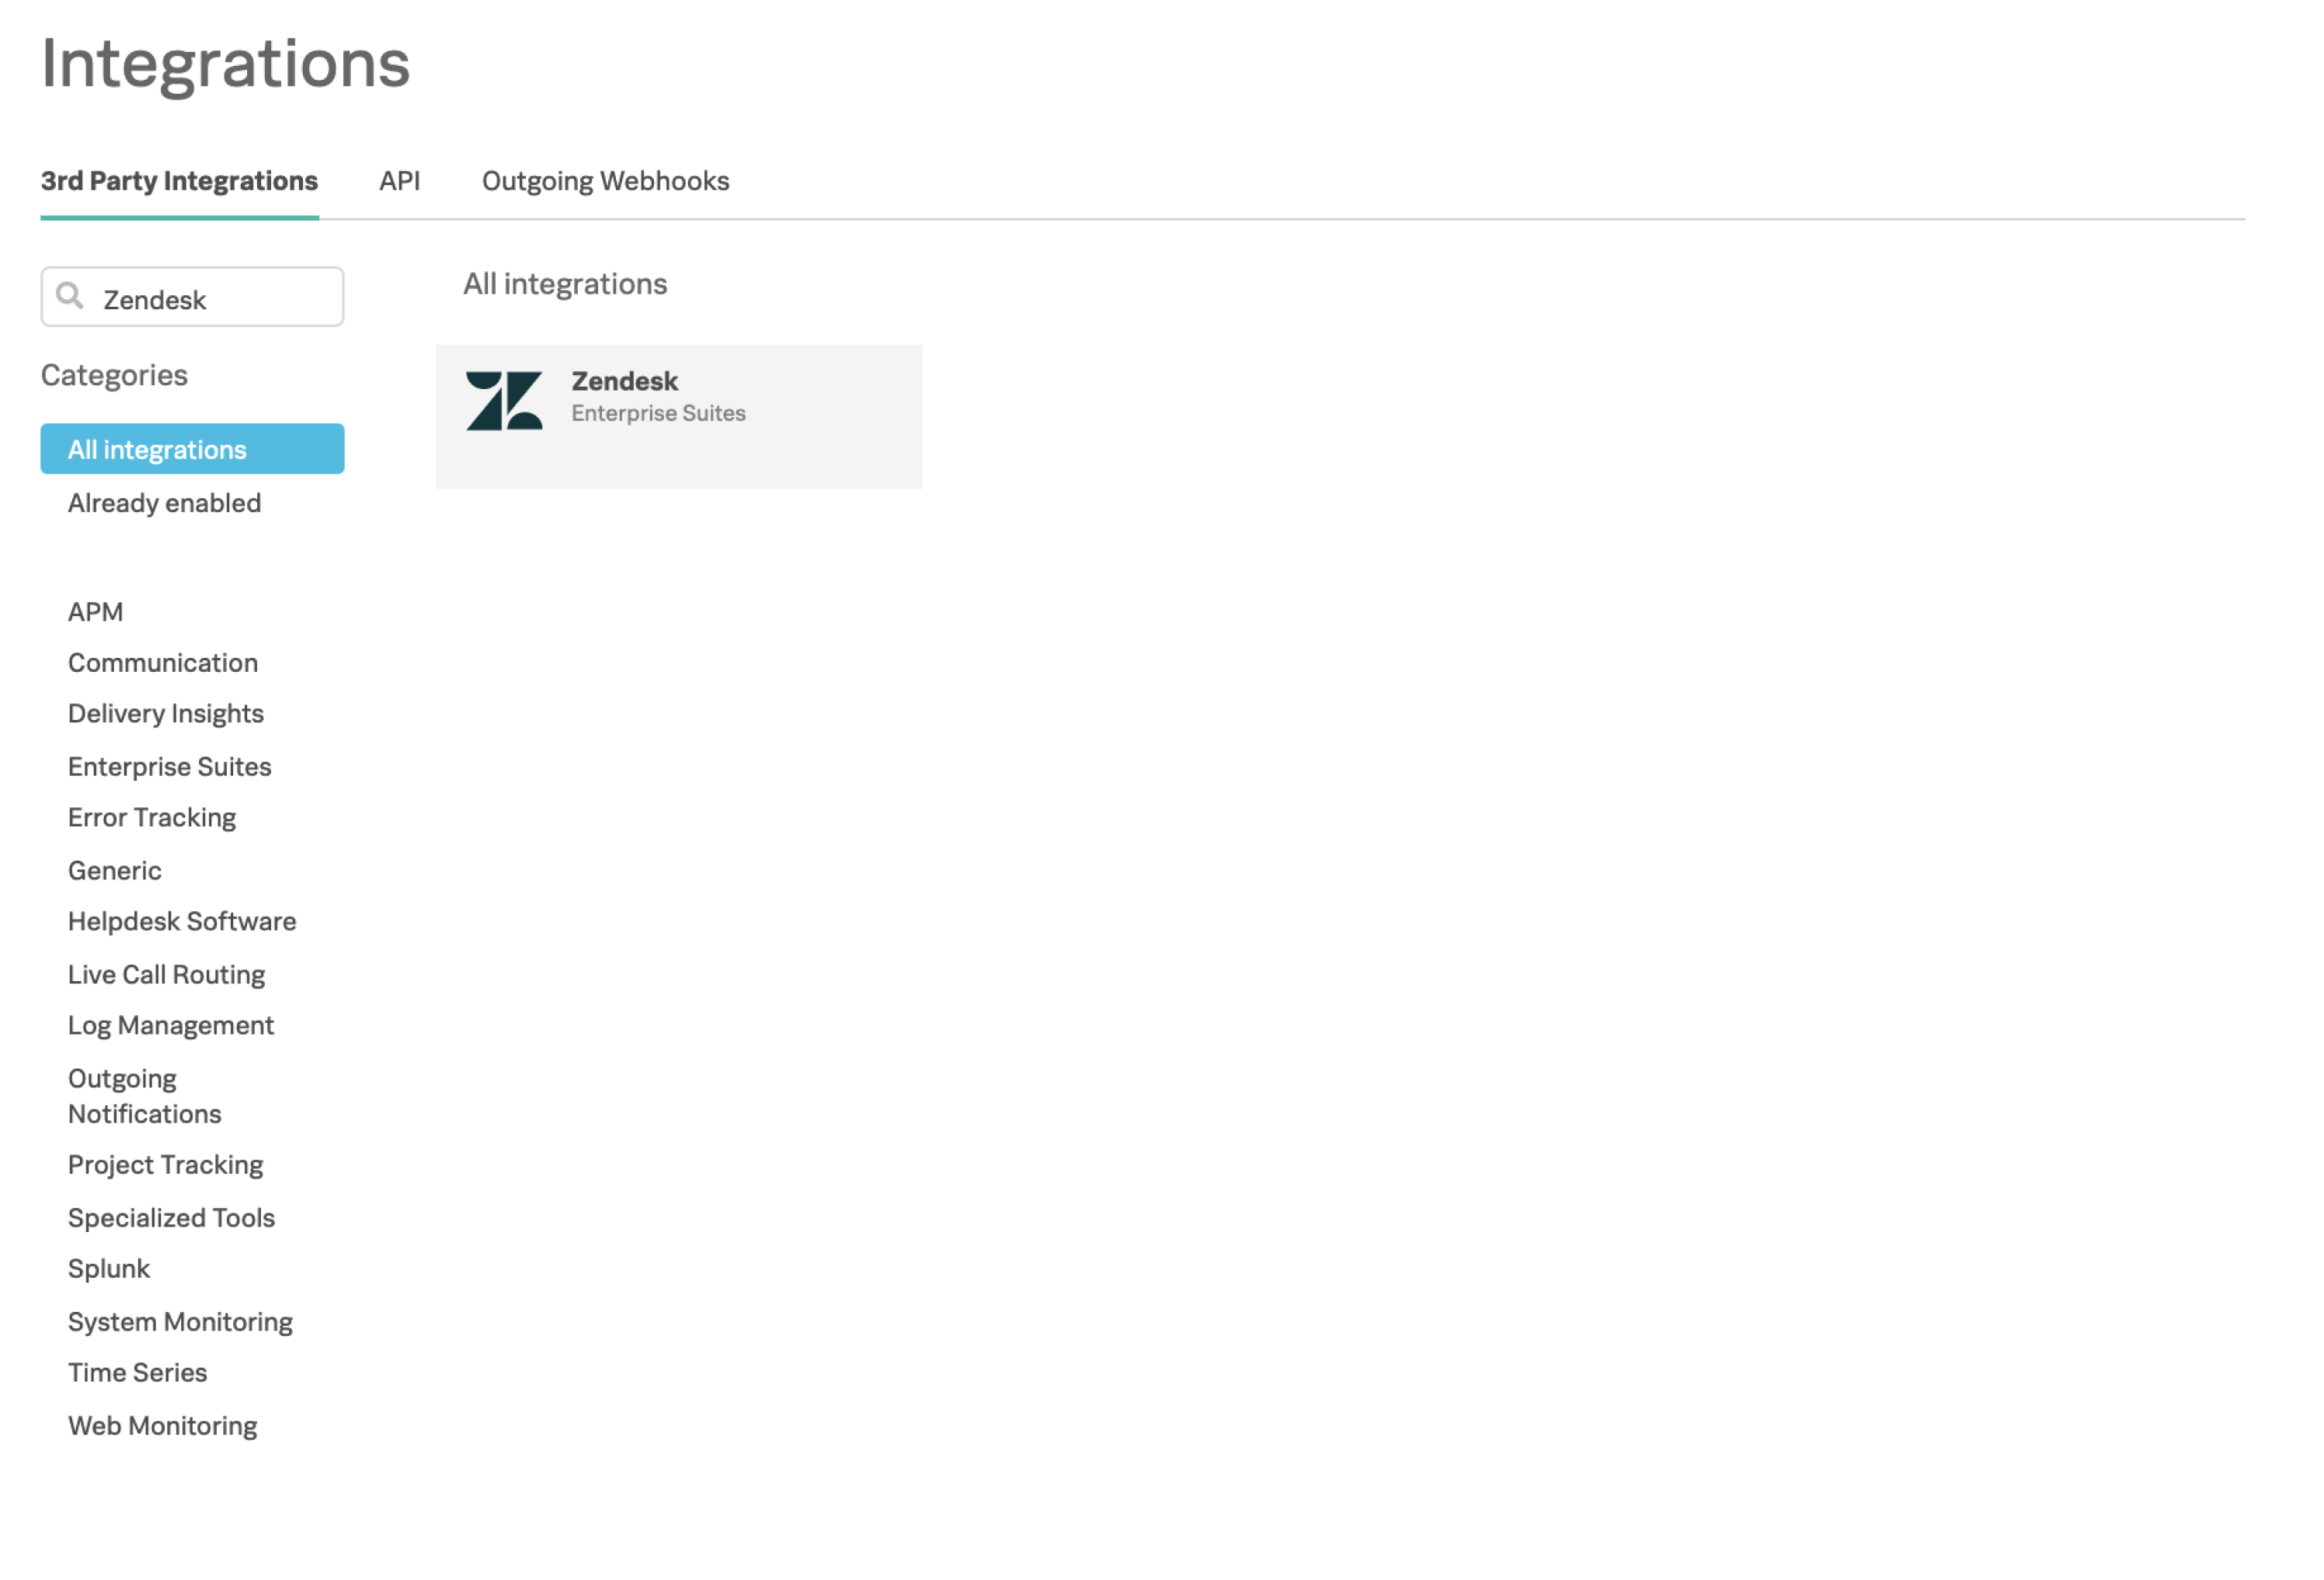
From the main timeline select Integrations then search for Zendesk on the 3rd Party Integrations tab.
If you haven’t enabled the integration, select Enable Integration to generate your configuration values as seen in the following image:
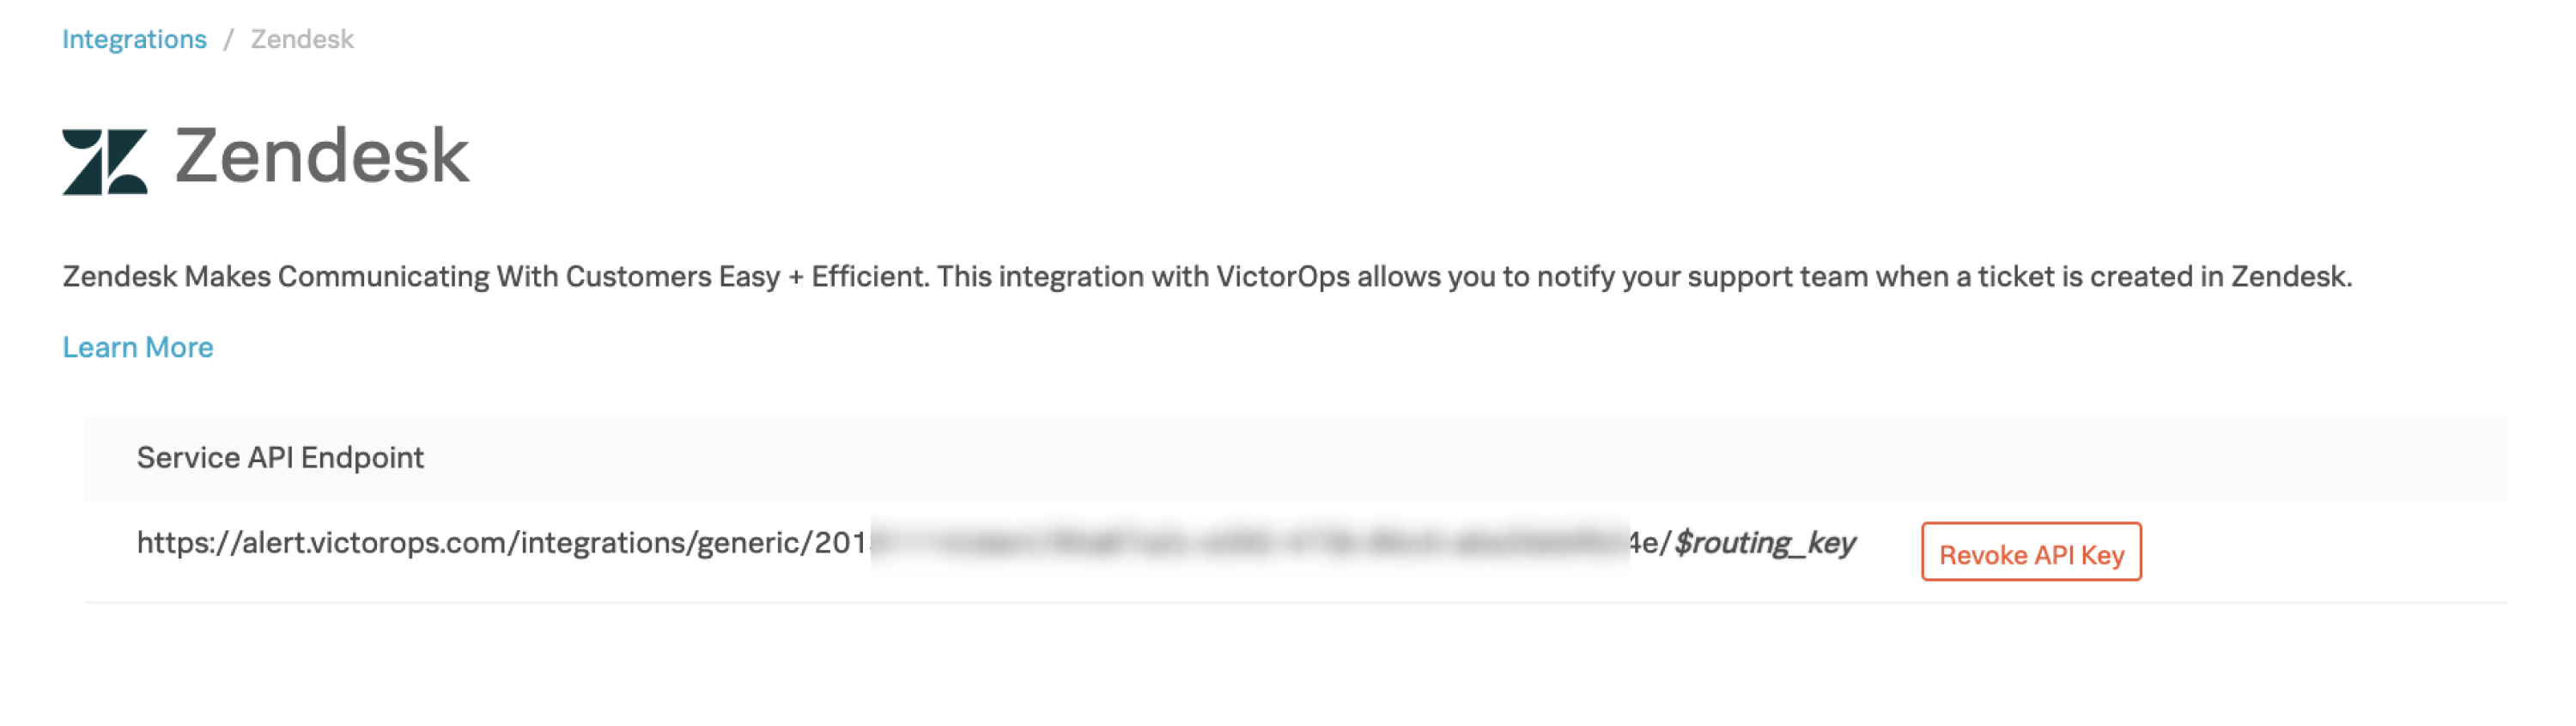
Copy this service API endpoint URL to your clipboard. You need it when configuring Zendesk.
Customize the endpoint URL to use your routing key 🔗
Customize the service API endpoint URL to use the routing key for the Zendesk integration. To do so, replace $routing_key with your routing key. For example, assuming a routing_key value of “database”: .....36437/$routing_key` becomes ``.....36437/database
You can set up routing keys in Splunk On-Call under Settings then Routing Keys. For more information on routing keys and best practices, see Create Routing Keys in Splunk On-Call
Create a target in Zendesk 🔗
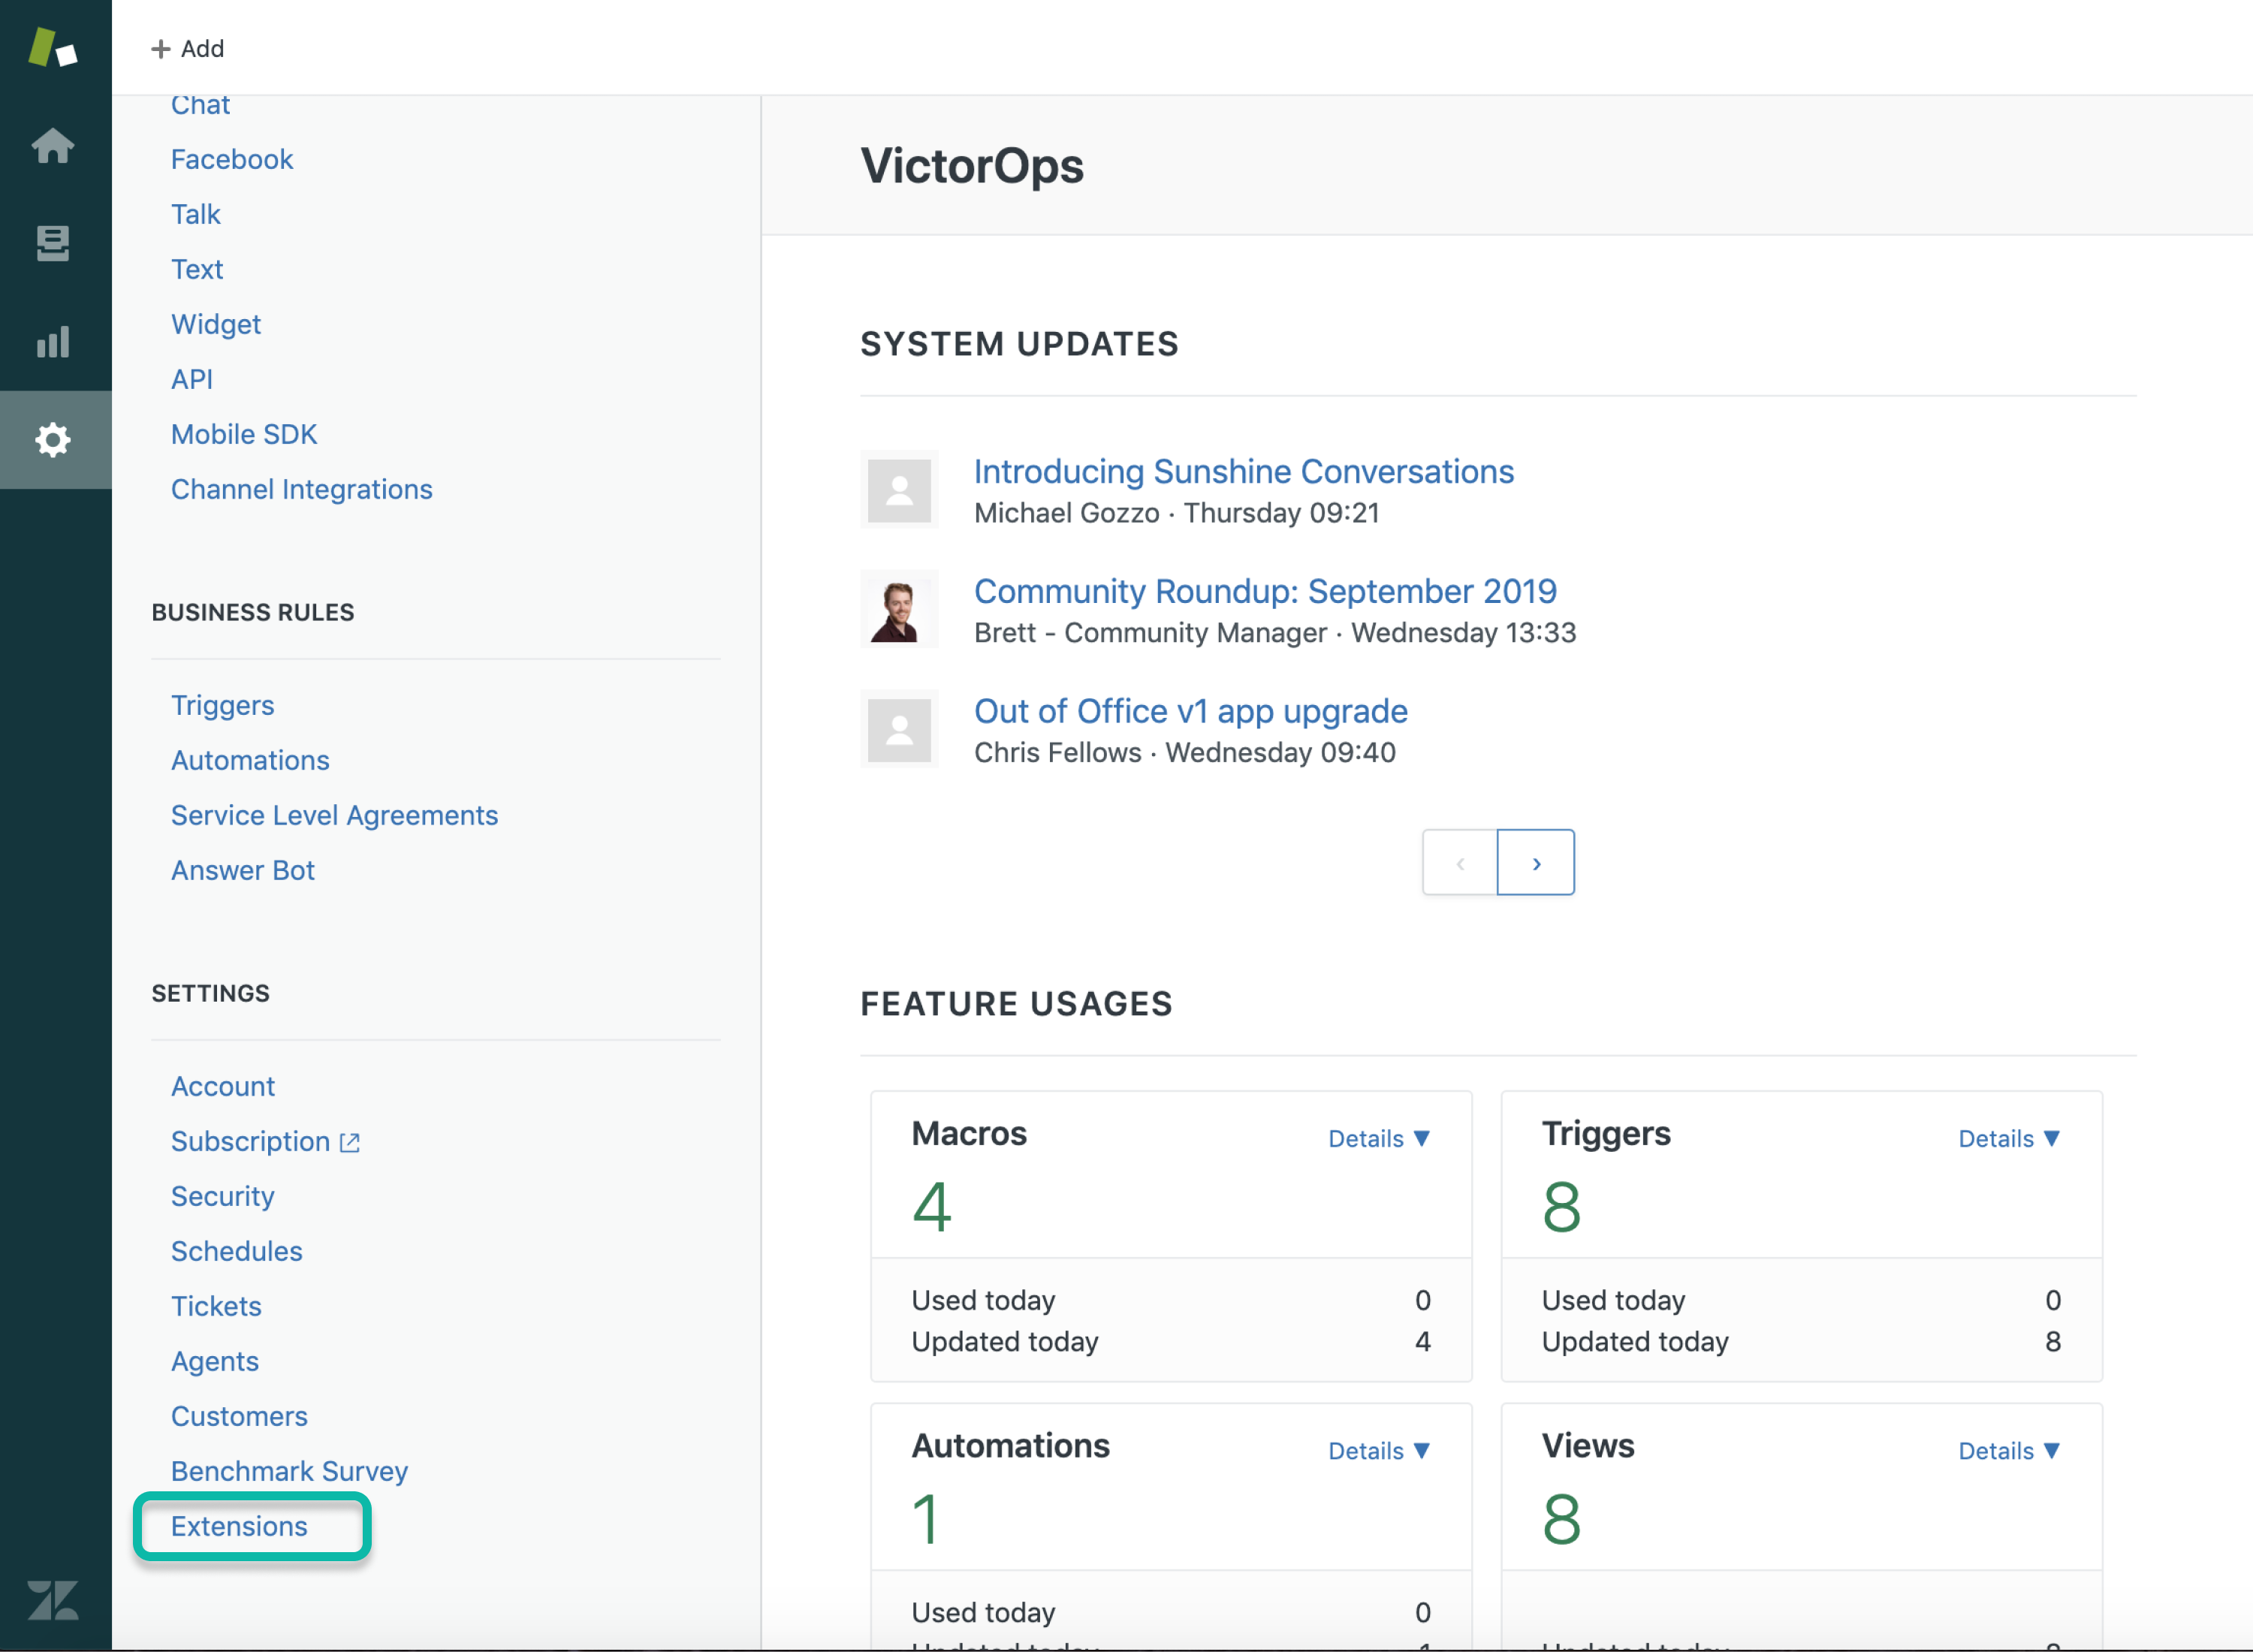
From your Zendesk portal, select Settings on the side-menu.
Under the Settings section, select Extensions.
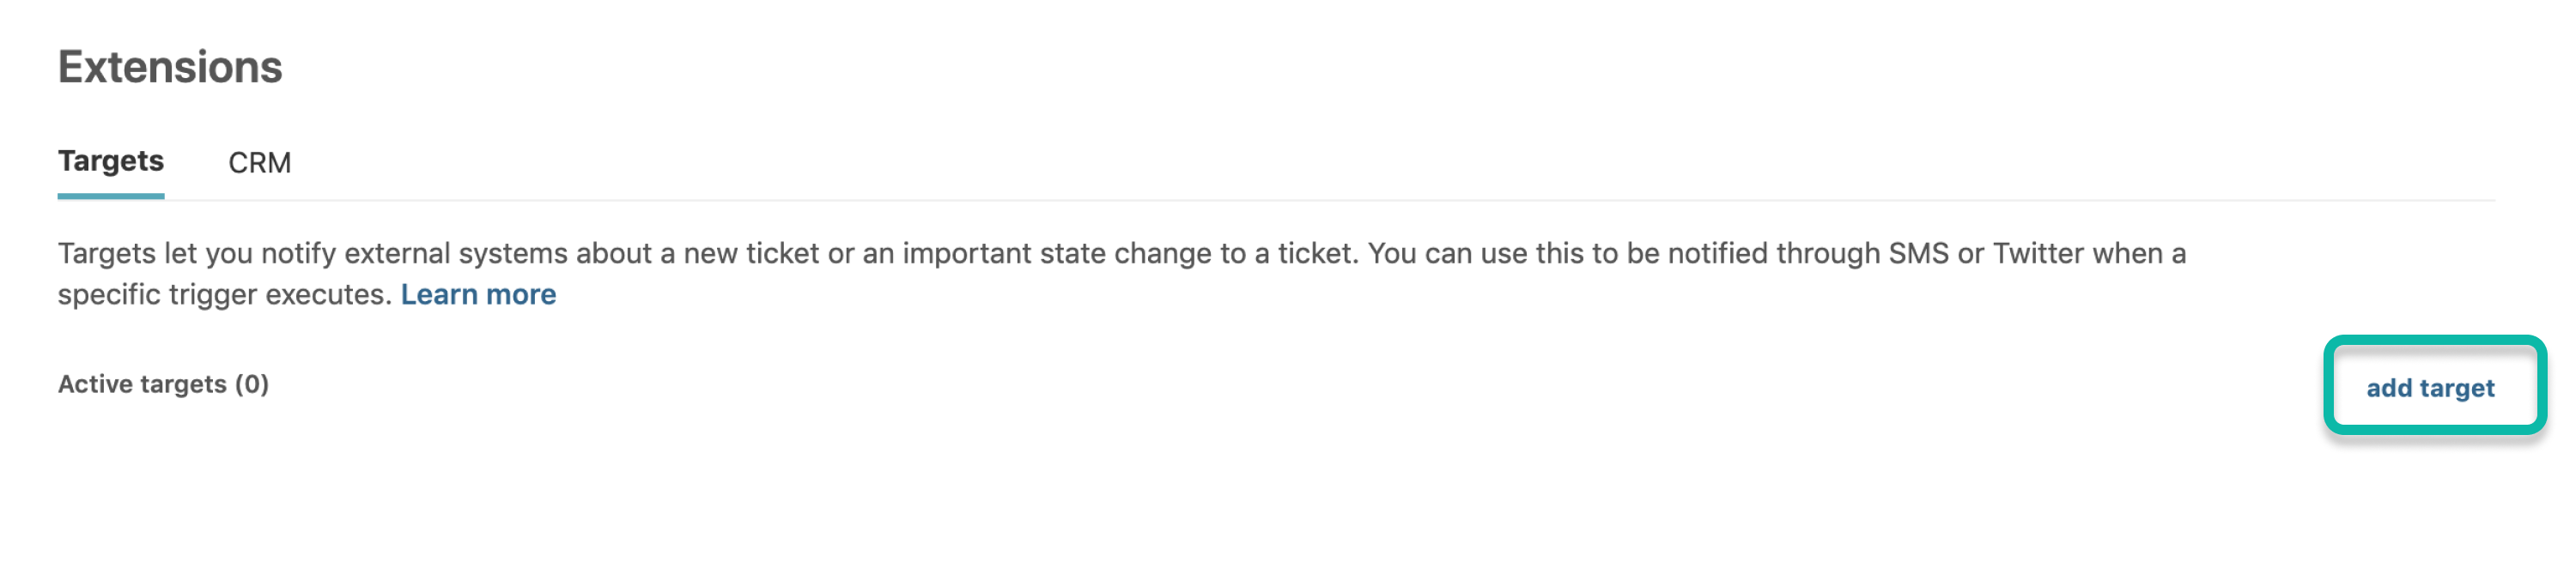
In the resulting menu, select add a target.
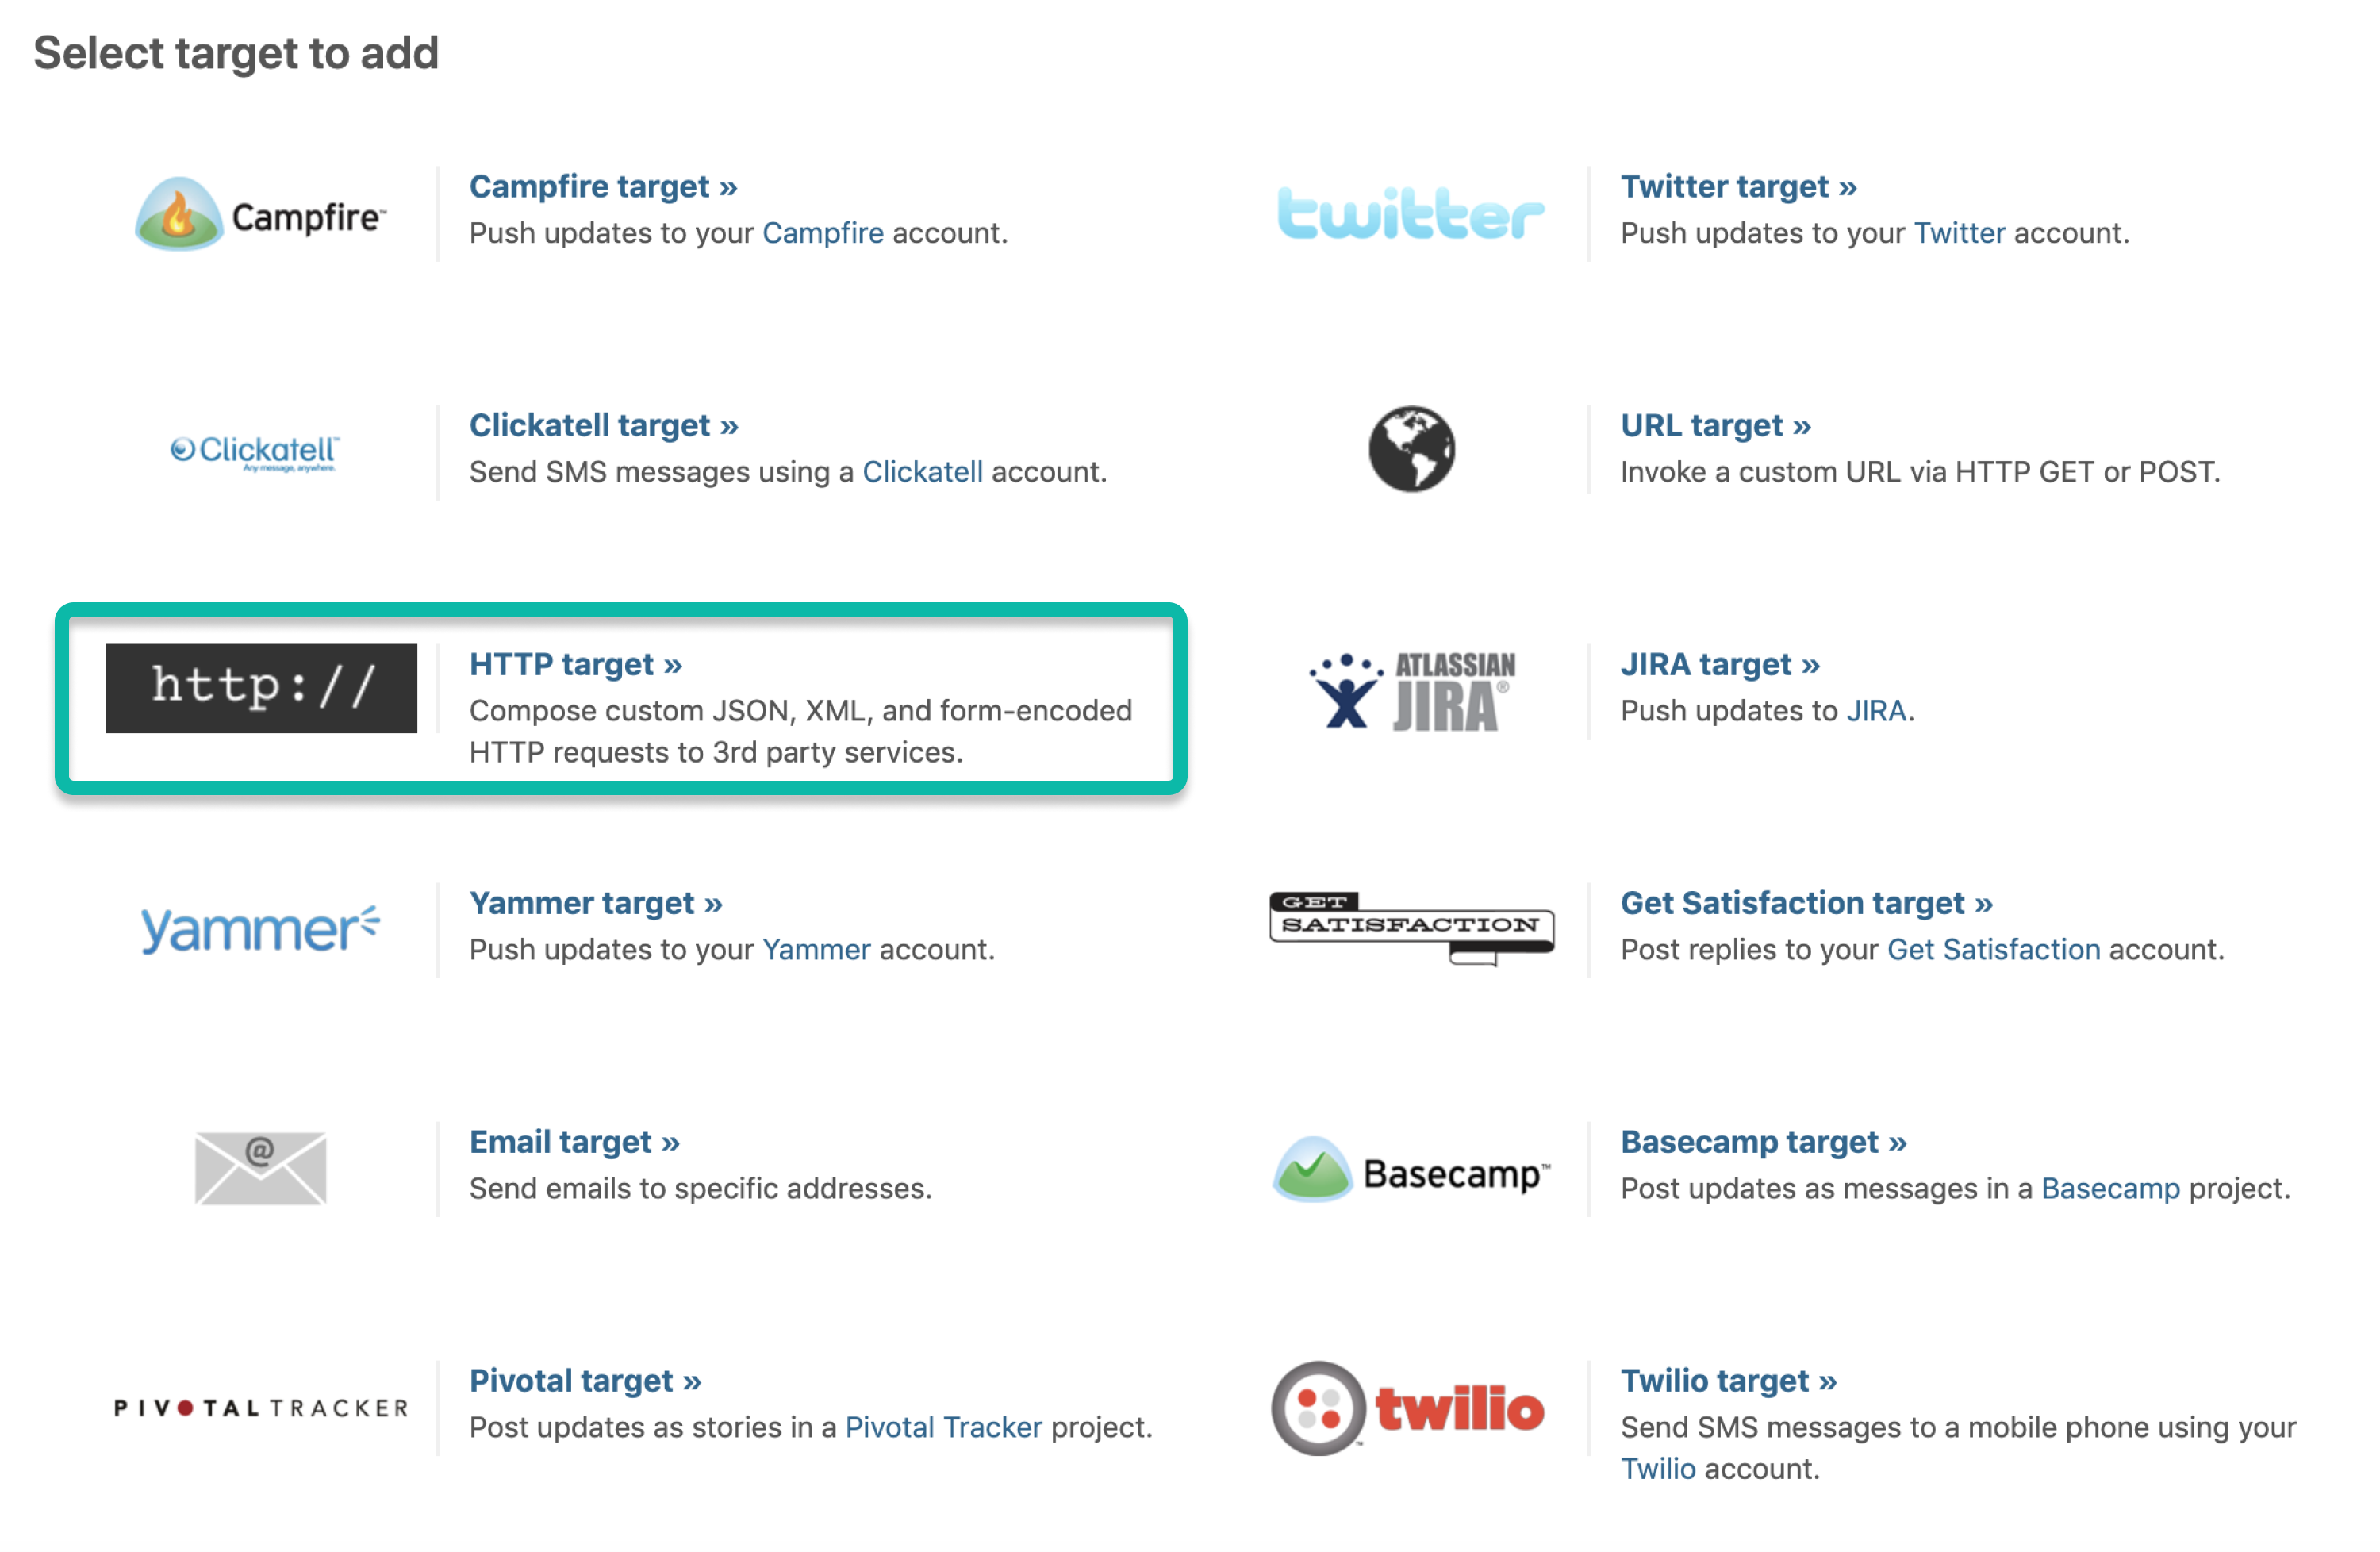
Select the HTTP Target option.
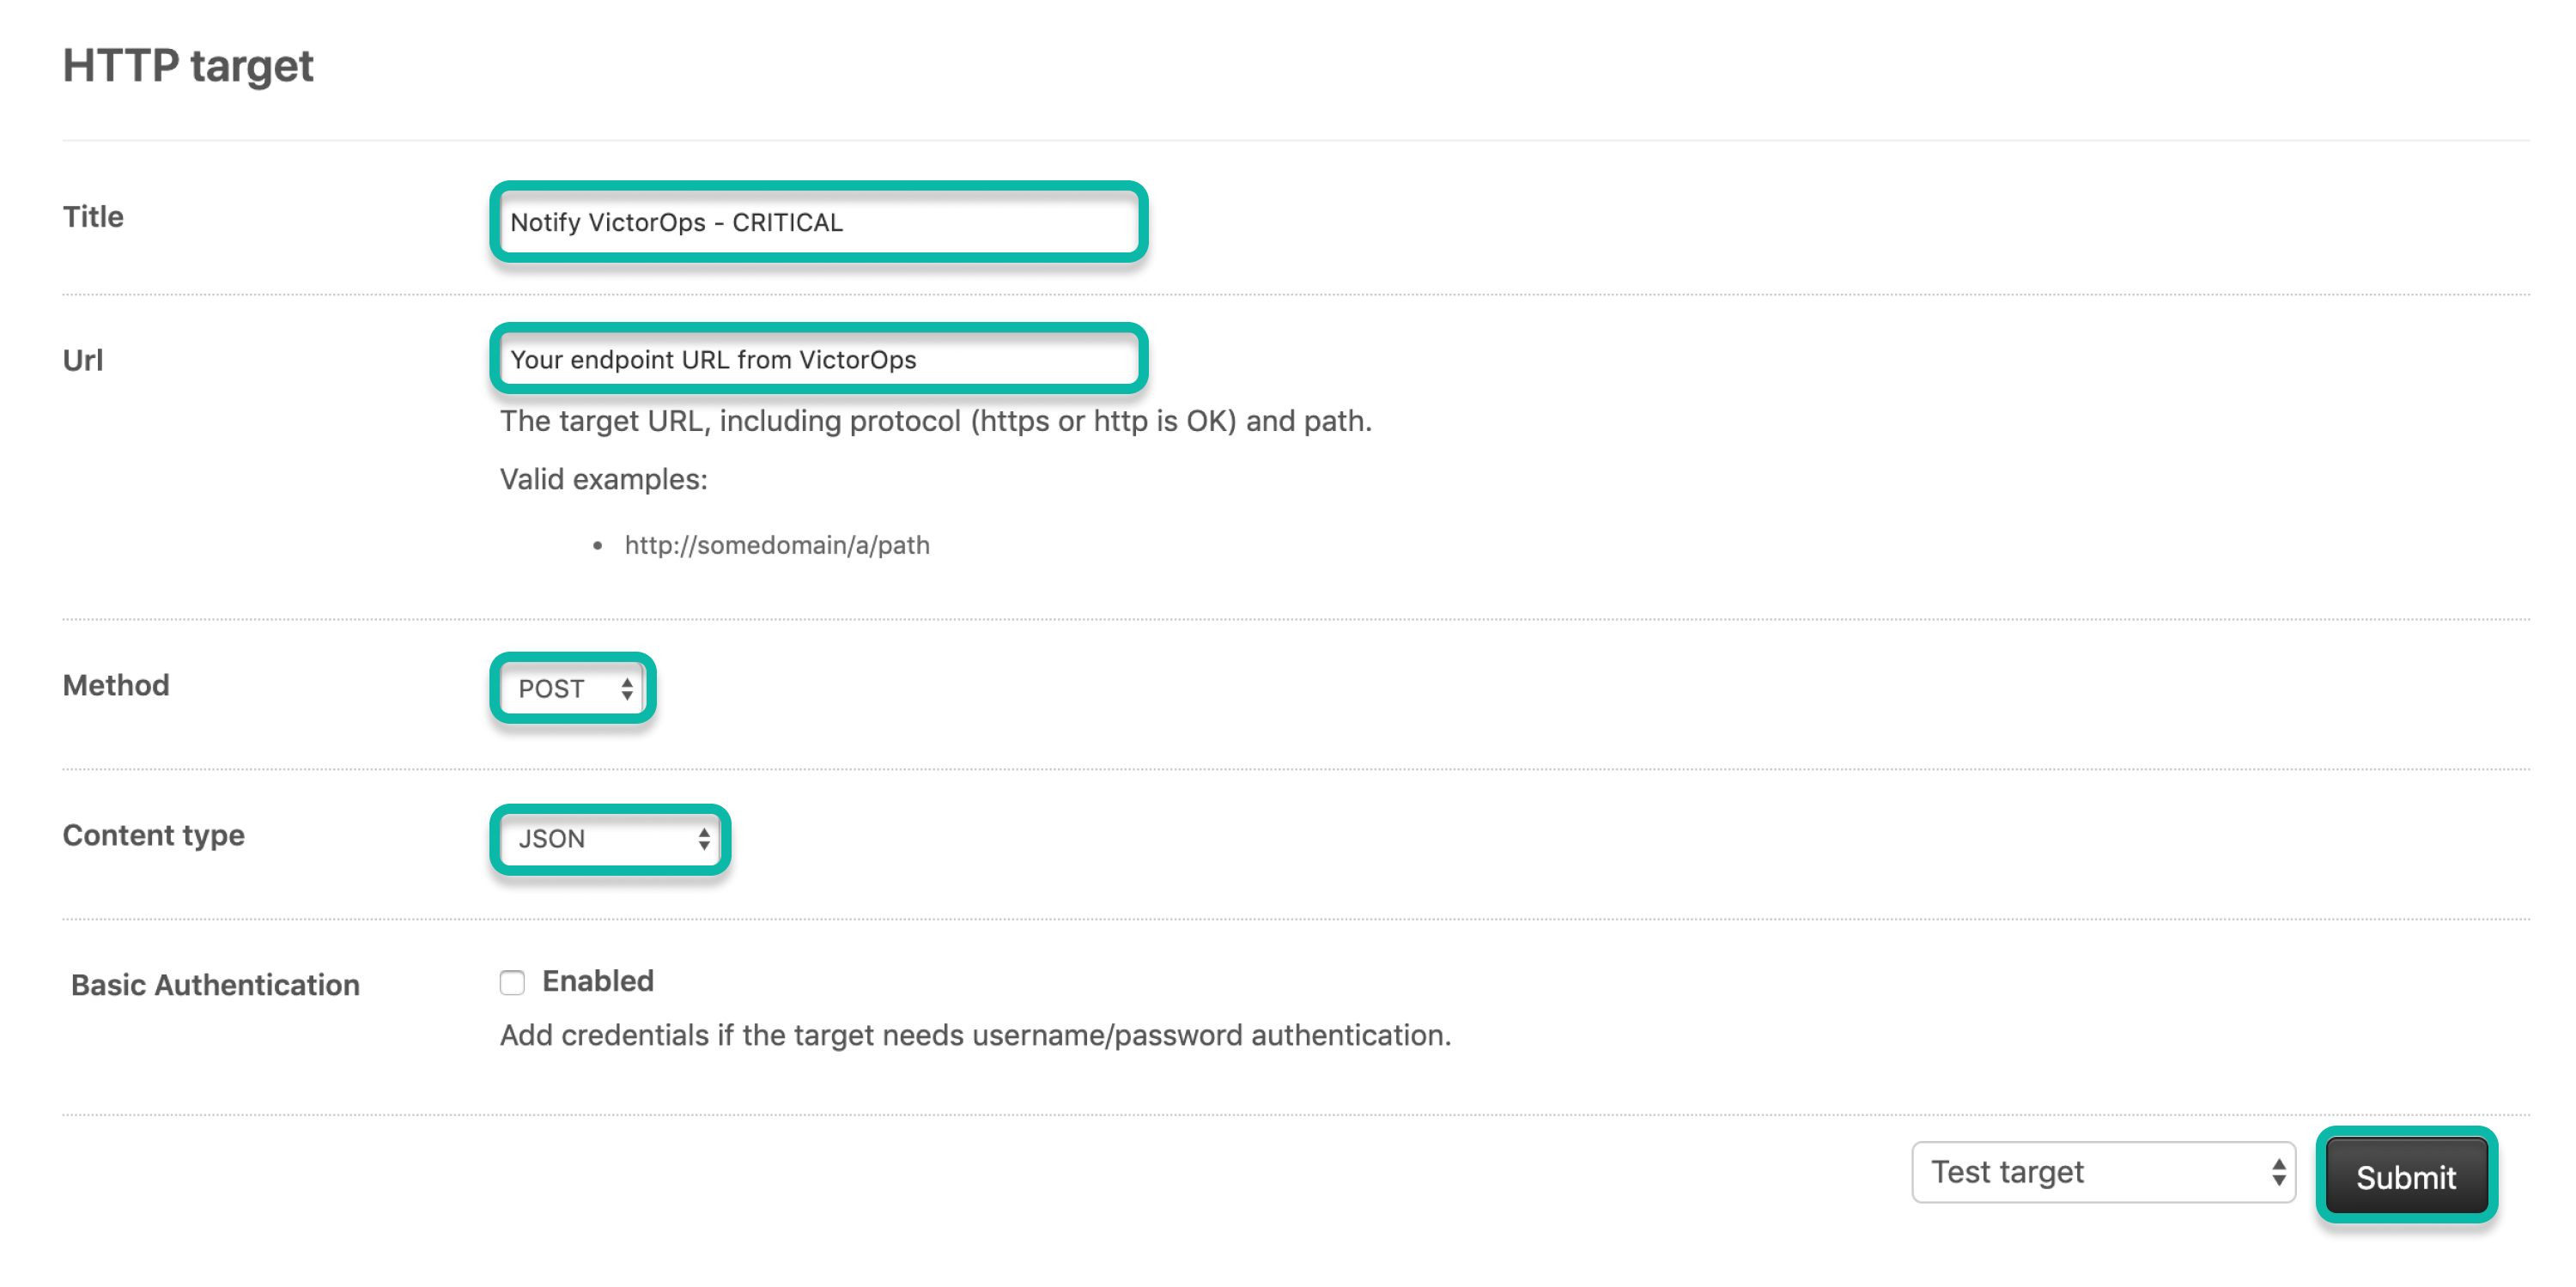
Give the HTTP target with a name.
Paste the endpoint URL you copied from Splunk On-Call with the valid routing key.
In Method select POST.
In Content type select JSON.
Leave Basic Authentication unselected.
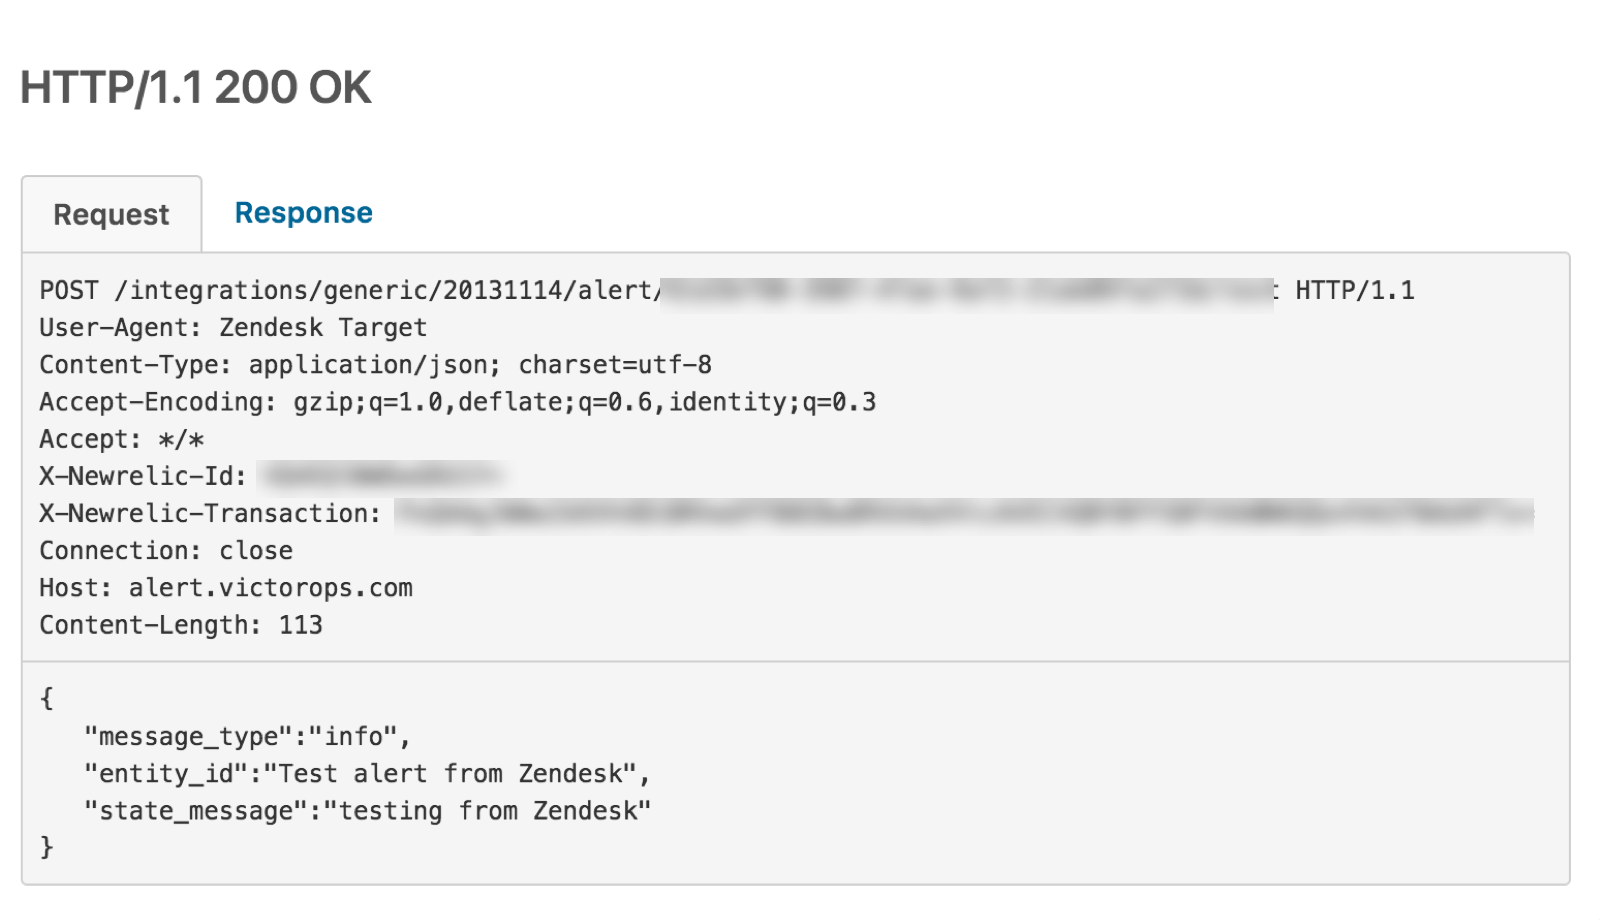
Select the Test target option.
Select Submit.
Copy and paste in the following JSON body.
Select Submit.
{
   "message_type":"info",
   "entity_id":"Test alert from Zendesk",
   "state_message":"testing from Zendesk"
}
If you configured the integration correctly, you see a 200 success response similar to this.
15. Check your Splunk On-Call timeline for a new event. This is an INFO message which, doesn’t create a new incident in Splunk On-Call. It is intended only to confirm that Zendesk can successfully send events to Splunk On-Call.

Exit the success message.
Change the option to Create target and select Submit.

Configure alerts from Zendesk to Splunk On-Call 🔗
In the Zendesk side-menu, locate the section for Business Rules and select Triggers.

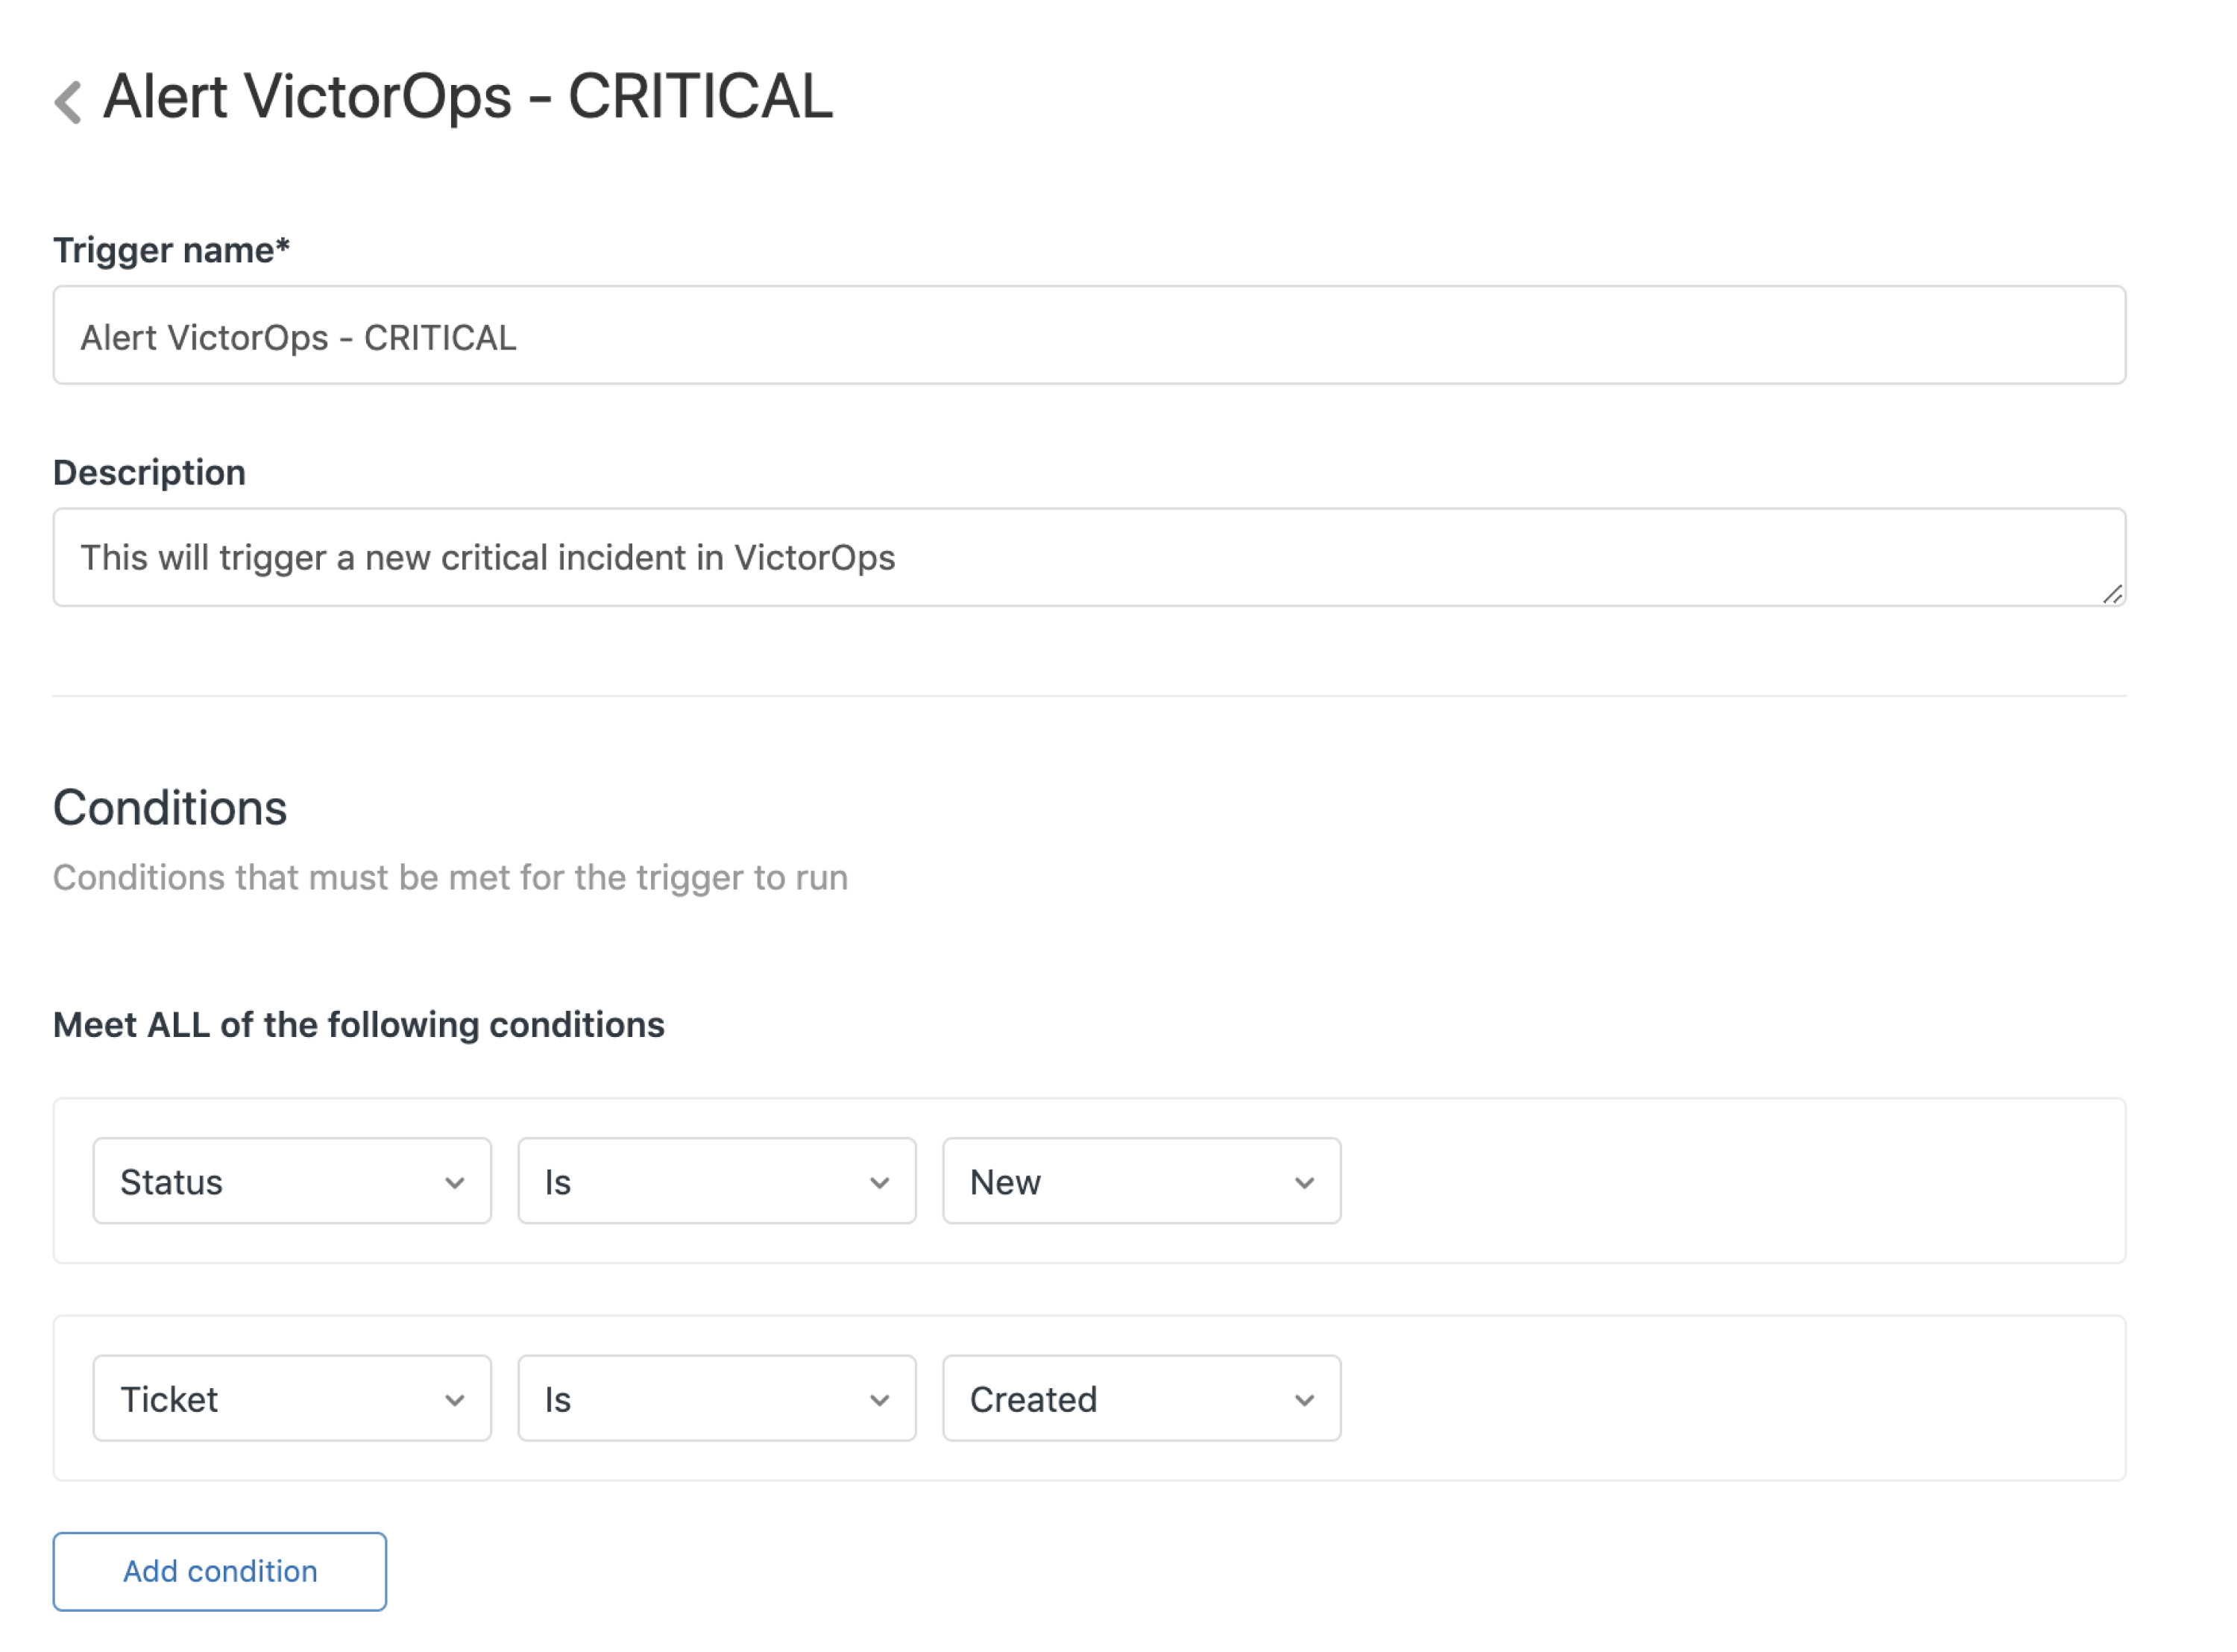
From the Triggers menu, select Add trigger.

Enter a name and description. Select Add condition and add the following 2 conditions. These 2 conditions create a Splunk On-Call incident for every new case in Zendesk. You can alter these to further filter which conditions alert Splunk On-Call to fit your specific workflow.
Conditions:
Status is New
Ticket is Created
Under the Actions section, select Add Action. In the first dropdown menu, scroll to the Notifications sections and select Notify target. In the second dropdown menu, select the Splunk On-Call target you created earlier.
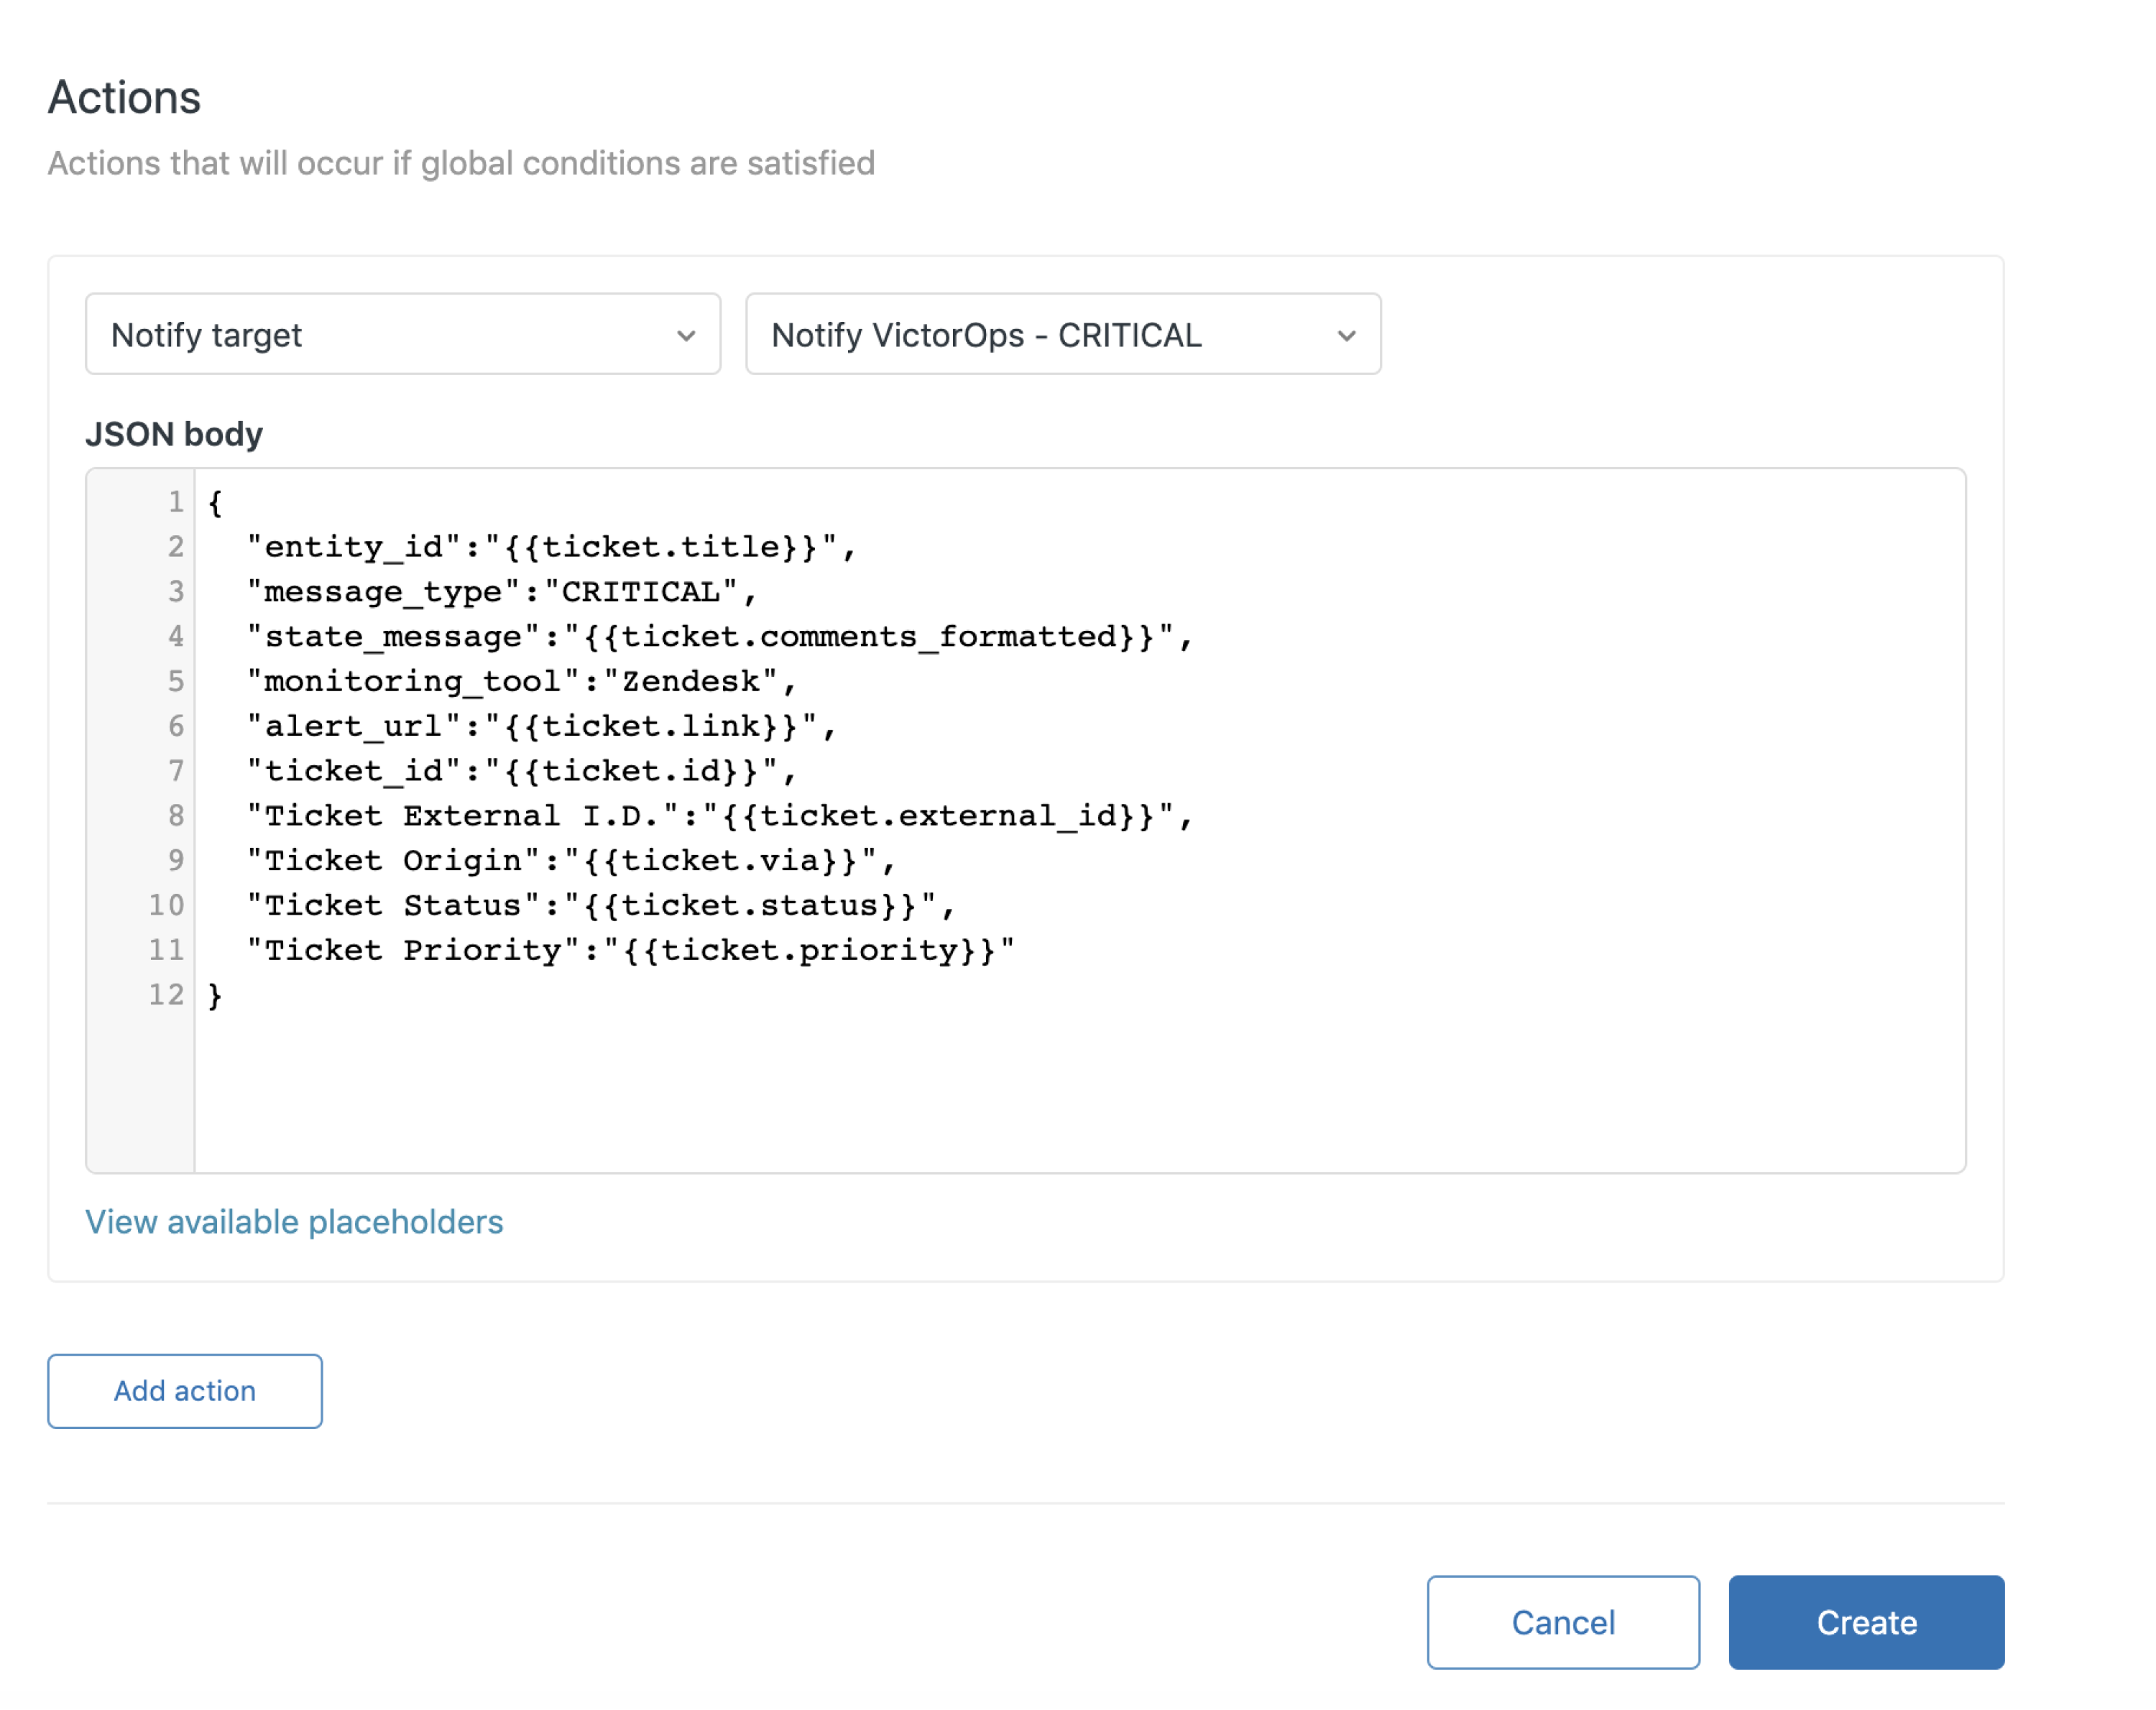
Copy the following JSON payload and paste it into the JSON body field, then select Create.
Critical alert 🔗
This trigger opens a new incident in Splunk On-Call.
{
   "entity_id":"{{ticket.id}}",
   "message_type":"CRITICAL",
   "state_message":"{{ticket.comments_formatted}}",
   "monitoring_tool":"Zendesk",
   "alert_url":"{{ticket.link}}",
   "ticket_id":"{{ticket.id}}",
   "Ticket External I.D.":"{{ticket.external_id}}",
   "Ticket Origin":"{{ticket.via}}",
   "Ticket Status":"{{ticket.status}}",
   "Ticket Priority":"{{ticket.priority}}"
}
You need to replicate this process to create 2 more triggers that send alerts to Splunk On-Call for acknowledgement and recovery events when cases are assigned or closed in Zendesk. Reuse the same target created earlier for each new trigger. You can change the trigger conditions to fit your specific needs.
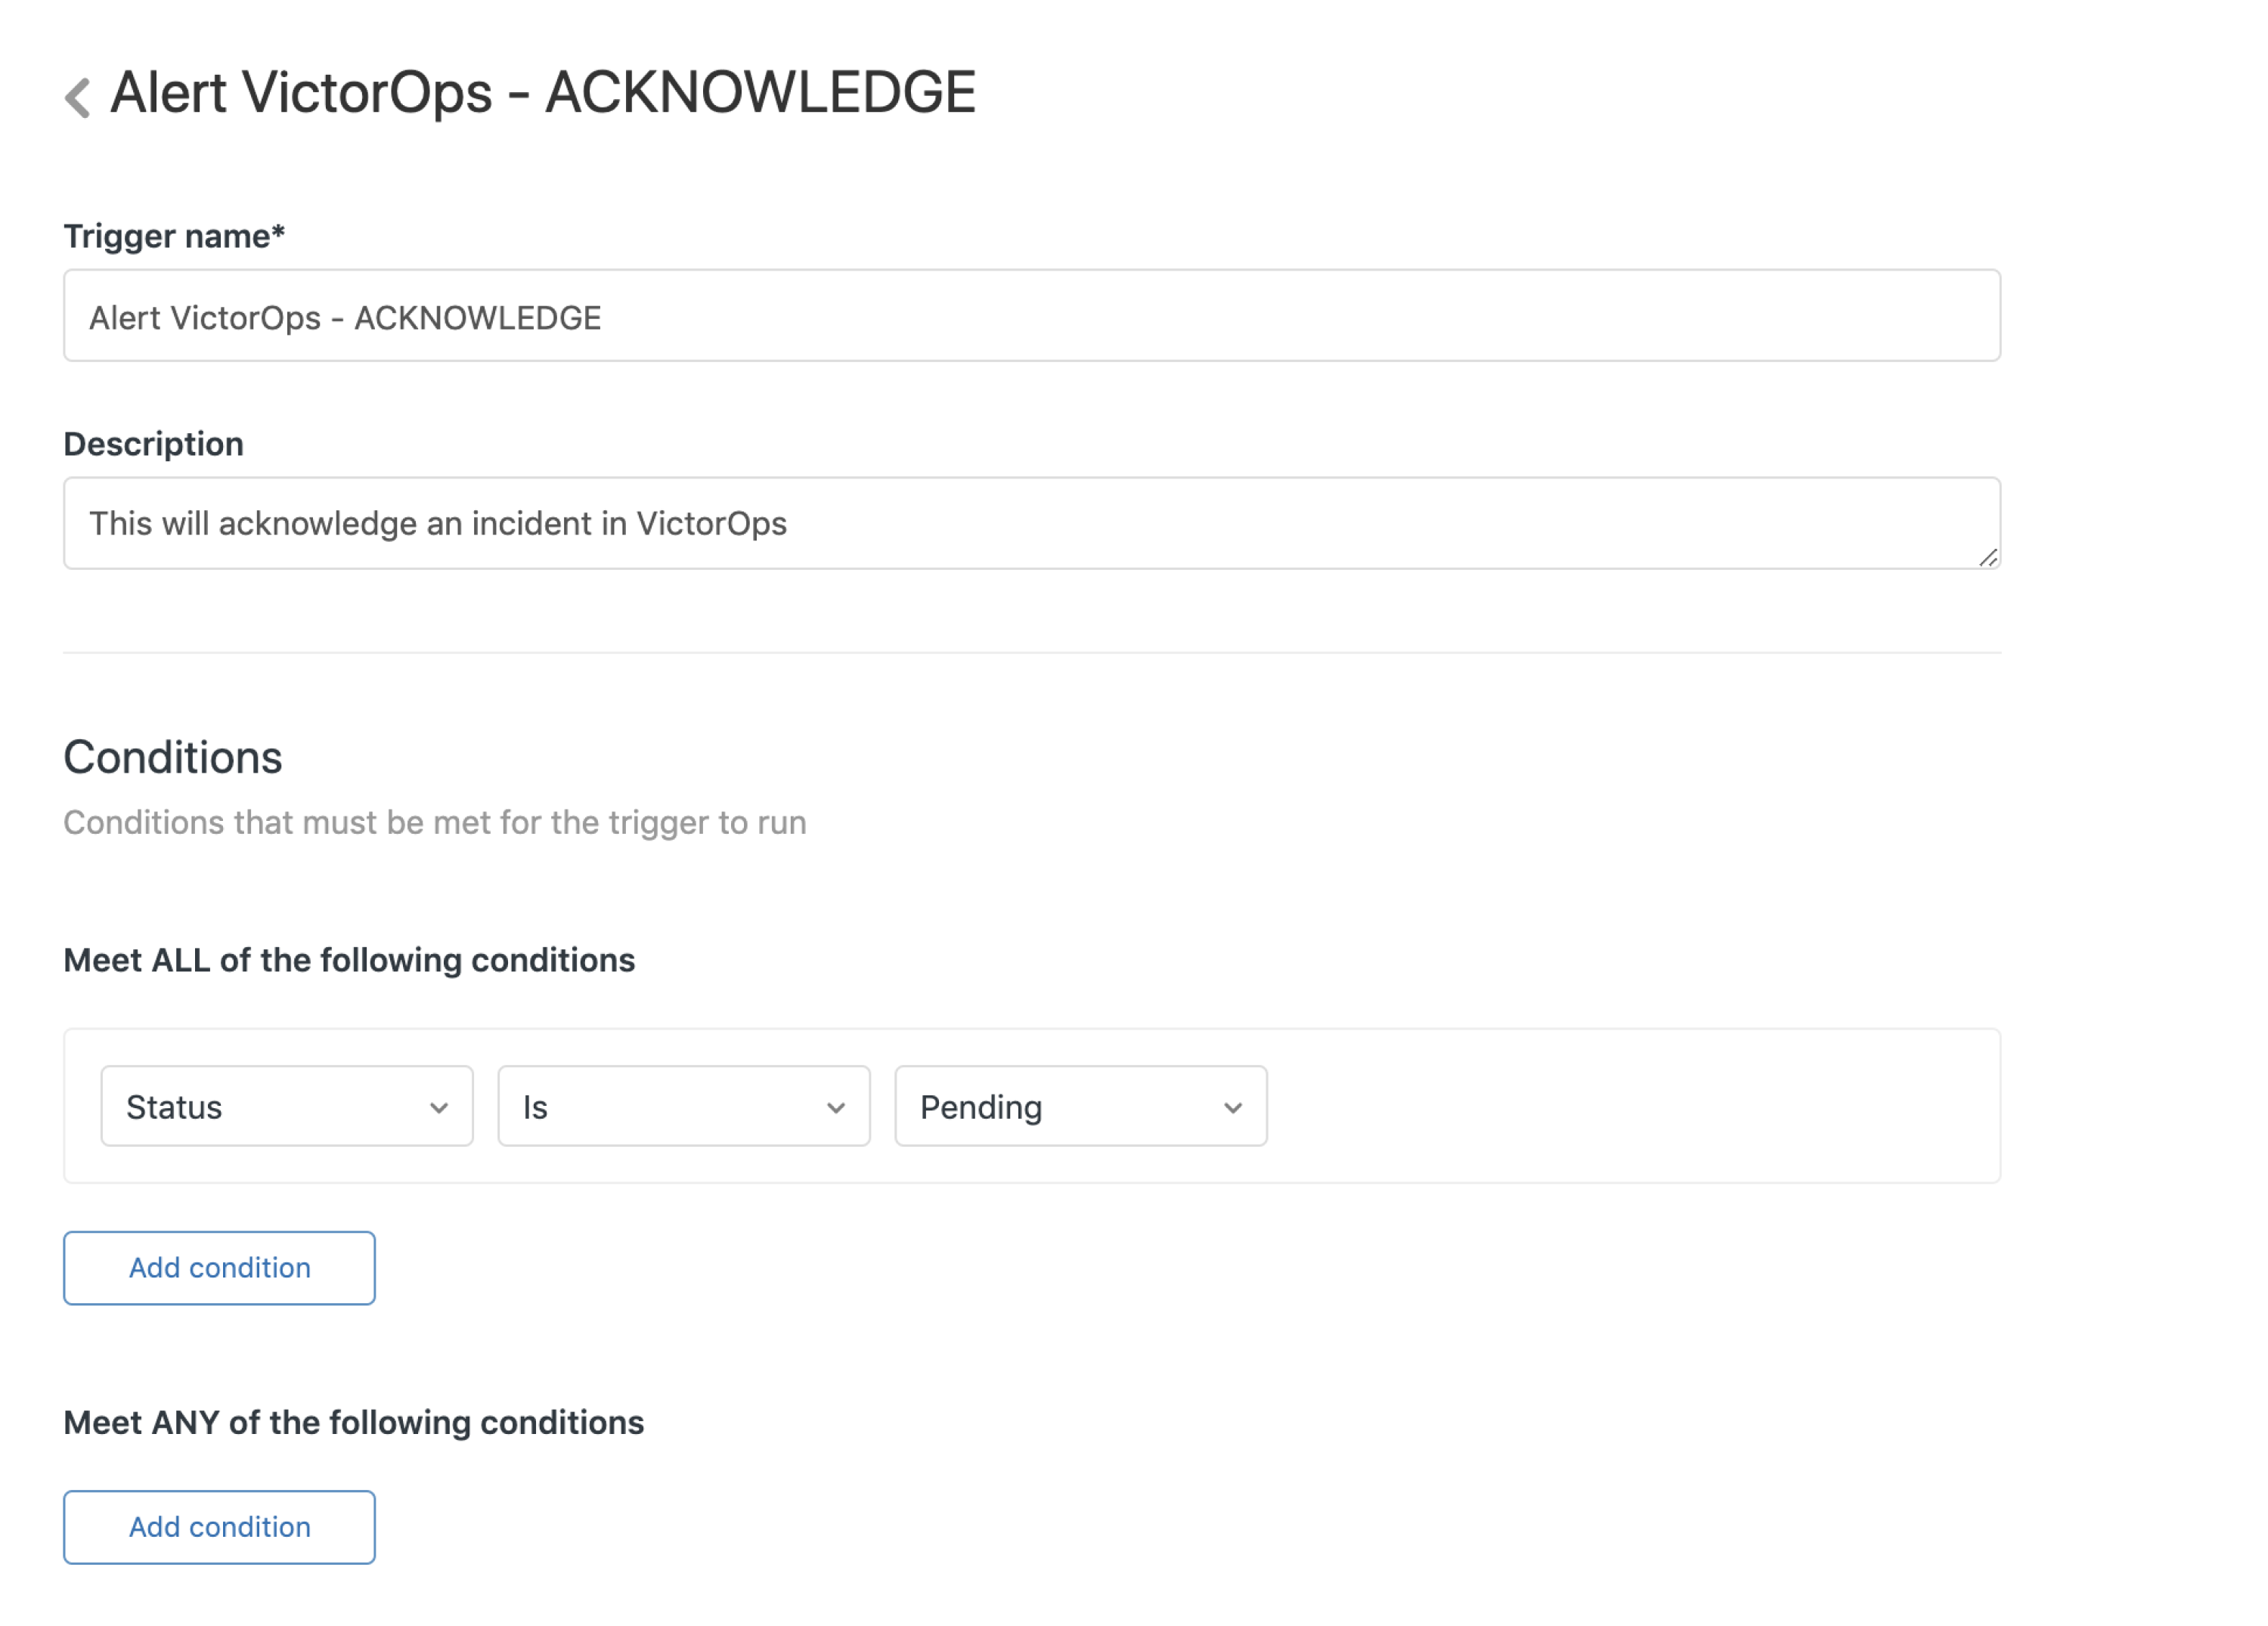
Acknowledgement alert 🔗
This trigger sends acknowledgement alerts to Splunk On-Call, to acknowledge the incident and stop paging and escalation.
Condition: Status is Pending
JSON payload:
{
   "entity_id":"{{ticket.id}}",
   "message_type":"ACKNOWLEDGEMENT",
   "state_message":"{{ticket.comments_formatted}}",
   "monitoring_tool":"Zendesk",
   "alert_url":"{{ticket.link}}",
   "ticket_id":"{{ticket.id}}",
   "Ticket External I.D.":"{{ticket.external_id}}",
   "Ticket Origin":"{{ticket.via}}",
   "Ticket Status":"{{ticket.status}}",
   "Ticket Priority":"{{ticket.priority}}"
}
Resolved alert 🔗
This trigger sends recovery notifications to Splunk On-Call to close out the incident.
Condition: Status is Closed
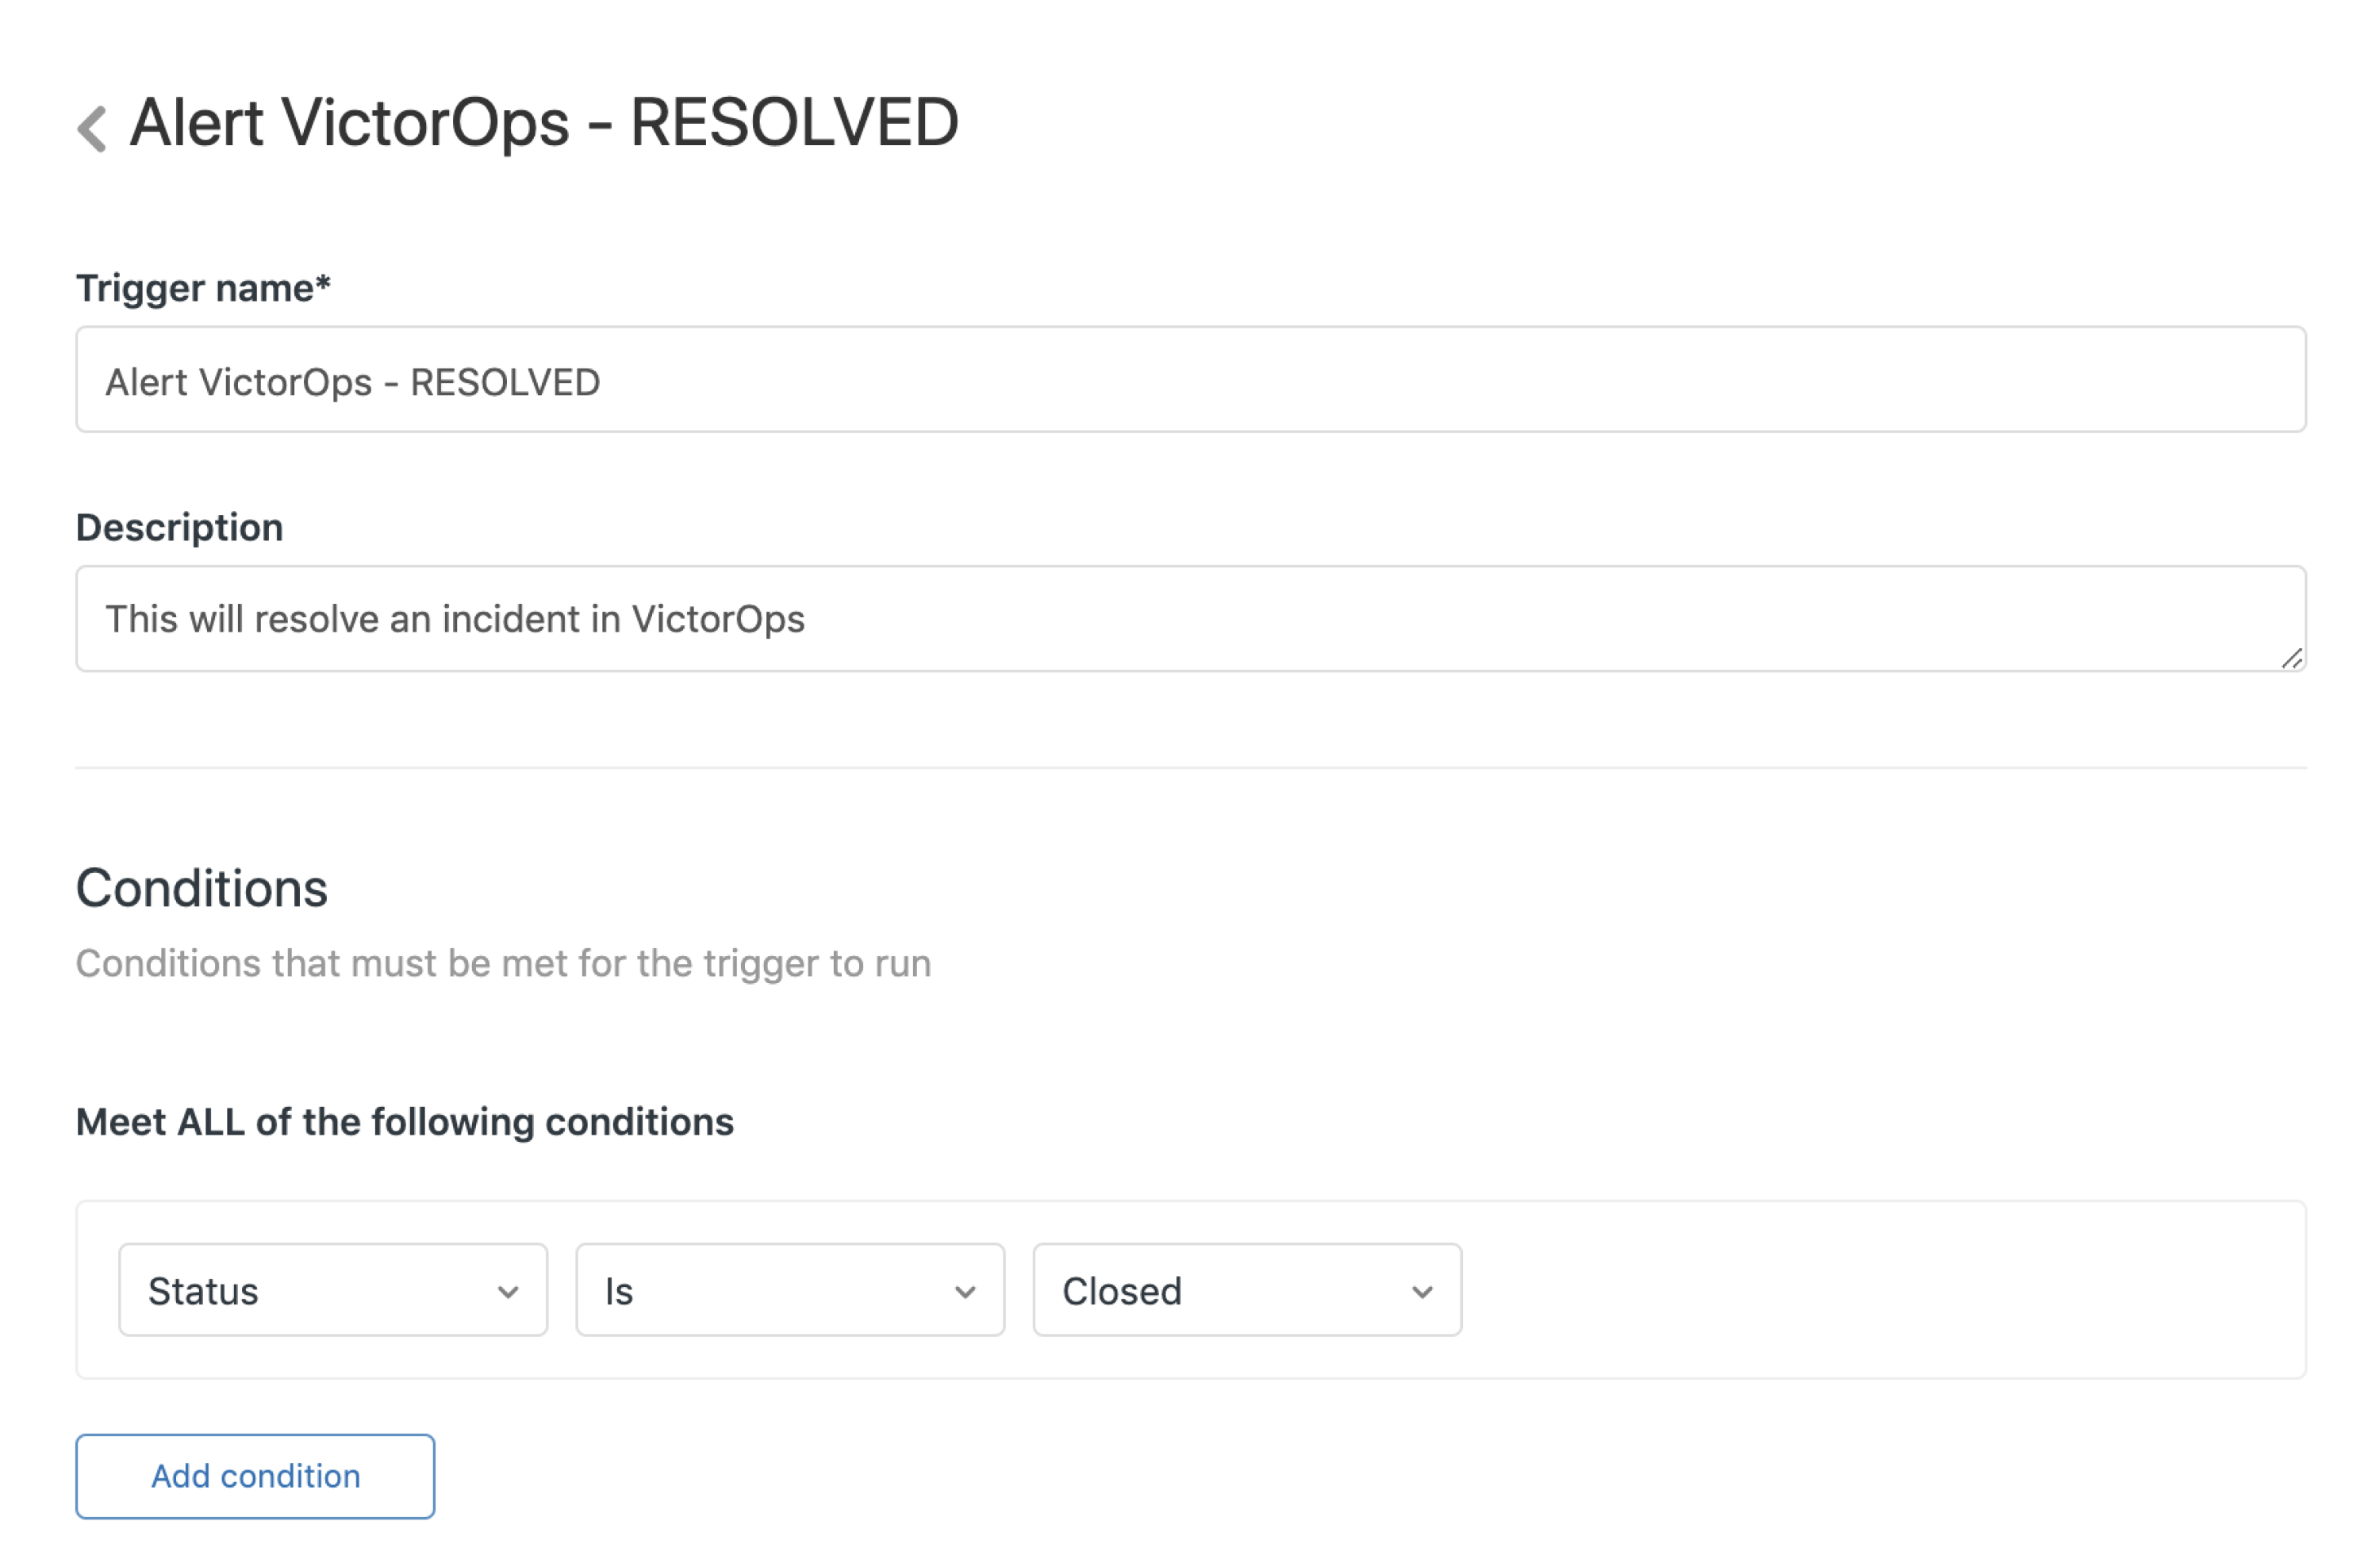
JSON payload:
{
   "entity_id":"{{ticket.id}}",
   "message_type":"RECOVERY",
   "state_message":"{{ticket.comments_formatted}}",
   "monitoring_tool":"Zendesk",
   "alert_url":"{{ticket.link}}",
   "ticket_id":"{{ticket.id}}",
   "Ticket External I.D.":"{{ticket.external_id}}",
   "Ticket Origin":"{{ticket.via}}",
   "Ticket Status":"{{ticket.status}}",
   "Ticket Priority":"{{ticket.priority}}"
}
(Optional) Use an outgoing webhook to acknowledge back 🔗
Using Splunk On-Call Custom Outgoing Webhooks, you can have the acknowledgement of a Zendesk incident in Splunk On-Call automatically transition the related Zendesk case to a status you specify.
Create the destination URL 🔗
First, you need to build the appropriate destination URL for your Zendesk account. Certain parts of the URL must be URL encoded to function properly, so make sure you follow the structure exactly.
The following example assumes the following:
The Zendesk subdomain is buttercupgames.zendesk.com
The email address of a Zendesk user is alex@buttercupgames.com
The API token generated by Zendesk is abc123efg456hij789
The structure of the URL is as follows:
https://<email-address>/token:<yourAPI-token>@<your-subdomain>.zendesk.com/api/v2/tickets/${{ALERT.ticket_id}}.json
Given the example data, the final URL is as follows:
https:/alex%40buttercupgames.com%2Ftoken:abc123efg456hij789@company.zendesk.com/api/v2/tickets/${{ALERT.ticket_id}}.json
Here is a summary of the crucial encoding elements:
The @ symbol in the email address is encoded as
%40.The forward slash before the word token is encoded as
%2F.The @ symbol before the subdomain isn’t encoded.
${{ALERT.ticket_id}}isn’t altered in any way. This syntax is required to dynamically insert the Zendesk ticket ID into the URL when the webhook is triggered.
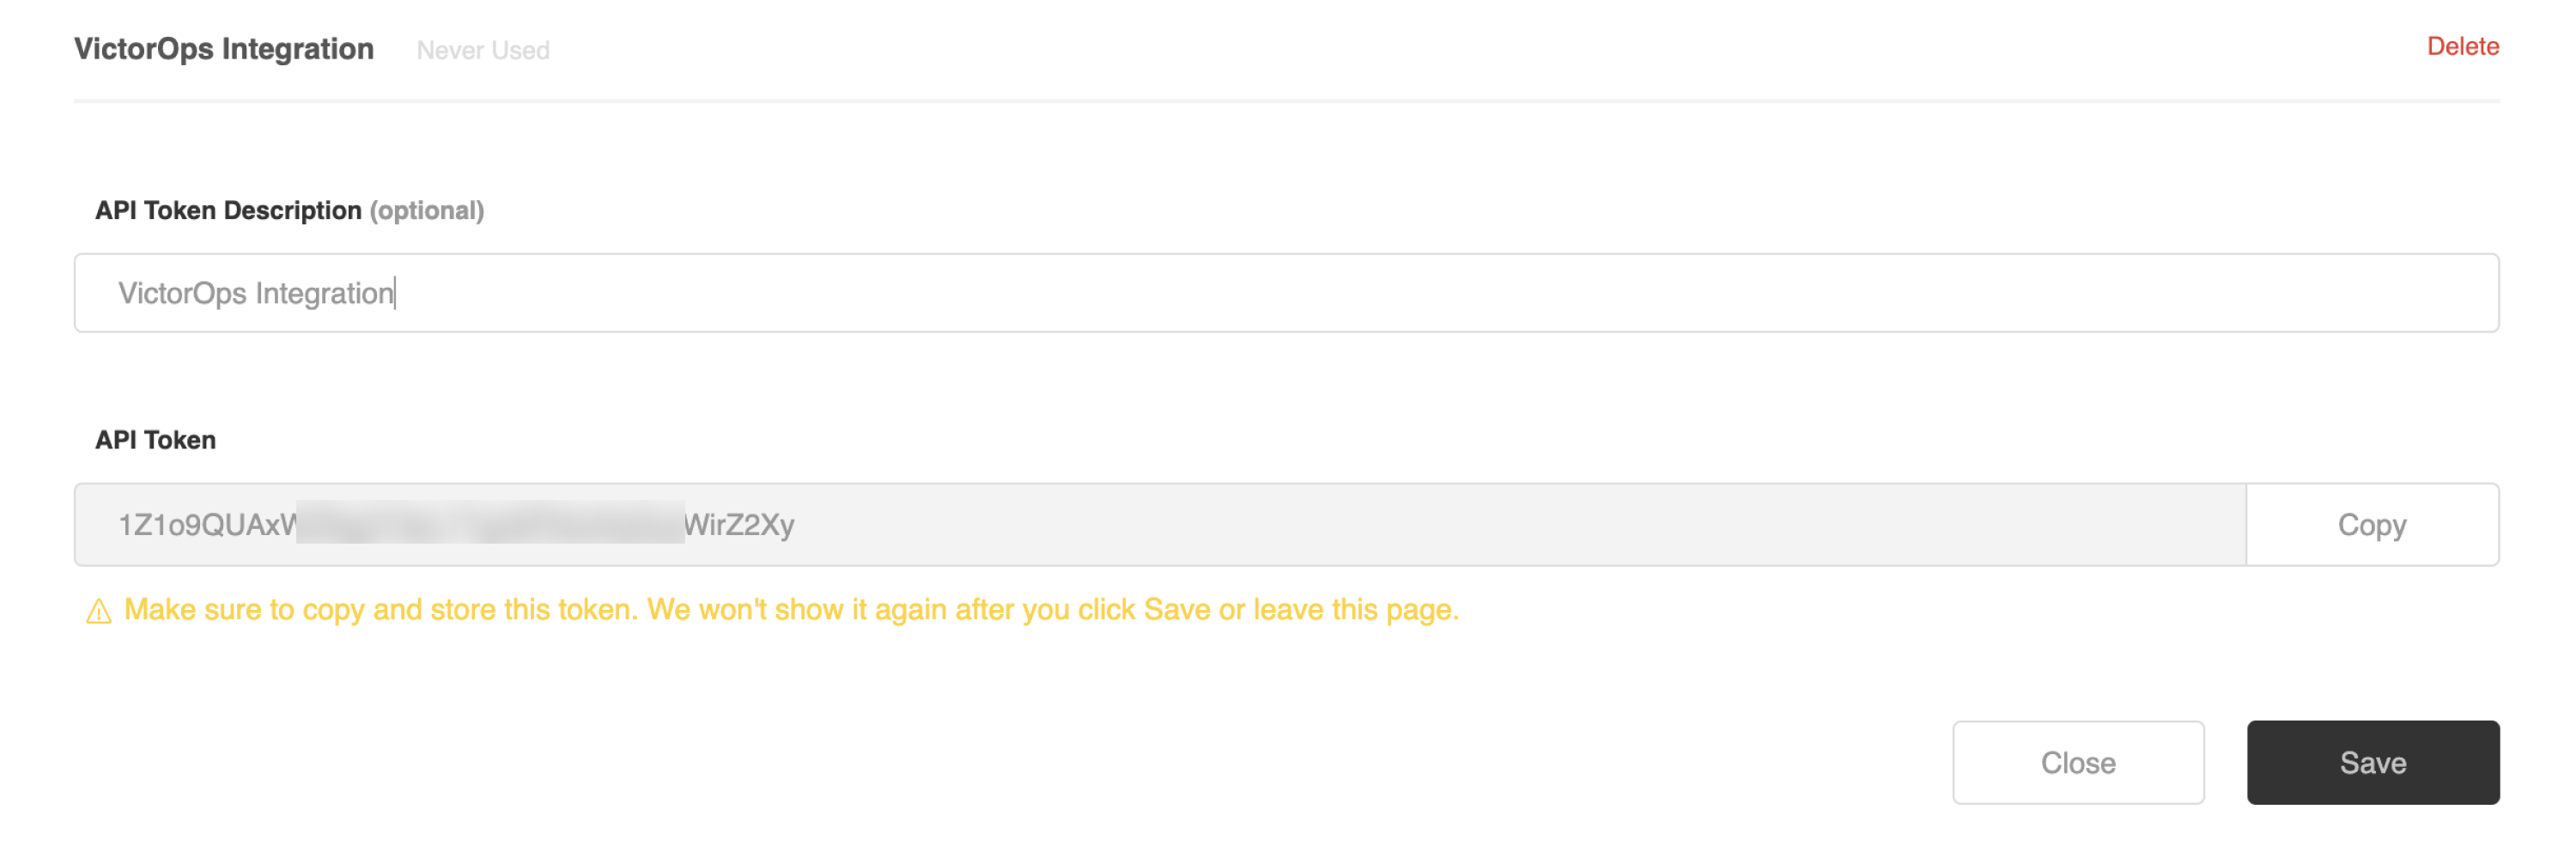
Generate a Zendesk API token 🔗
In the side-menu, locate the Channels section and select API.
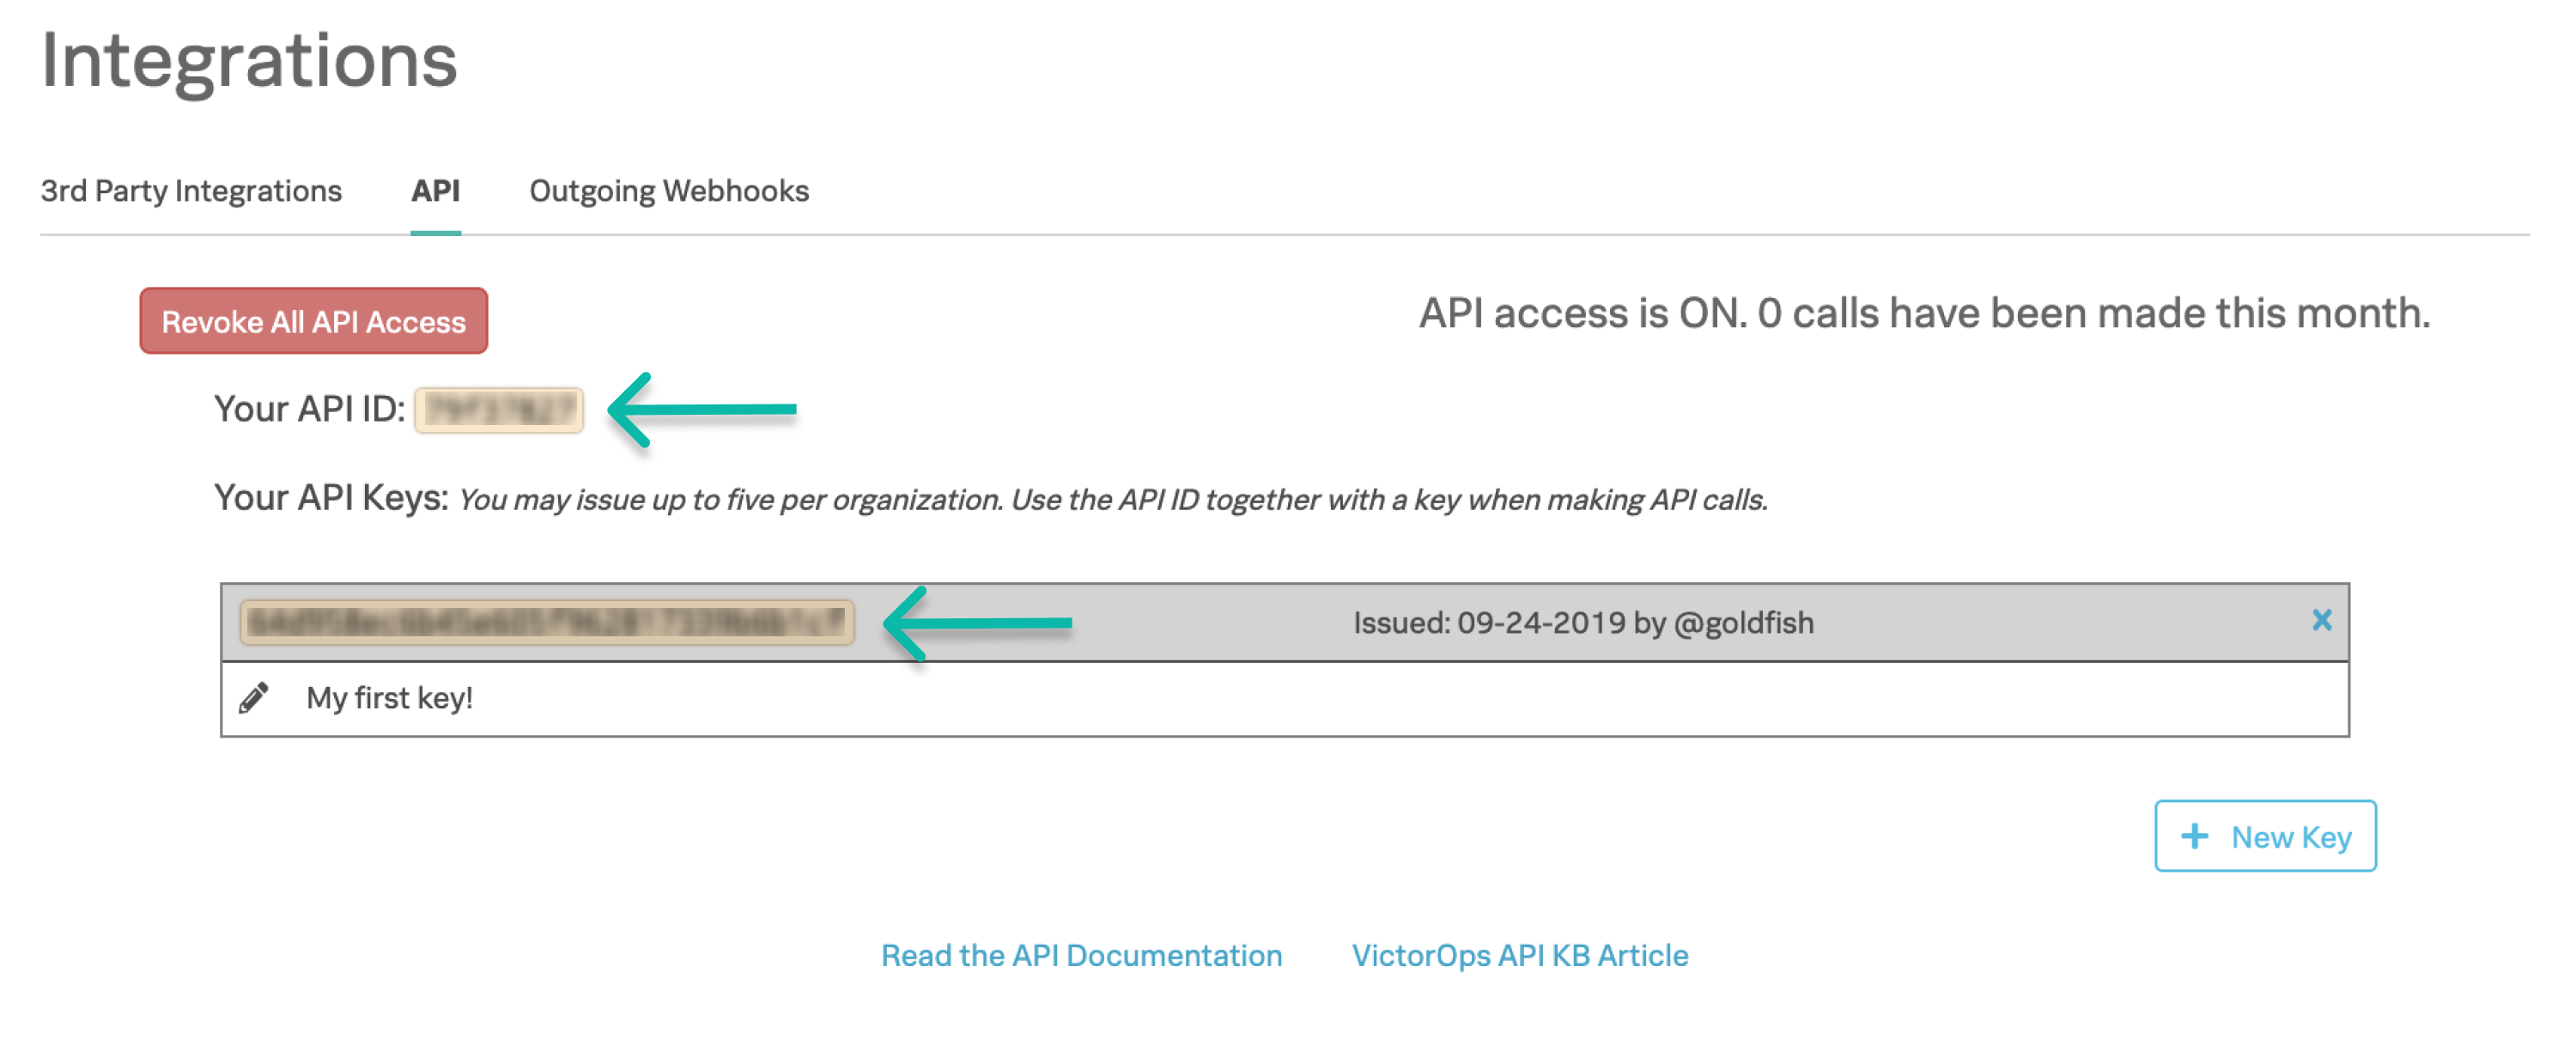
Under Zendesk API, select the Settings tab.
Turn on Token Access.
Select the + to generate a new token.
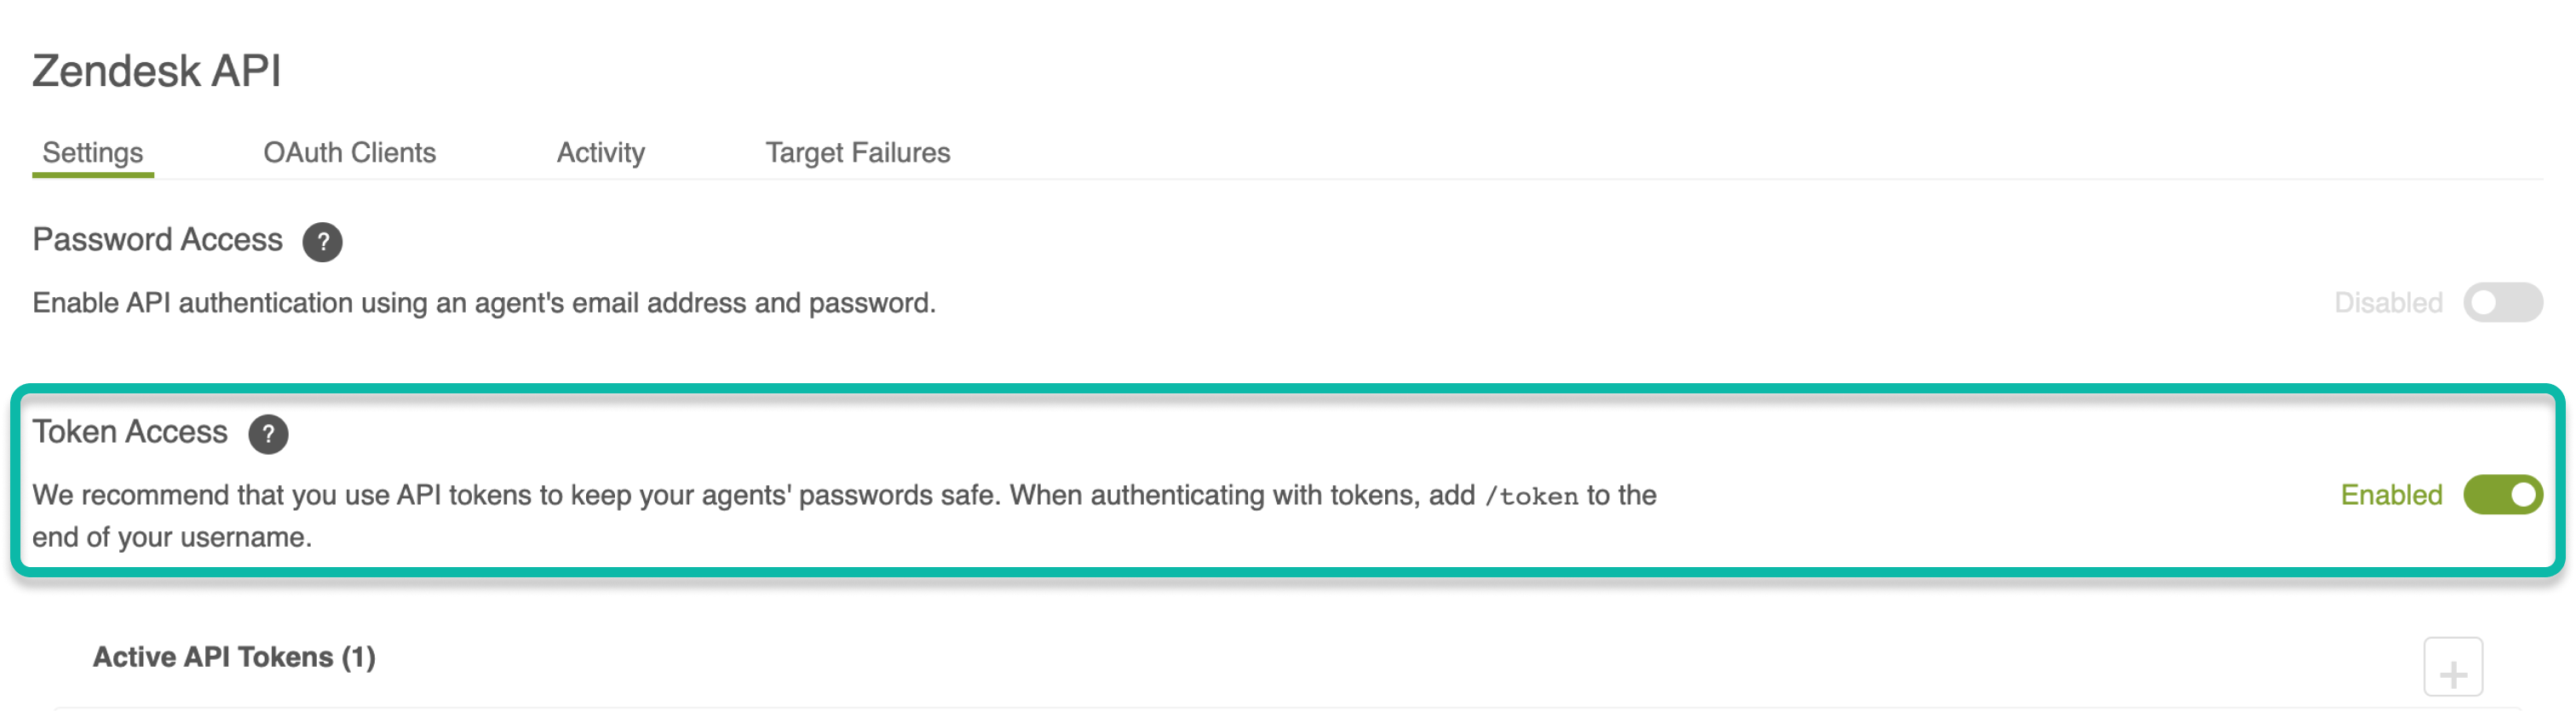
Give the token a name.
Select Copy button to copy the token to your clipboard.
Select Save.
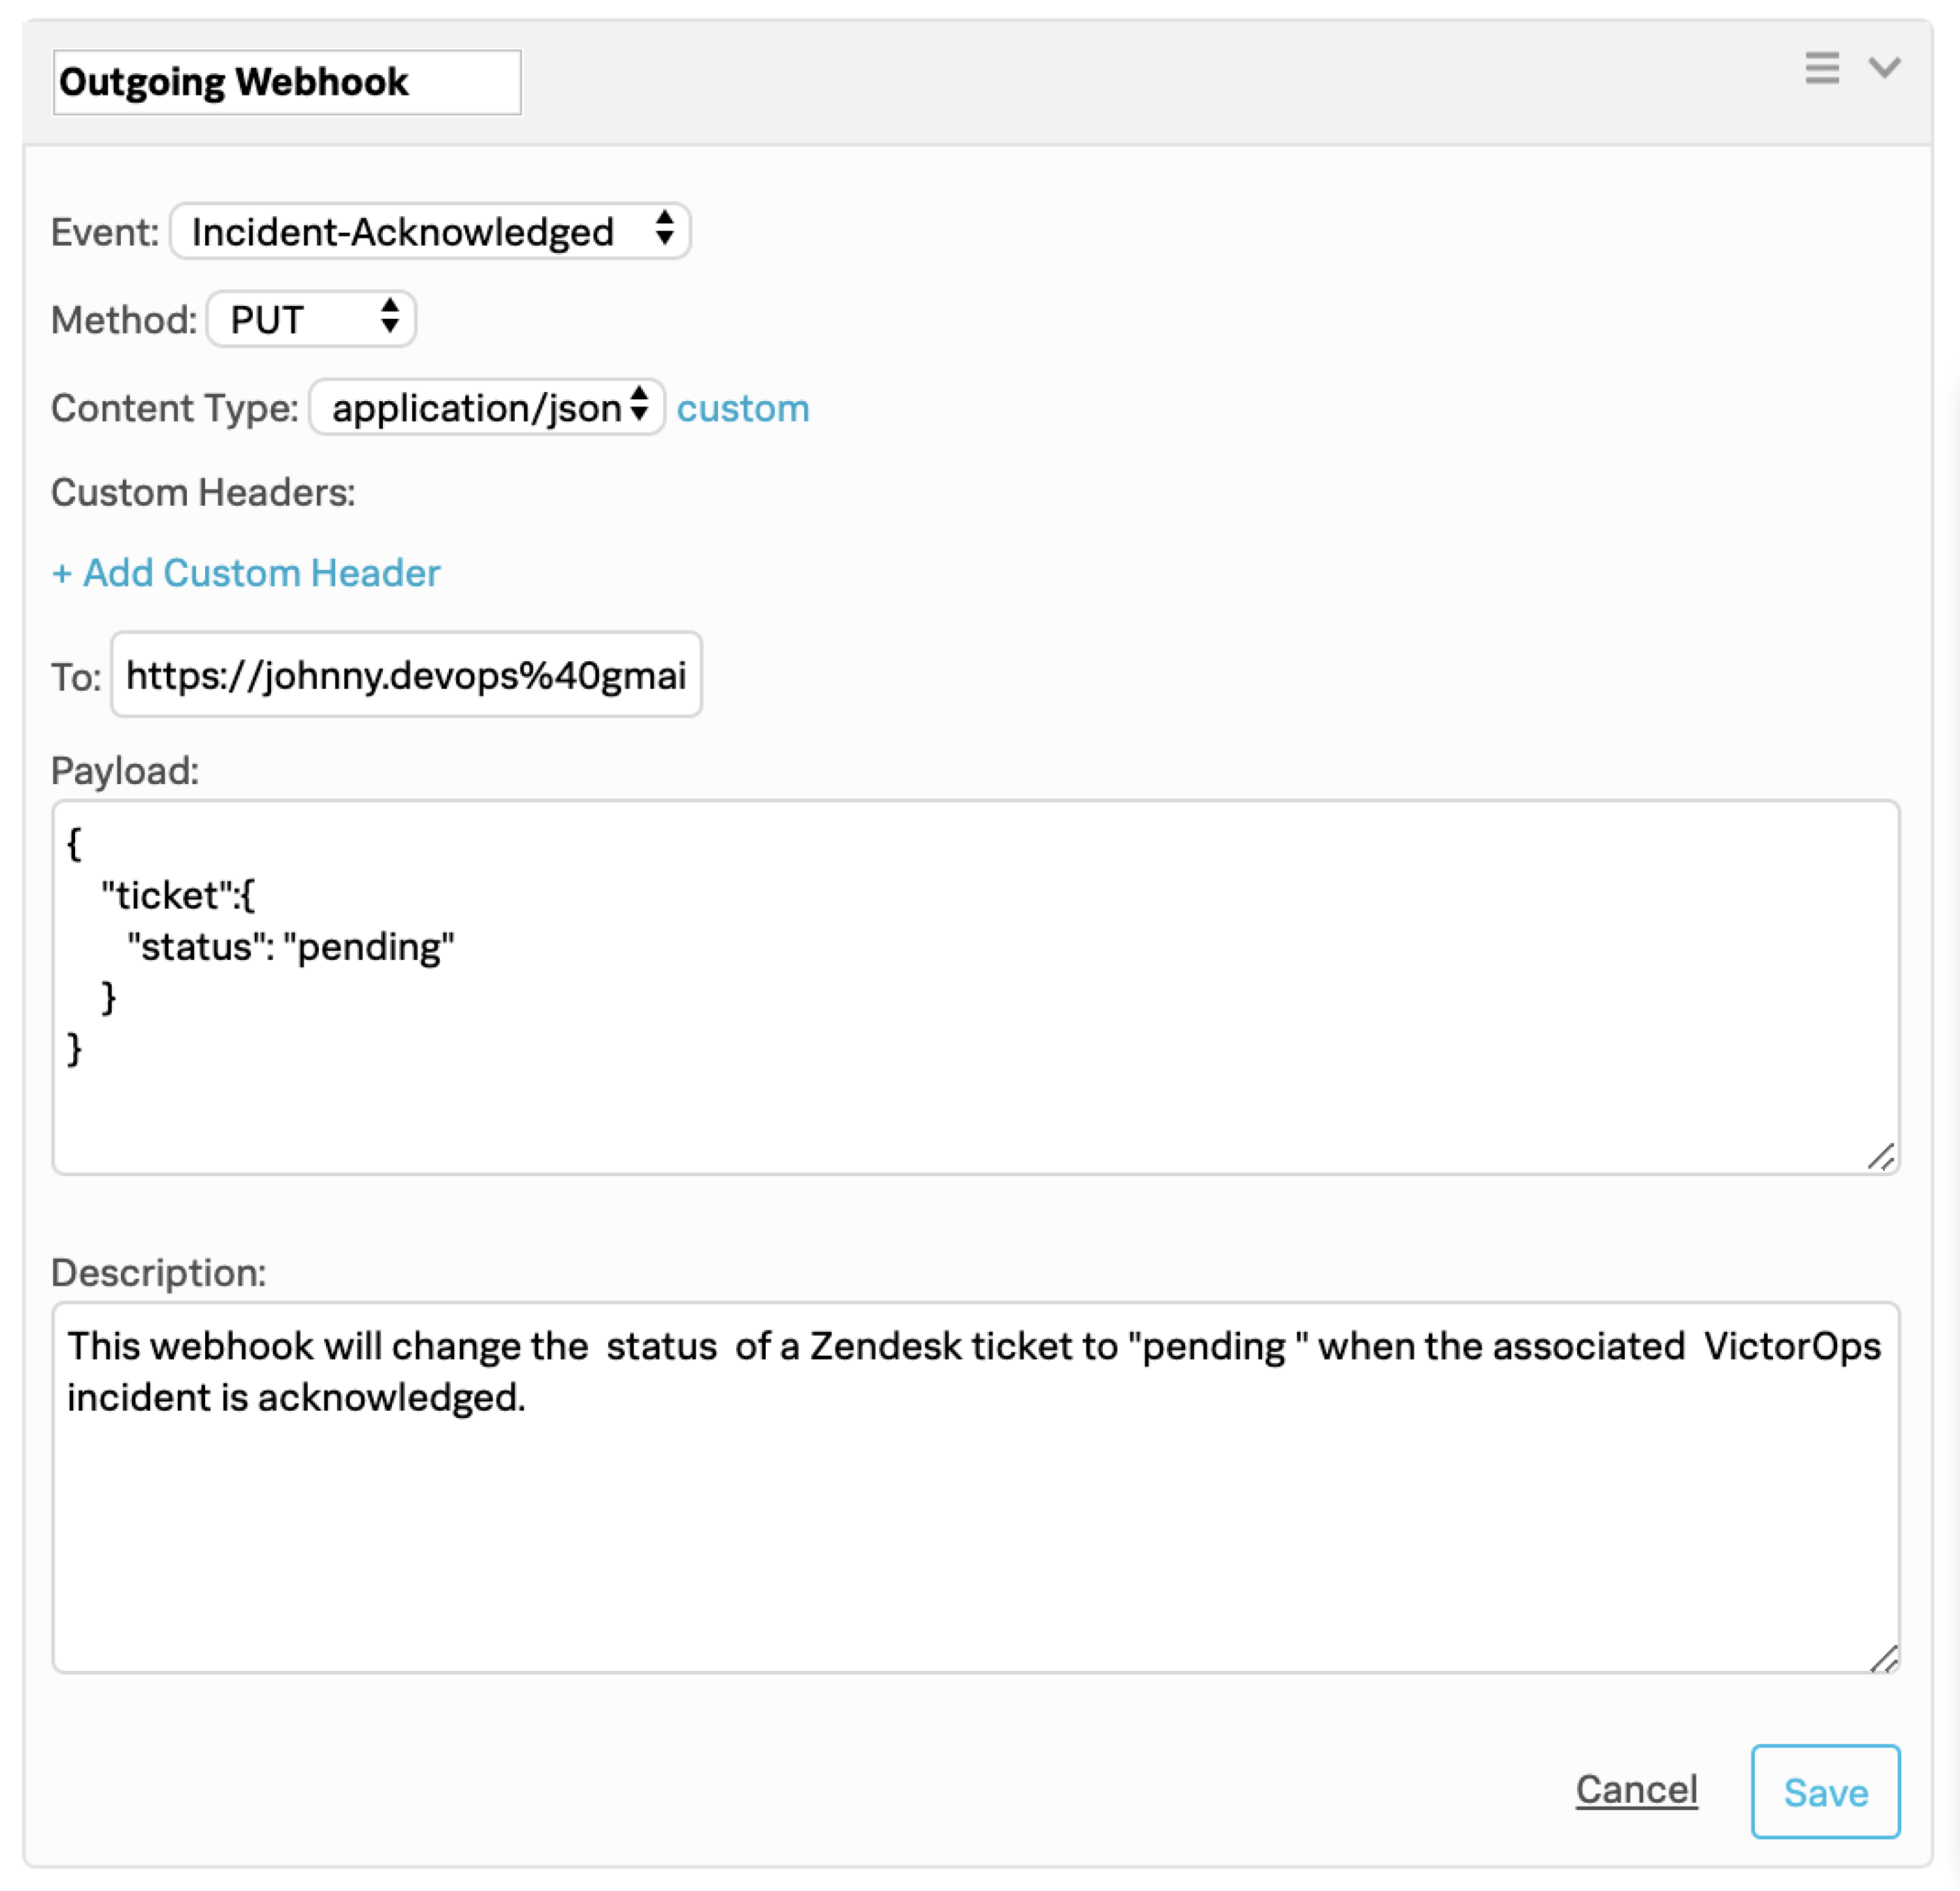
Set up the outgoing webhook 🔗
In Splunk On-Call, select Integrations then Outgoing Webhooks.
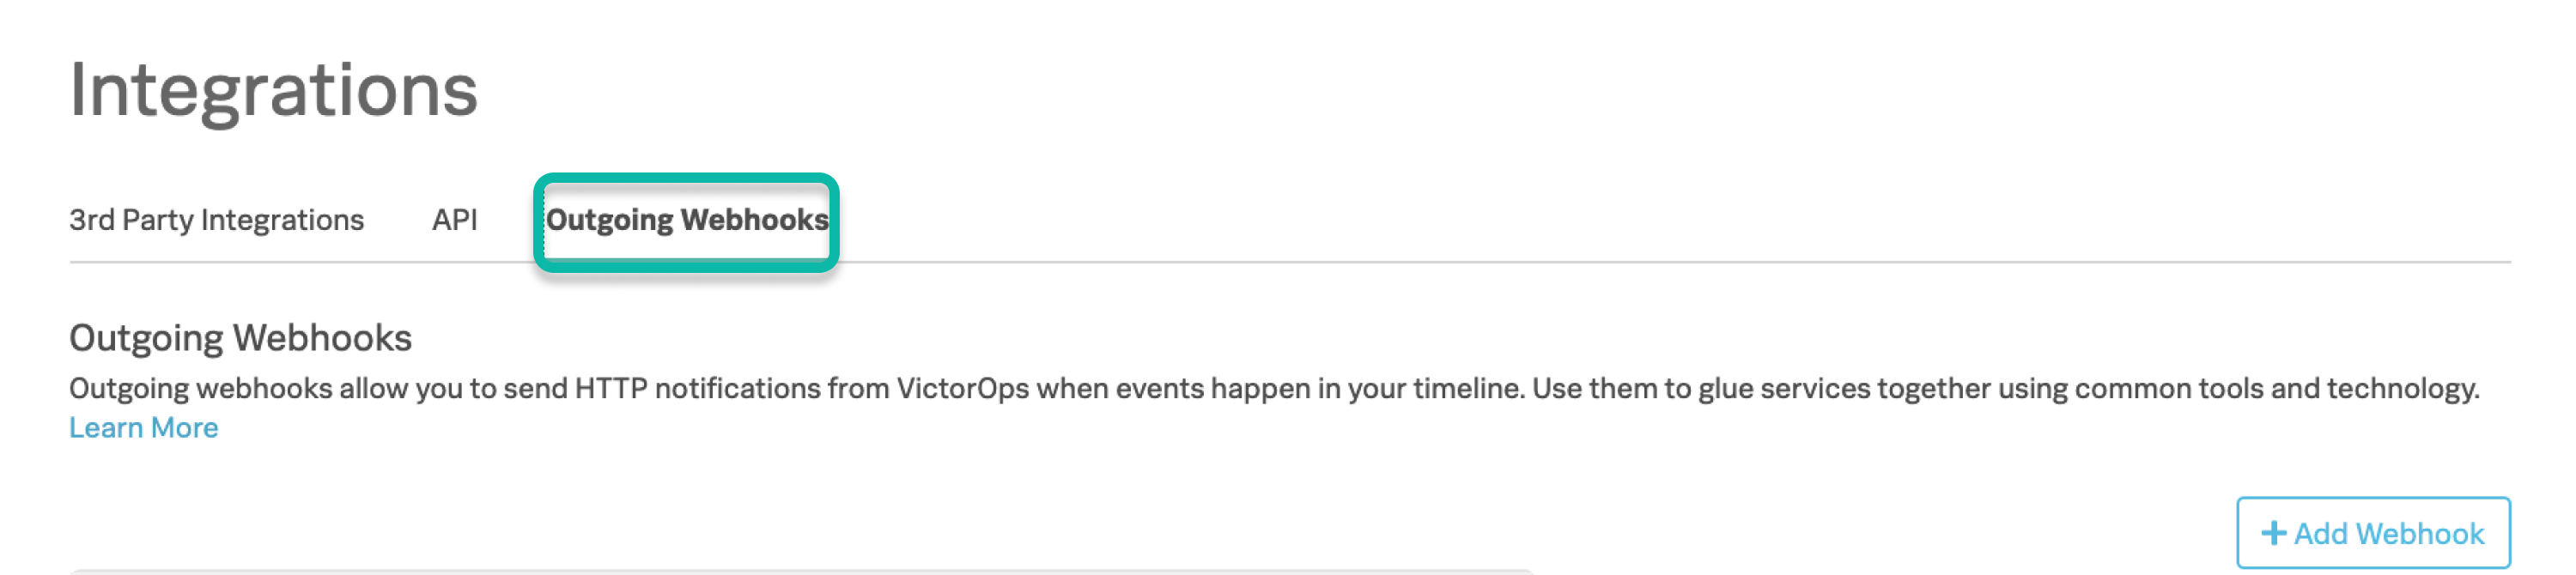
Under Outgoing Webhooks, select Add Webhook.
For Event, select Incident-Acknowledged.
For Method, select PUT.
For Content Type, select application/json.
In the To field, paste the complete destination URL described previously.
In the Payload field, paste the following payload. You can change the status value to your preferred status.
{
   "ticket":{
      "status": "pending"
   }
}
Enter a description for the webhook and select Save.