SSO beta integration for Splunk On-Call 🔗
Disclaimer 🔗
This documentation is subject to Splunk’s Websites Terms and Conditions of Use. Please be advised that using this integration is permitted subject to your obligations, including data privacy obligations, under your agreement with Splunk and Splunk’s Privacy Policy.
This is a beta release and may contain defects or deficiencies. Please use it at your own risk. Splunk disclaims any and all warranties for this feature, including any implied warranties of merchantability, fitness for a particular purpose, and other warranties arising out of course of dealing or usage of trade or by statue or in law. Splunk does not guarantee that this feature will meet your requirements, will be error-free, accurate, reliable, complete, or uninterrupted. This feature is not subject to support, update or upgrade, or any other commitments from Splunk under its agreement with you. Splunk is making this feature available for evaluation purposes only and is not obligated to develop the full functionality or include this feature in a future release.
Important Notes 🔗
This article explains how to set up SSO using SCIM/ULM configuration. If you need to set up SSO using SAML configuration instead, see Configure Single Sign-On for Splunk On-Call
Configuring SCIM Single Sign-On and initial activation of Okta provisioning with Splunk On-Call (formerly VictorOps) is currently not a self-service process and requires contacting the Support team.
Please note that the name of the app in Okta is VictorOps (Beta).
Warning 🔗
Deprovisioning a user will permanently delete the following attributes from Splunk On-Call for that user, and the user will not be able to login.
Any Splunk On-Call user contact methods not present in Okta
User mobile device registration for push notifications
User paging policies
User team membership
User on-call rotation membership
Removes the user from any Escalation Policies and Scheduled Overrides for On-call.
Reassigning a previously de-provisioned user will not recover the above attributes in Splunk On-Call.
Features 🔗
Single Sign-on using SAML and SCIM 2.0 user provisioning.
The following provisioning features are supported:
Push New Users
Okta users assigned to the VictorOps (Beta) App in Okta will have a Splunk On-Call username created and provisioned.
Push User Deactivation
Deactivating the user or disabling the user’s access to the VictorOps (Beta application through Okta will deactivate the user in Splunk On-Call.
Note: For this scenario, deactivating a user means removing the user from your Splunk On-Call organization.
That user will no longer be able to login to Splunk On-Call
That user will no longer be present in any on-call rotations
Reactivate Users
User accounts can be reactivated in the application. The reactivated user will require certain manual reconfiguration in Splunk On-Call.
Configuration Process Rundown 🔗
Complete Initial Requirements. See more below.
Wait for Support to do complete their end of things.
Complete SSO Setup in the VictorOps (Beta) App in Okta. See more below.
Assign users or groups to the VictorOps (Beta) app in Okta.
Test SSO Sign-On to Splunk On-Call.
Initial Requirements for the customer 🔗
You must be a Global Admin for your Splunk On-Call organization.
Ensure you have configured the General Settings and any Sign-On Options for the VictorOps (Beta) app on Okta. See Instructions Below: Initial Setup.
Please provide a list of users that will be assigned to the Vops (Beta) app in Okta. Do NOT assign users to the app yet.
Please provide the URL of the Identity Provider Metadata.
Initial Setup (In Okta) 🔗
From the Okta User Homepage, select Admin.
Selecting Admin will bring you to the Okta Dashboard. From the Okta Admin Dashboard, click Applications and select Add Application.
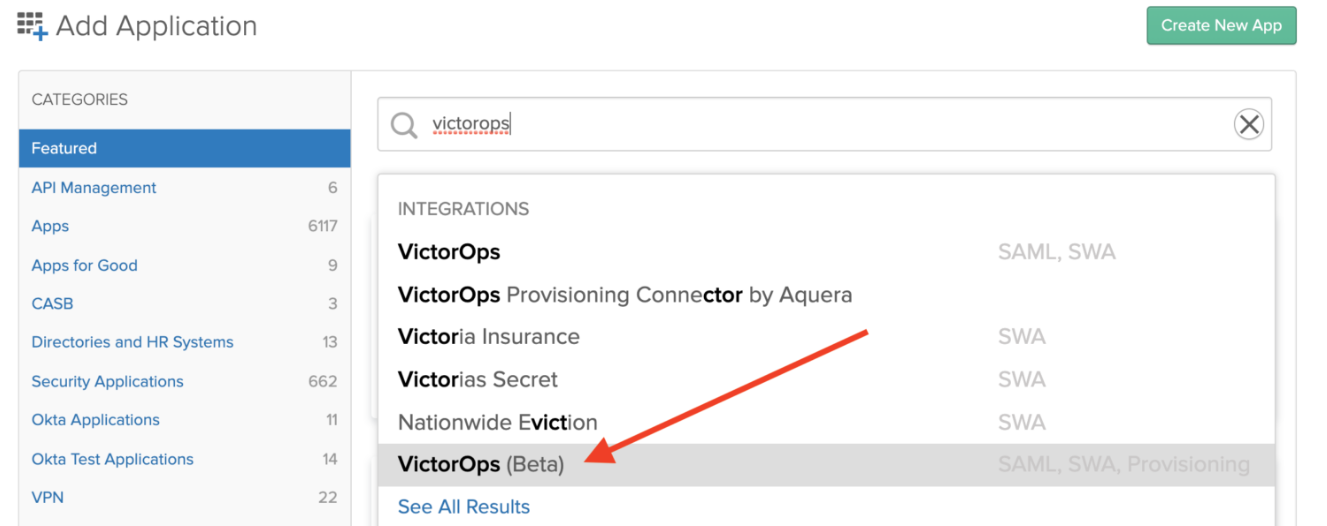
In the search bar, search for “VictorOps (Beta)“. Click on “VictorOps (Beta) in results to open.
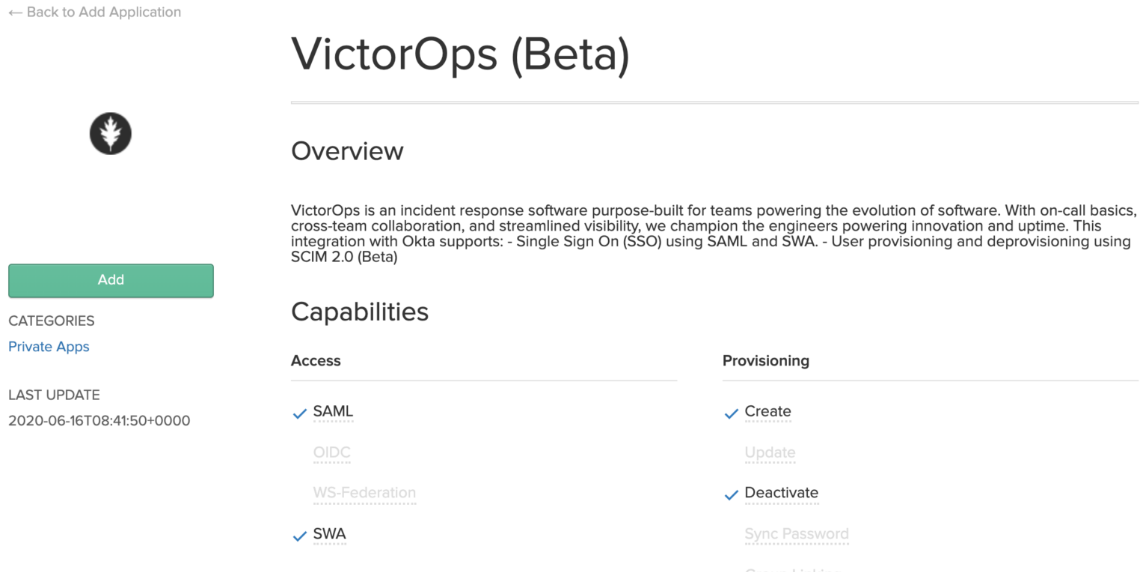
Once the page loads, click on “Add” button.
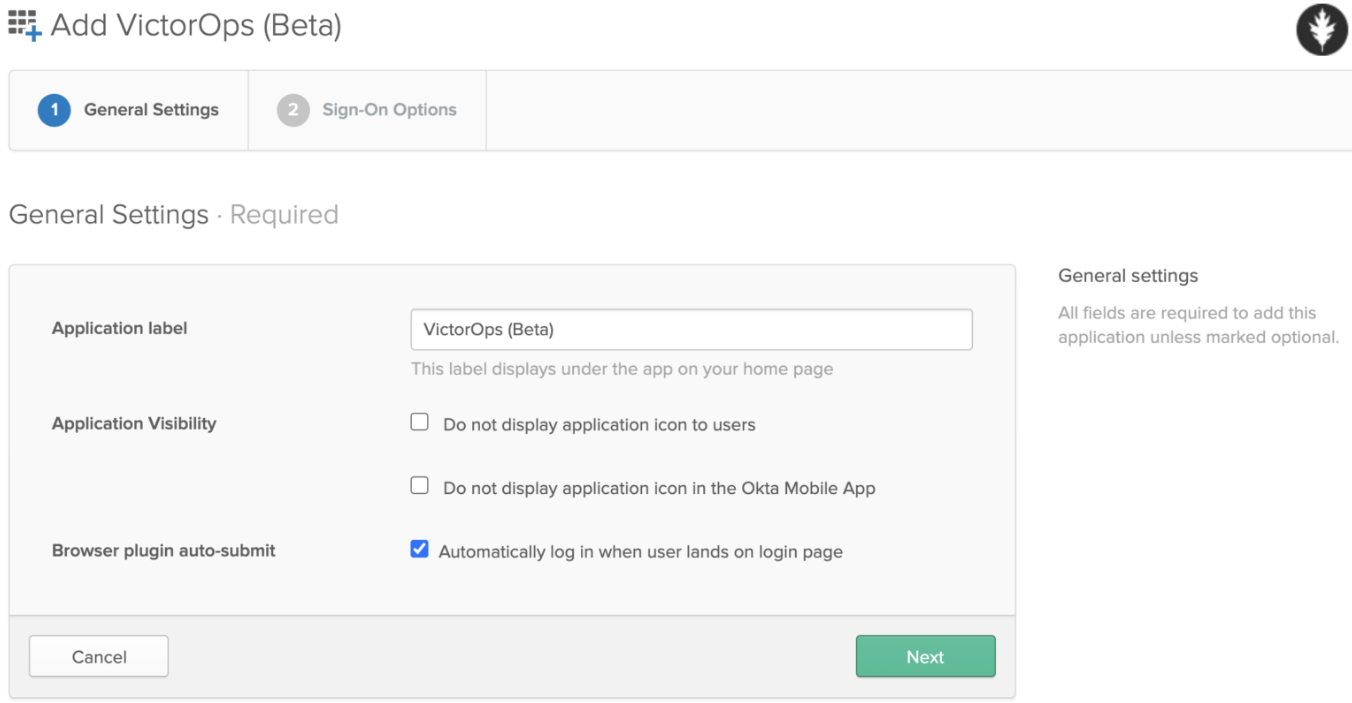
The Application label should auto-populate with the name VictorOps (Beta) but please feel free to rename this label and click Next.
In the page that loads, click on SAML 2.0 radio button.
6. You will need Splunk On-Call (formerly VictorOps) organization identifier for this step (or Org Slug). To find the identifier, login to your Splunk On-Call account and view the URL in the browser address bar. In the example screenshot below, “Your Org Slug” is the organization identifier.

In the Default RelayState text box add:
https://portal.victorops.com/auth/ulm/sso/<your-org-identifier>In the field Organization identifier enter just the org-identifier
Select Application username format to: Email (this is the only option currently supported)
7. Copy the URL linked to the Identity Provider metadata link to your clipboard, and click Done.
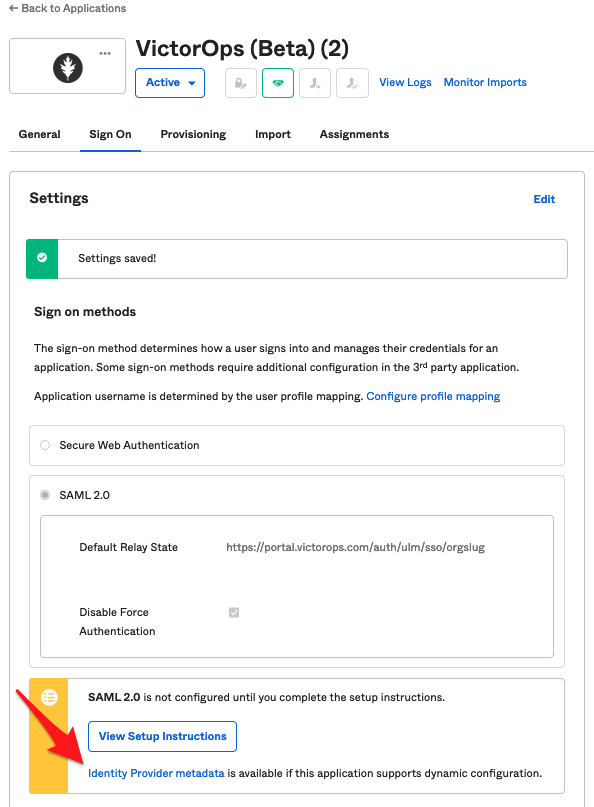
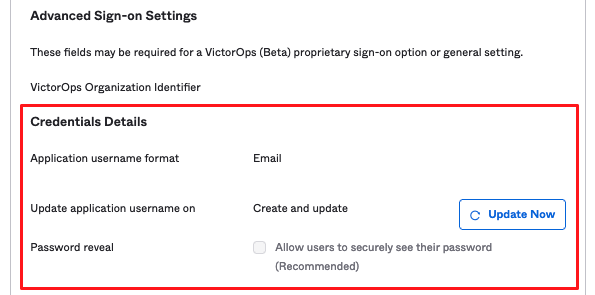
8. Once you configure the General and Sign-On options, please open a support ticket with subject “Okta SCIM setup request” and ask to configure Okta SCIM SSO for your Splunk On-Call organization. Provide the URL link you copied from the Identity Provider metadata from step 7 above and the list of users you will be assigning to the VictorOps (Beta) App in Okta.
Please wait for a response from Splunk On-Call Support team before proceeding with final instructions below.
Finalizing SSO Setup 🔗
Get Bearer Token from Splunk On-Call
Please make sure Splunk On-Call Support team has configured SSO before proceeding with following instructions.
1. Once Splunk On-Call support team configures SSO for your account, login as Global Admin to Splunk On-Call.
2. Navigate to Integrations >> API. If API Access is disabled, click on Activate API Access. More details on API access can be found here Splunk On-Call API.
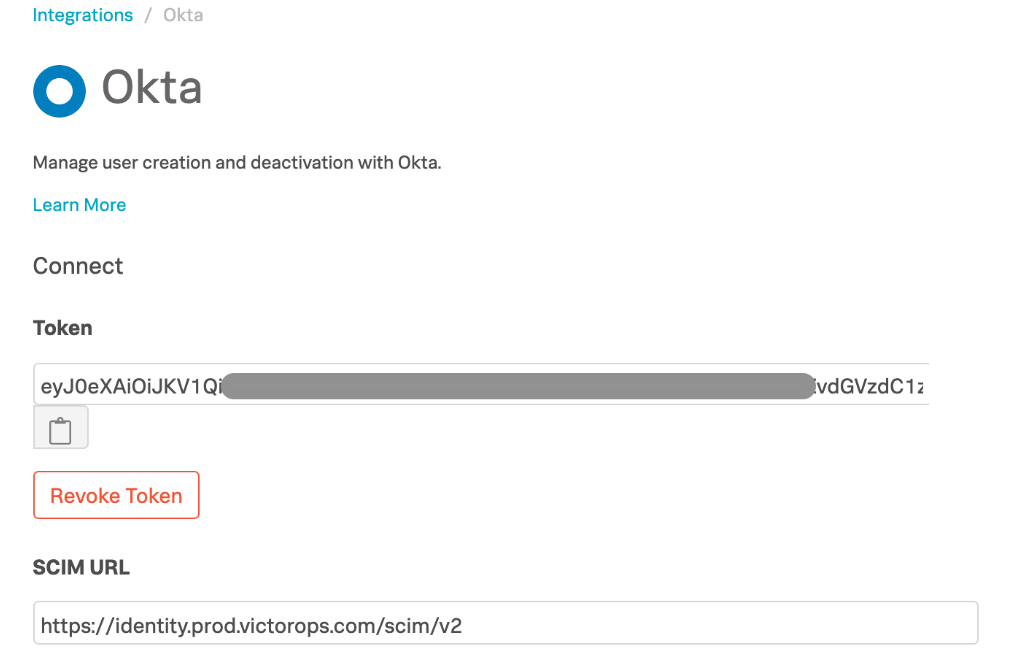
Click on Integrations >> 3rd Party Integrations. Search for “Okta” in the search bar and click on the resulting tile.
2. In the result page, click on Enable Integration which will generate a bearer token as shown below. If Okta is already enabled and you wish to generate a new token, click Revoke Token and reenable the integration.
5. Copy the token and save it in a temporary place as you will need it in subsequent steps.
Provisioning Setup (In Okta)
Please make sure Splunk On-Call Support team has configured SSO before proceeding with following instructions.
1. Go to VictorOps (Beta) application in Okta and click on Provisioning tab and click Configure API Integration.
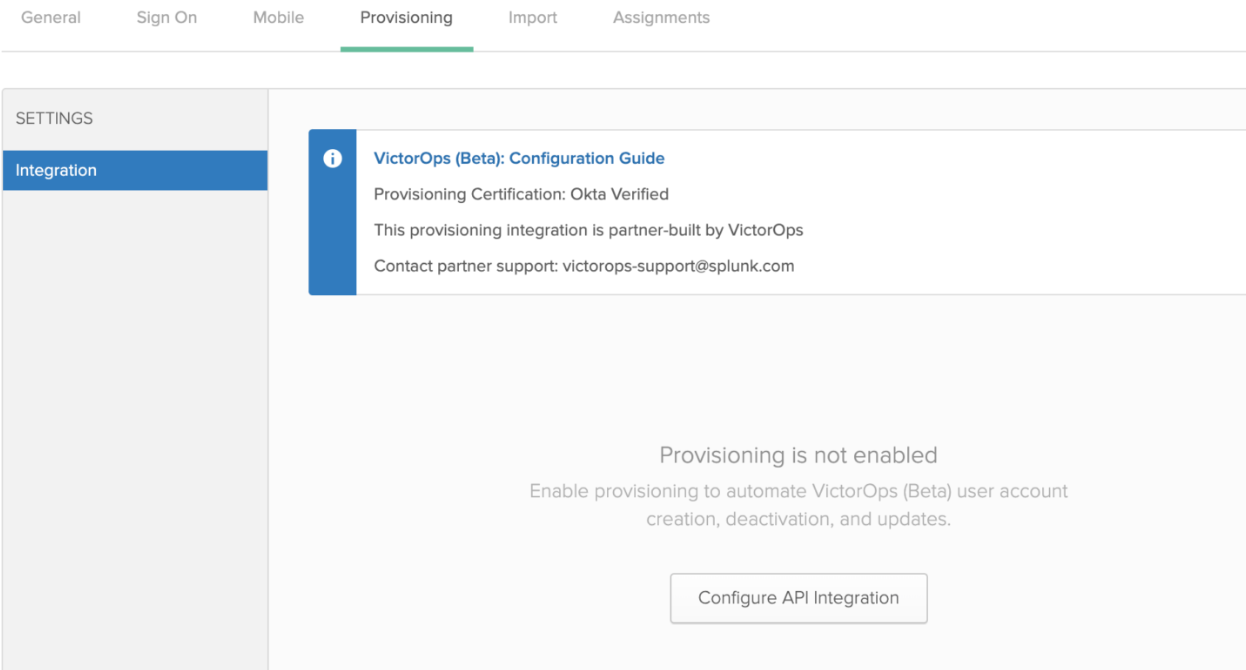
2. Select Enable API integration and paste the API token copied from Splunk On-Call (step 5 from In Splunk On-Call section above). Click Test API Credentials to verify the API communication is working correctly between Okta and Splunk On-Call. Click Save.
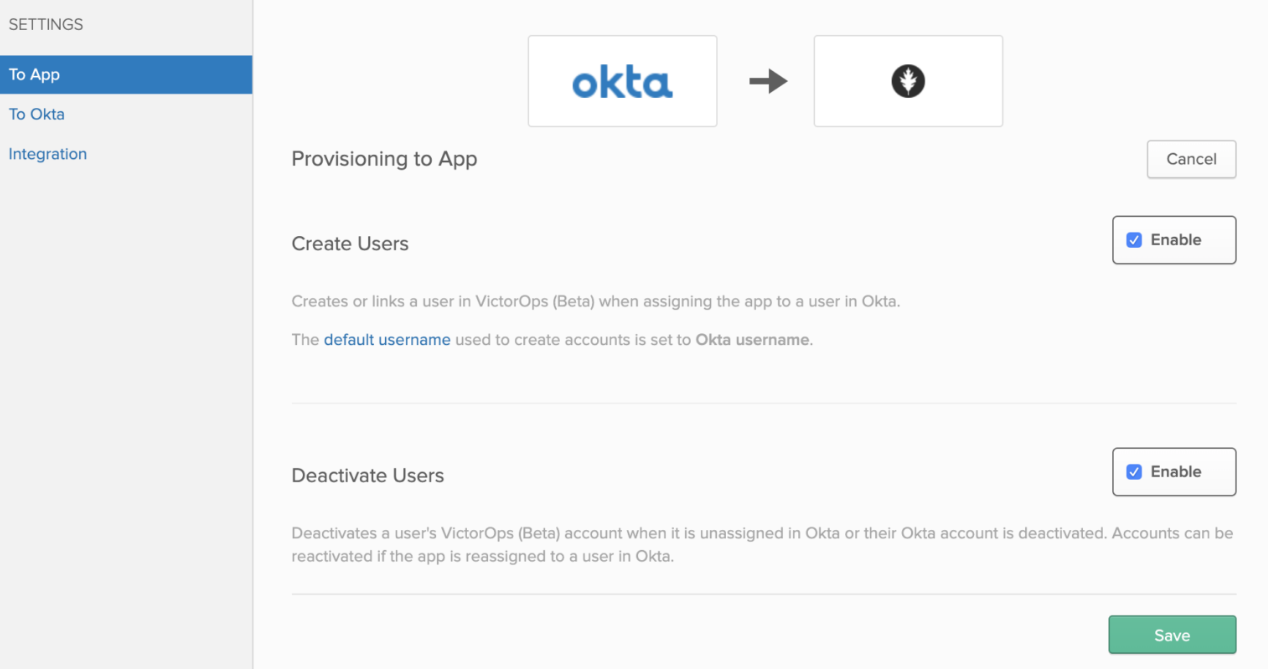
3. Click on To App under Provisioning tab. Click Edit and select Enable for Create Users and Deactivate Users. Click Save.
Final Steps
Once the above steps are done, your configuration for SSO SCIM is ready. You can now go ahead and assign the VictorOps (Beta) app to any groups or users. The provisioned users can use the Okta application (chiclet) to log into Splunk On-Call using SSO.
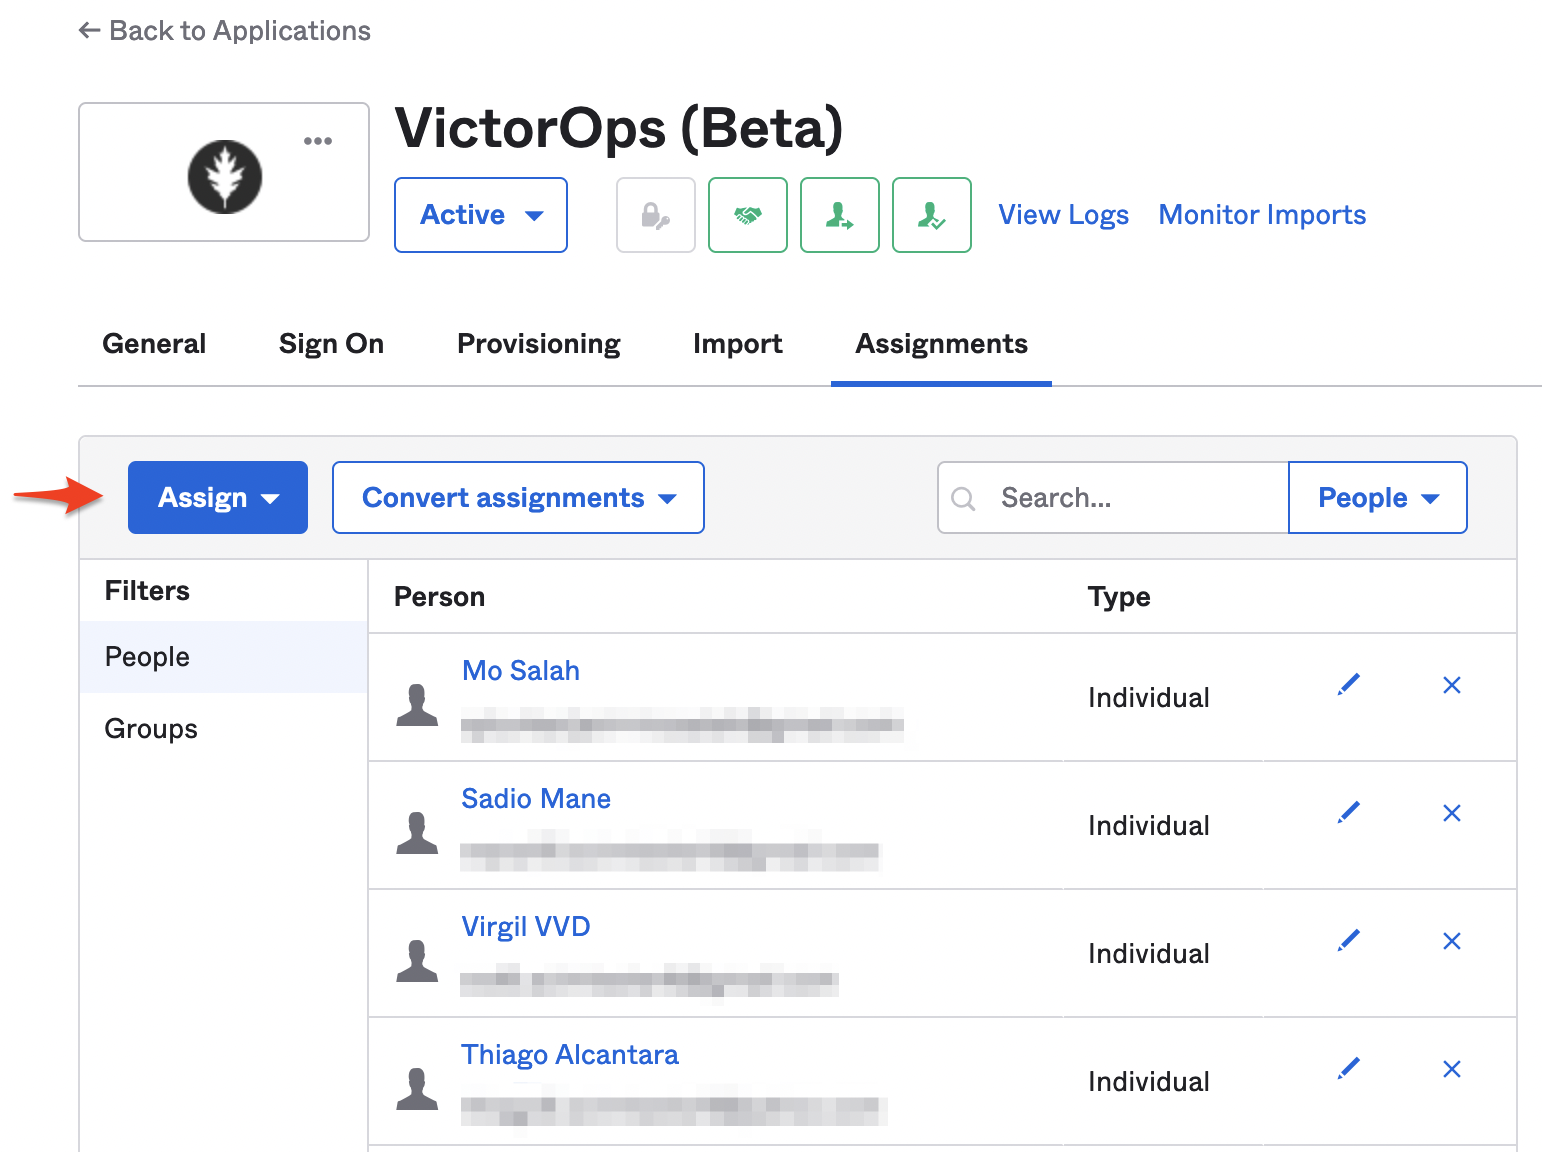
Your VictorOps (Beta) app in Okta is now ready to provision new users to your On-Call instance as well. Any new users you assign to the app will be provisioned to On-Call and will use the email as the On-Call username.
User Provisioning Process 🔗
This section describes how Okta user accounts are linked to a Splunk On-Call user account when the Okta–Splunk On-Call integration is enabled.
User profiles are connected between the two systems as follows:
Okta sends a new user provisioning request to Splunk On-Call
Splunk On-Call retrieves the primary email attribute for the user from the request
Splunk On-Call searches for matching user profile containing the same email address
If no users are found, a new user is created in Splunk On-Call.
If exactly one user is found, the Okta user is linked to the Splunk On-Call user.
If more than one user is found, an error is returned to Okta and the provisioning request fails. To fix this error, ensure the email address in Okta profile exists in only one user profile in Splunk On-Call.
If a user is found but the accounts were already linked previously, an error is returned. Please reach out to Splunk On-Call Support to resolve this.
User Deprovisioning Process 🔗
Okta requests to deactivate user from Splunk On-Call are handled as follows:
For Users to be removed who are part of On-call rotations, Escalation Policies or User is overriding another user’s on-call in Scheduled Overrides
1. Find all the teams the user is part of or teams in which the user took scheduled overrides or manual on-call. 2. For each team:
If the user is not part of on-call rotation or escalation policies in the team, then user is removed from the team. Otherwise proceed to next step.
Look for an admin in the team in this order: Team Admin, Alert Admin, Global Admin, Non-admin.
Users who have mobile device registered for push notification or verified phone number in their profile are given preference.
If there are more than one user resulting from above two steps, then pick the first user after sorting on username A->Z.
Place the resulting user as replacement for removed user in on-call rotations and escalation policies.
The replacement user is notified by email. In the email they get a list of rotations, escalation policies that were changed and also are told if any overrides changed.
3. If the user to be removed is the only member in a team, then an error message is returned to Okta and the remove-user operation is not completed in Splunk On-Call.
For Users who manually took on-call from another user and is currently on-call
Same process as above.
For User to be removed who is the only Global Admin in the Splunk On-Call org 🔗
This operation is not supported and an error is sent back to Okta.
After the above checks and replacements are complete, the user is removed from their org in Splunk On-Call and can no longer login.
Troubleshooting 🔗
Test API Credentials fails in Okta
Ensure there are no leading or trailing spaces in the token copied from Splunk On-Call. If you continue to see this error, please contact the Splunk On-Call support team.
Updates to user profile attributes in Okta are not reflected in Splunk On-Call
Updates to user profile attributes in Splunk On-Call, including username, are currently not supported. If updating a certain user’s profile is really important, a workaround is to delete the user from Okta. And then create a new user in Okta and assign to the Splunk On-Call application. This will result in a new user being created in Splunk On-Call with the desired user profile attributes.
Error: This Okta user is already linked to a different user in Splunk On-Call with the email address
You may receive this error if the Okta user is already linked to a user in Splunk On-Call. Please contact Splunk On-Call support.
Error: More than one Splunk On-Call user was found with the Okta user email address
Ensure only one user exists in the Splunk On-Call organization with the given email address.
Error: This user can not be removed from Splunk On-Call because they are the last Splunk On-Call Global Administrator for this organization
At least one Global Administrator is required to be present in an active Splunk On-Call account. Please login to Splunk On-Call and assign the Global Admin role to another user and retry this operation.
Error: This user could not be removed from Splunk On-Call because they are part of an on-call rotation or escalation policies and a replacement user could not be found
Please login to Splunk On-Call and remove dependent on-call rotations, escalation policies or teams and retry this operation.
Error: Another Okta user is already linked to the user in Splunk On-Call with this email address
Ensure only one Okta user exists with the given email address.
Or check if the matching Splunk On-Call user has two email addresses, each pointing to a different Okta user. This type of mapping should be avoided.