Splunk Observability Cloudの無料トライアルとガイド付きオンボーディング 🔗
このトライアルでは、Splunk Observability Cloudのトライアル環境を作成するための手順を案内します。トライアルの一環として、Hipster shop(Splunk Observability Cloudトライアルショップ)が、メトリクスとトレースを提供するDockerコンテナのセットとしてローカルのminikubeクラスターにデプロイされます。minikubeクラスターとOpenTelemetryコレクターをセットアップする場合は、自動化によってクラスターを設定できるようにするため、Helmおよびgnu-sedエディターもインストールする必要があります。
Splunk Observability Cloudを完全無料で14日間お試しいただけます。トライアルを利用した検討には2つの方法があります:
事前インストルメント済みの環境(Hipster shop)でサンプルデータを使用する。
OpenTelemetryを使ってアプリケーションをインストルメントすることにより、独自のデータを使用する。
Splunk Observability Cloud製品のご紹介は、Splunk Observability Cloudの概要 を参照してください。
これらの製品を併用して現実のシナリオに対処する方法については、シナリオ:KaiがSplunk Observability Cloudを使用してブラウザからバックエンドまでの問題をトラブルシューティングする を参照してください。
Splunk Observability Cloudを今回初めてお使いになる方は、以下の無料トライアルの登録方法を参照してください。
- 以下のURLのいずれかに移動します:
AWSリージョンについては、https://www.splunk.com/en_us/download/o11y-cloud-free-trial.html を参照してください。
GCPリージョンについては、https://www.splunk.com/en_us/download/observability-for-google-cloud-environments.html を参照してください。
無料トライアル申し込み画面で、お住まいの地域に最も近い場所を選択します。オプションには以下が含まれます:米国、ヨーロッパ、アジア太平洋地域(オーストラリア)、アジア太平洋地域(日本)。Next を選択します。
- 連絡先情報を入力します。注意:
名前とメールアドレスは、システム上の最初のユーザーを作成するために使用され、自動的に管理者ロールが付与されます。
会社名は、組織の命名に使用されます。ご利用のアカウントとその機能を説明する名前を選択してください。例:Acme Dev platform。
利用規約に同意し、Start Free Trial を選択します。
- 組織にログインするためのリンクが記載されたメールが届きます。10分経っても届かない場合は、迷惑メールフォルダをチェックしてください。
メール内の Verify を選択するか、このリンクをブラウザに貼り付けます。
パスワードを作成し、Sign in Now を選択します。

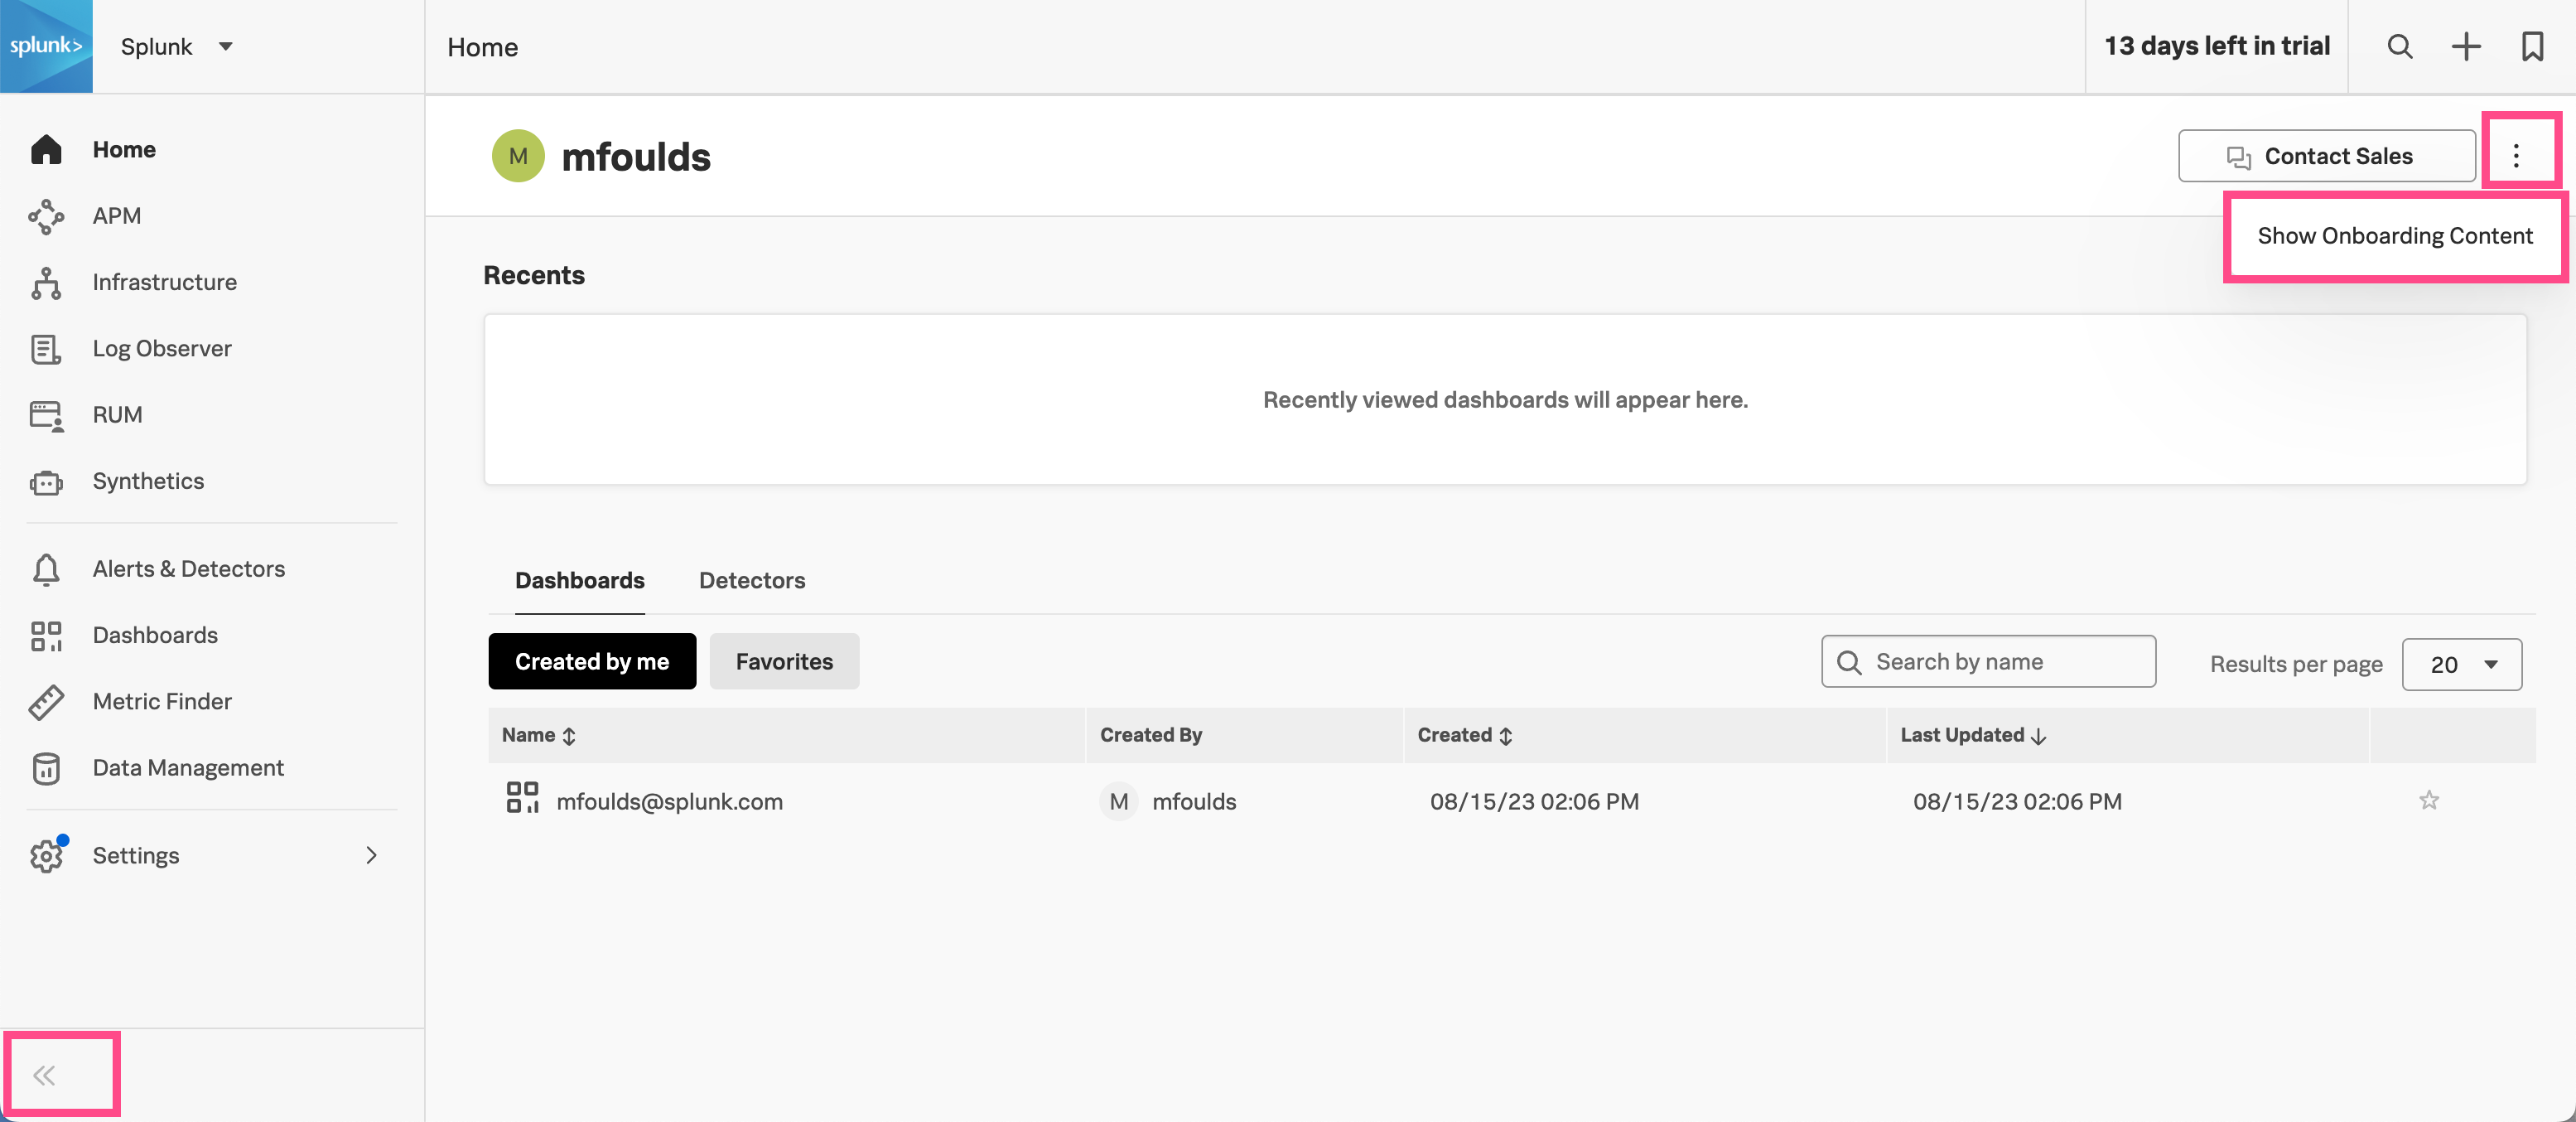
初めてログインすると、ホームページが表示されます。右上の角のアクションメニュー(⋯ )を選択すると、オンボーディングコンテンツが表示されます。これにより、大部分のページに関する動画やリンクが表示され、利用開始に役立てることができます。
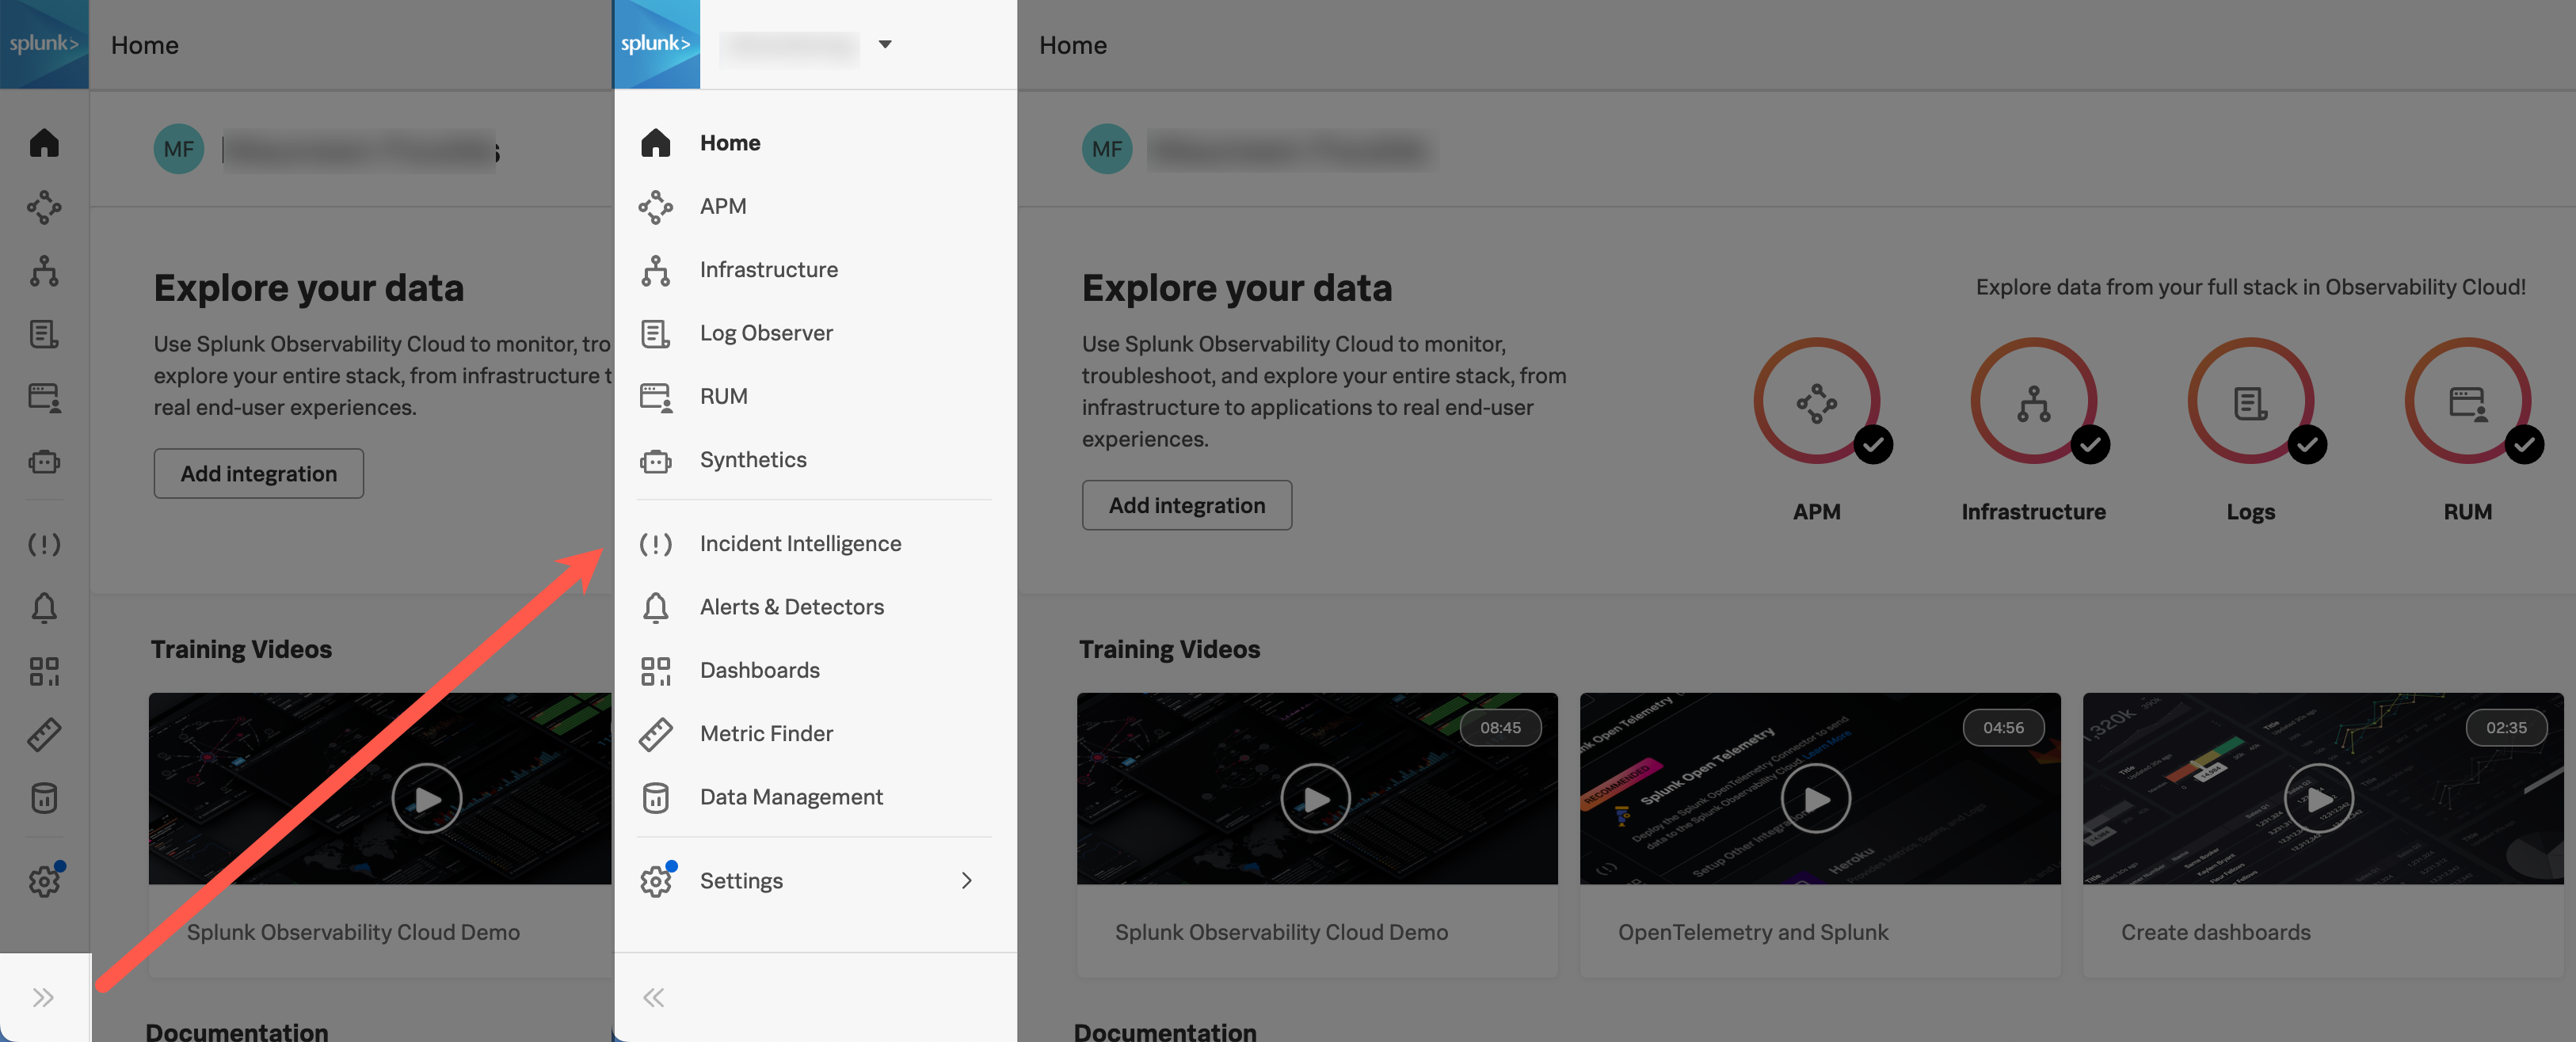
また、下の隅にある二重山括弧を選択すると、ナビゲーションメニューを展開して、アイコンのみの表示ではなくセクションの正式名称の表示に変更することもできます。

ガイド付きオンボーディングには5つのステップがあります。UIにしたがうと各ステップに移動し、必要なコマンドおよびリンクが提示されます。
前提条件の準備
OpenTelemetryのインストール
ローカルクラスターへのHipster Shopのインストール
Hipster Shopを探索することによるトラフィックの作成。Hipster Shopサイト内をクリックして回ると、Splunk Observability Cloudで表示するためのトレースとメトリクスが生成されます。
Application Performance Monitoring(APM)での結果の調査
最初のステップは、デモ環境用の前提条件をセットアップすることです。トライアルのUIに従うと、この手順が案内され、必要なリソースへのリンクが提示されます。
デモ環境を実行するには、以下のインストールと機能するバージョンの保持が必要です:
Docker:必要に応じてインストールします。https://docs.docker.com/engine/install を参照してください。
minikube:minikubeのインストールと設定を行います。https://minikube.sigs.k8s.io/docs/start を参照してください。
Helm:Helmのバージョン3.0以上をインストールします。https://helm.sh/docs/intro/install/ を参照してください。
GSED:ストリームエディターのGNU実装。gnu-sedはkubernetesマニフェストの設定スクリプトで使用されます。https://formulae.brew.sh/formula/gnu-sed を参照してください。
Hipster Shopクラスターは、最低4GBのメモリを必要とします。
OpenTelemetryコレクターをインストールするには、以下を把握している必要があります:
ご利用のSplunk Observability Cloudのレルム。自分のレルムを見つける方法は、自分のレルムと組織の情報を表示する を参照してください。
Splunk Observability Cloudのアクセストークン。詳細については、Splunk Observability Cloudを使用した組織のアクセストークンの作成および管理 を参照してください。
Hipster Shopを使用して、サンプルデータを生成します。Hipster Shopのデモをローカルにインストールするには、Real User Management(RUM)のトークンが必要です。手順については、Splunk Observability CloudでRUMアクセストークンを生成する を参照してください。
Hipster Shop環境のインストールと設定が完了したら、Splunk Observability Cloudのトライアル組織でトラフィックを生成し、結果を調査できます。