パート 1:Collectorのインストールと、設定ファイルの場所 🔗
このチュートリアルのパート1では、Linuxインストーラ・スクリプトを使用してSplunk Distribution of OpenTelemetry Collectorをインストールすることから開始します。インストーラーはデフォルトの設定ファイルをデプロイしますが、これを、任意のテキストエディターを使用して変更することができます。
チュートリアルの概要は、チュートリアル:Linuxホスト上でのSplunk Distribution of OpenTelemetry Collectorの設定 を参照してください。
Collector for Linux のインストール 🔗
ターミナルセッションで、以下の環境変数を定義します:
export SPLUNK_REALM="<splunk_o11y_cloud_realm>"
export SPLUNK_ACCESS_TOKEN="<splunk_access_token>"
export SPLUNK_MEMORY_TOTAL_MIB="512"
変数 SPLUNK_REALM の値は、Splunk Observability Cloudのレルムです(例: us0 )。アカウントのレルム名を確認するには、以下の手順に従ってください:
Splunk Observability Cloud のナビゲーションメニューを開きます。
を選択します。
ユーザー名の下にある View Profile を選択します。
Organizations セクションでレルム名を探します。
アクセストークンを取得するには、Splunk Observability Cloudを使用したユーザー APIアクセストークンの取得と管理 を参照してください。
環境変数を設定したら、同じターミナルセッションで以下のコマンドを実行して、Linuxインストーラ・スクリプトをダウンロードおよび実行します:
curl -sSL https://dl.signalfx.com/splunk-otel-collector.sh > /tmp/splunk-otel-collector.sh;
sudo sh /tmp/splunk-otel-collector.sh --realm $SPLUNK_REALM --memory $SPLUNK_MEMORY_TOTAL_MIB -- $SPLUNK_ACCESS_TOKEN
以下のメッセージが表示されるまで待ちます:
The Splunk OpenTelemetry Collector for Linux has been successfully installed.
注釈
Splunk Observability Cloudで Collectorガイド付きセットアップ を使用して、事前入力済みのインストールコマンドを生成できます。
データがSplunk Observability Cloudに入ってきていることを確認する 🔗
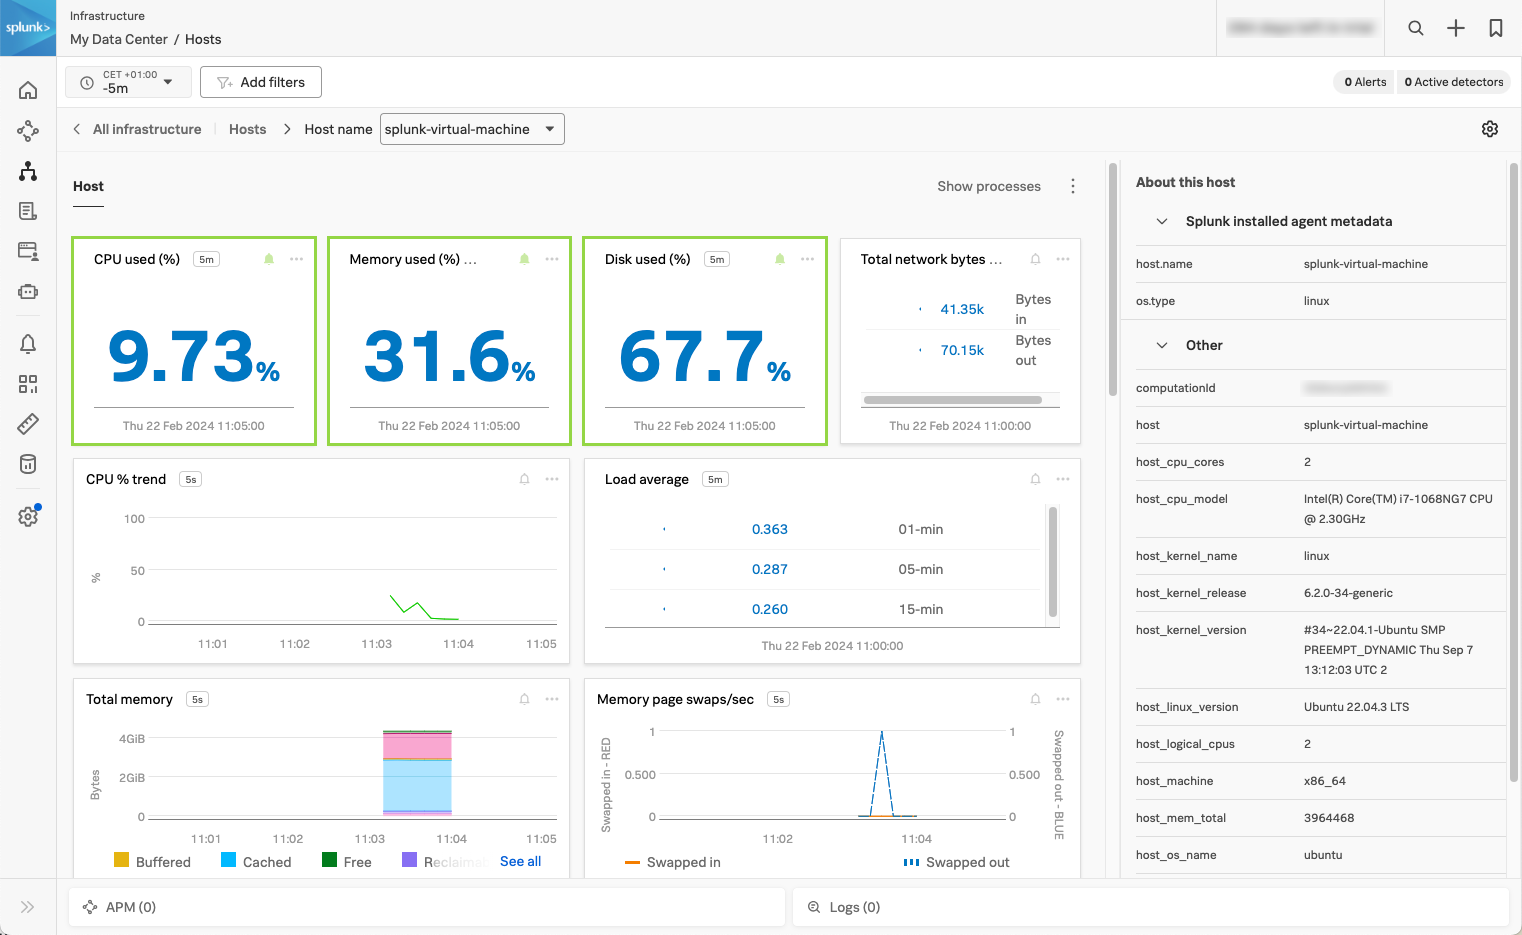
Splunk Observability Cloudを開き、Infrastructure に移動してLinuxマシンから入ってくるデータを確認します。次のスクリーンショットは、CPU負荷、ディスク使用量、ホスト上で実行中のプロセスのリストなど、Splunk Observability Cloudに入ってくる典型的なホストメトリクスを示しています。

設定ファイルを見つける 🔗
Collectorをインストールしたら、/etc/otel/collectorに移動して設定ファイルを探します。ファイルをリストすると、以下のような結果になります:
.
|-- agent_config.yaml
|-- config.d
|-- gateway_config.yaml
|-- splunk-otel-collector.conf
|-- splunk-otel-collector.conf.example
`-- splunk-support-bundle.sh
agent_config.yamlファイルおよびgateway_config.yamlファイルには、Collector をホスト監視モードまたはデータ転送モードでデプロイするための設定が含まれています。設定の構造とモードは、デプロイメントのモードに関係なく同じです。このチュートリアルでは、Collectorをエージェントとして設定するため、agent_config.yamlファイルを使用します。
splunk-otel-collector.confファイルには、Splunk Observability CloudアクセストークンやSplunk Observability Cloudレルムを含むsystemdの環境変数が含まれています。Collectorをサービスとして実行する場合は、必ずこのファイルに正しい値が含まれていることを確認してください。
サンプル設定ファイルを作成する 🔗
Collectorのすべての設定は、YAML形式で記述された以下のコンポーネントで構成されます:
レシーバー:1つまたは複数のソースからテレメトリを収集します。
プロセッサー:エクスポーターへの送信前にデータを修正または変換します。
エクスポーター:オブザーバビリティバックエンドや他の宛先にデータを送信します。
コネクター:2つのパイプラインを結合し、エクスポーターとレシーバーの両方の役割を果たします。
エクステンション:Collectorの機能を拡張するアクセサリ。
独自のユースケースにあわせてCollectorを構成する際、多くの場合は、前のすべてのコンポーネントを組み合わせたCollector設定ファイルを編集または作成する必要があります。
お好みのコードエディターまたはテキストエディターを使用して、新しい設定ファイルを作成します。そのファイルをsample.yamlとして保存し、以下のように、レシーバー、プロセッサー、エクスポーター、拡張機能を記述したセクションを追加します:
extensions:
  health_check:
    endpoint: "${SPLUNK_LISTEN_INTERFACE}:13133"

receivers:
  otlp:
    protocols:
      grpc:
        endpoint: "${SPLUNK_LISTEN_INTERFACE}:4317"
      http:
        endpoint: "${SPLUNK_LISTEN_INTERFACE}:4318"

processors:
  batch:

exporters:
  otlp:
    endpoint: "${SPLUNK_GATEWAY_URL}:4317"
    tls:
      insecure: true
すべてのコンポーネントは、特別な service セクションを介してパイプラインで接続されます。sample.yamlファイルの最後に以下のフラグメントを追加します:
service:
  pipelines:
    traces:
      receivers:
      - otlp
      processors:
      - batch
      exporters:
      - otlp
  # Extensions don't go inside pipelines
  extensions: [health_check]
注釈
各設定は、YAML形式の規約にしたがって必ず2つ以上のスペースでインデントしてください。設定のエラーの原因は、多くの場合、不適切なインデントによるものです。
前のCollector設定ファイルが有効かどうかを確認するには、そのファイルをsample.yamlとして保存し、validate コマンドと --config オプションを使用してCollectorに渡します。これは、使用する設定をCollectorに指示するものです:
otelcol validate --config=sample.yaml
設定が有効であることを示す、以下の応答のような出力が表示されます:
2024/02/19 16:28:44 settings.go:479: Set config to [sample.yaml]
2024/02/19 16:28:44 settings.go:532: Set ballast to 168 MiB
2024/02/19 16:28:44 settings.go:548: Set memory limit to 460 MiB
2024/02/19 16:28:44 settings.go:415: set "SPLUNK_LISTEN_INTERFACE" to "0.0.0.0"
次のステップ 🔗
これでチュートリアルの最初のパートは完了です。Collector設定の機能と、その保存場所を学習しました。
新しいコンポーネントを追加するためのCollctor設定ファイルの編集方法を学習する場合は、パート2:Collectorの設定を編集して新しいコンポーネントを追加する に進んでください。
さらに詳しく 🔗
Collectorの設定の形式と構造の詳細については、以下のリソースを参照してください:
OpenTelemetry.ioの 設定