パート1:マシンにKubernetesクラスターをセットアップして監視する 🔗
このチュートリアルを進めるには、マシン上にKubernetes環境が必要です。チュートリアルの概要については、チュートリアル:Kubernetes上でのSplunk Distribution of OpenTelemetry Collectorの設定 を参照してください。
Kubernetesのデモ環境をセットアップする便利な方法は、Minikube、Podman、Helmを使用することです。それぞれのツールには特定の目的があります:
Minikubeは、ローカルのKubernetesクラスターを作成します。
Podmanは、Kubernetesでコンテナを実行します。
Helmは、Kubernetesの設定を支援します。
注釈
Dockerなどのコンテナランタイムをすでにインストールしている場合は、Podmanは必要ありません。
以下の手順は、ホストオペレーティングシステムとしてmacOSを使用していることを前提としています。また、Homebrewパッケージ・マネージャーが必要です。Homebrewがインストールされていない場合は、まずターミナルで以下のコマンドを実行してください:
/bin/bash -c "$(curl -fsSL https://raw.githubusercontent.com/Homebrew/install/HEAD/install.sh)"
必要項目をインストールする 🔗
ターミナルセッションを開き、Homebrewを使用してMinikube、Helm、Podmanをインストールします:
brew install minikube helm podman
以下のコマンドを実行して、すべての必要項目がインストールされたことを確認します:
minikube version
# minikube version: v1.32.0
podman -v
# podman version 4.9.3
helm version
# version.BuildInfo{Version:"v3.14.2", ...}
ローカルのKubernetesクラスターを作成する 🔗
このチュートリアルで使用するローカルKubernetesクラスターを起動するには、以下のコマンドを実行します:
minikube start
5分後に、Minikubeが正常にクラスターを作成したことを伝える次のメッセージが表示されます:
Done! kubectl is now configured to use "minikube" cluster and "default" namespace by default
新しく作成したクラスターをテストするには、以下のコマンドを実行します:
minikube dashboard
Kubernetesダッシュボードが空の状態でブラウザに表示されるのは、コンテナ化されたアプリがまだデプロイされていないことを意味します。次のステップでは、最初のコンテナ化されたアプリであるCollectorをクラスターにインストールします。
Splunk Distribution of OpenTelemetry Collectorをインストールする 🔗
チュートリアルの当パートを完了するための最後のステップは、Helmチャートを使ってSplunk Distribution of OpenTelemetry Collectorをインストールすることです。
以下のコマンドを実行して、Collector用のHelmチャートをインストールします:
helm repo add splunk-otel-collector-chart https://signalfx.github.io/splunk-otel-collector-chart
helm repo update
helm install --set="splunkObservability.accessToken=<access_token>,clusterName=splunkTutorial,splunkObservability.realm=<realm>,gateway.enabled=false,splunkObservability.profilingEnabled=true,environment=splunkTutorialEnv" --generate-name splunk-otel-collector-chart/splunk-otel-collector
インストールコマンドの <realm> と <access_token> は、自分のレルムとアクセストークンに置き換えてください。
アクセストークンを取得するには、Splunk Observability Cloudを使用したユーザー APIアクセストークンの取得と管理 を参照してください。
Splunk Observability Cloudのレルムを見つける方法は、レルムに関する注意事項 を参照してください。
注釈
また、Splunk Observability Cloudで Collectorガイド付きセットアップ を使用して、事前入力済みのHelmコマンドを生成することもできます。
Helmチャートのインストールが完了すると、以下のようなメッセージが表示されます:
NAME: splunk-otel-collector-1709226095
LAST DEPLOYED: Thu Feb 29 18:01:36 2024
NAMESPACE: default
STATUS: deployed
NOTES:
Splunk OpenTelemetry Collector is installed and configured to send data to Splunk Observability realm <realm>.
データがSplunk Observability Cloudに入ってきていることを確認する 🔗
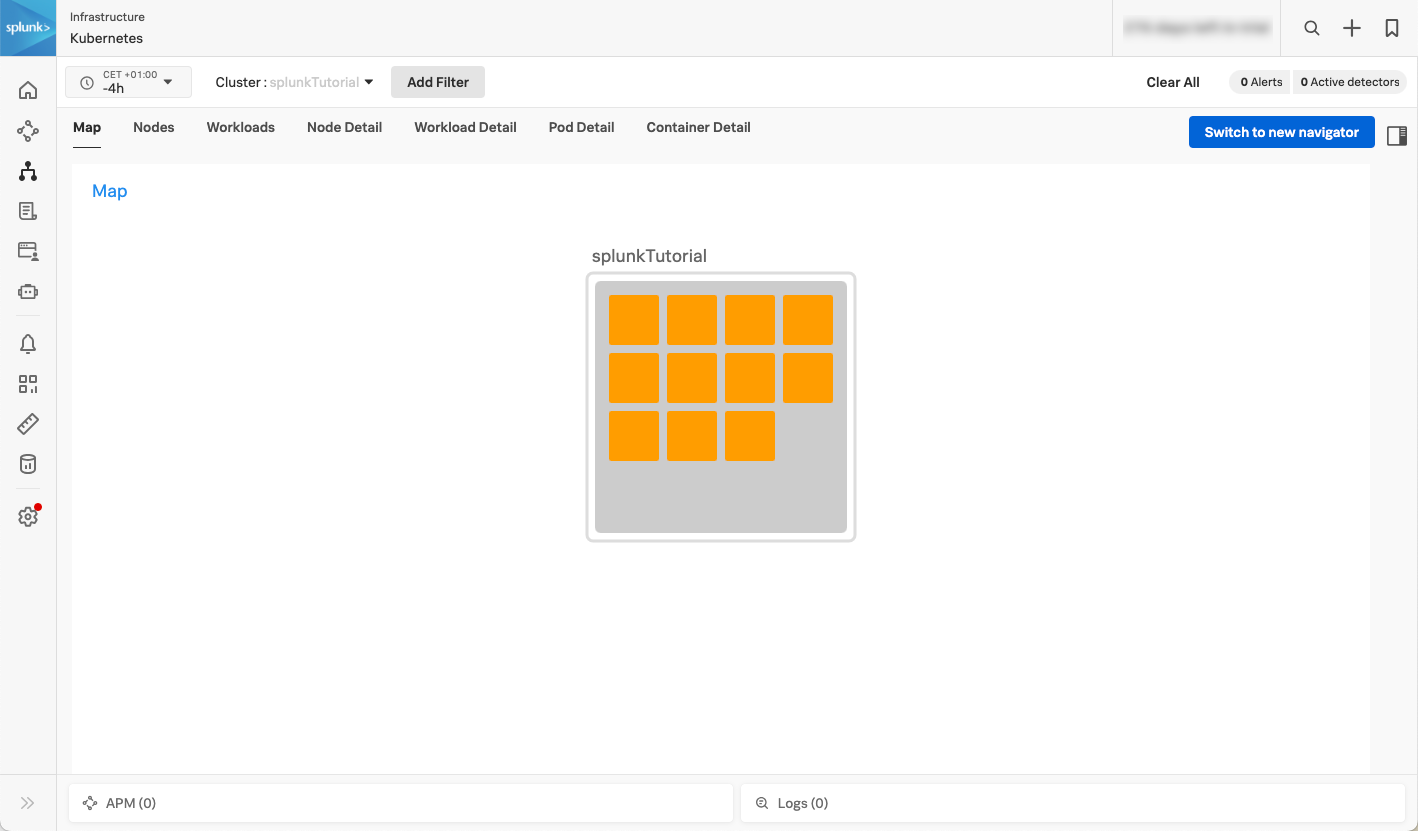
Splunk Observability Cloudを開き、Infrastructure、Kubernetes、K8s nodes にアクセスして、ローカルのKubernetesクラスターから来ているデータを確認します。splunkTutorial クラスターのみを表示するようにフィルターリングします。
次の画像は、デモ用 splunkTutorial クラスターからのデータを示しています:

次のステップ 🔗
これでチュートリアルの最初のパートは完了です。ローカルのKubernetesクラスターを作成し、コンテナ化されたアプリとしてCollectorをデプロイしました。
次は、設定を編集して、ログをSplunk Cloud Platformに送信します。パート 2:Collectorの設定を編集して、ログをフィルタリングしSplunk Cloud Platformに送信する に進んでください。
さらに詳しく 🔗
Collectorの設定の形式と構造の詳細については、以下のリソースを参照してください: