Splunk On-Call用のActive Directoryフェデレーションサービスシングルサインオンを設定する 🔗
要件 🔗
このインテグレーションは以下のバージョンのSplunk On-Callと互換性があります:
フルスタック
組織でシングルサインオン(SSO)を有効にするには、更新されたメタデータファイルとIDPを提供する必要があります。SSOの設定に関心がある場合は、Splunk On-Callサポート までご連絡ください。
当社の標準SSOセットアップでは、SAML 2.0プロトコルを使用しています。SAML 2.0 プロトコルを使用できるIDPであれば、Splunk On-Callと統合できます。正確な手順は使用するIDPによって異なりますが、通常、.XMLメタデータファイルをエクスポートしてサポートチームに送信します。.xml ファイルを送信すると、Splunk On-Callサポートスペシャリストがバックエンドで設定を完了し、確認の返信をします。
お使いのIDPに SAML機能がない場合は、Splunk On-Callサポートに連絡して、利用可能な代替オプションを検討してください。Splunk On-Callサポートへの連絡方法の詳細については、Splunk On-Callサポートへのお問い合わせ を参照してください。
Active Directoryフェデレーションサービス(ADFS)のSSOを設定する 🔗
ADFSを使用してSplunk On-CallのSSOを設定するには、以下の手順を完了します。
メタデータファイルを送信し、Splunk On-Callサポートチームが設定を完了すると、お客様側で設定を完了するための更新されたメタデータファイルが送信されます。
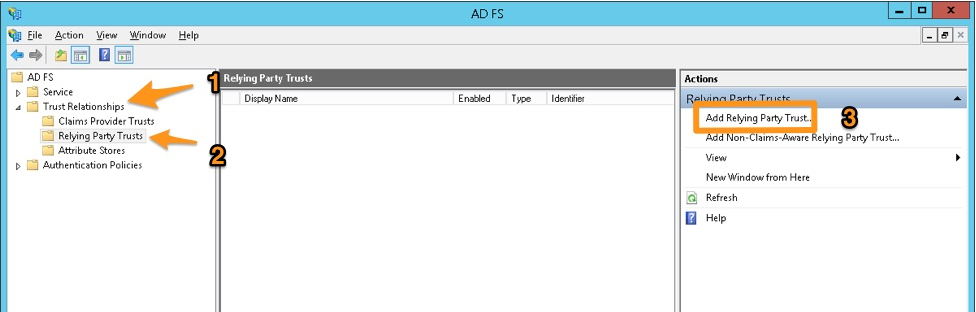
ADFS管理コンソールで、Trust Relationships、次に Relying Party Trusts に移動し、 ペインで Add Relying Party Trust を選択します。
「Add Relying Party Trust Wizard」で Start を選択します。
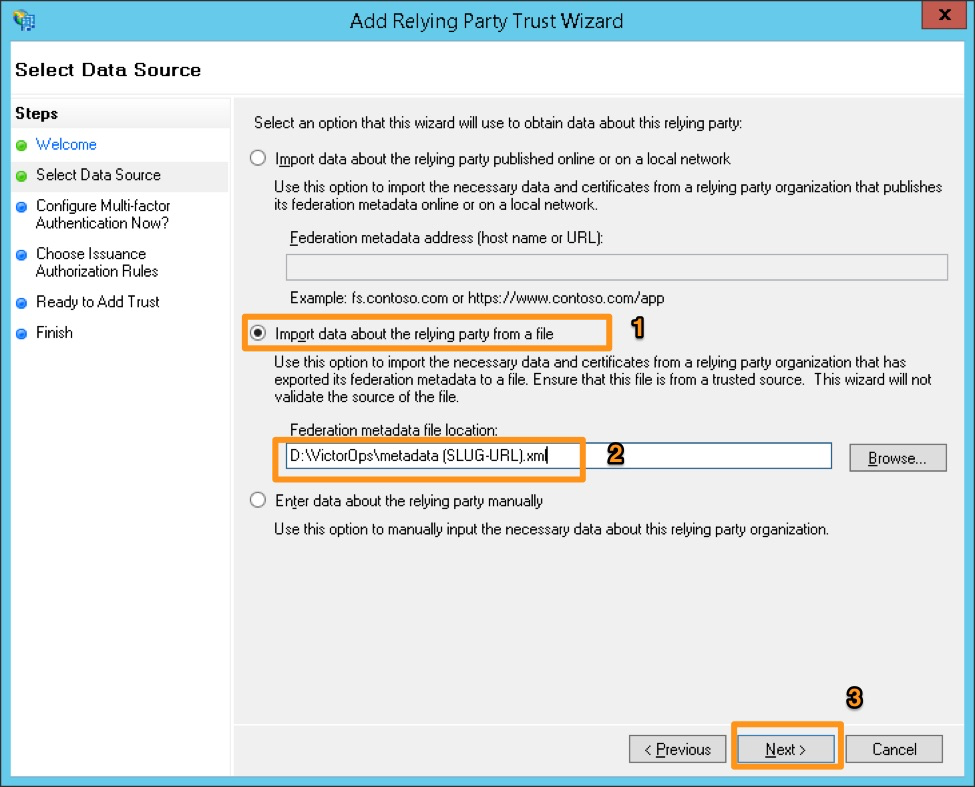
Import data about the relying party trust from a file を選択し、Splunk On-Callサポートが提供する metadata.xmlを参照します。Next を選択します。
表示名とメモを入力し、Next を選択します。

#.:guilabel:I do not want to configure multi-factor authentication settings for this relying party trust at this time を選択し、次に Next を選択します。
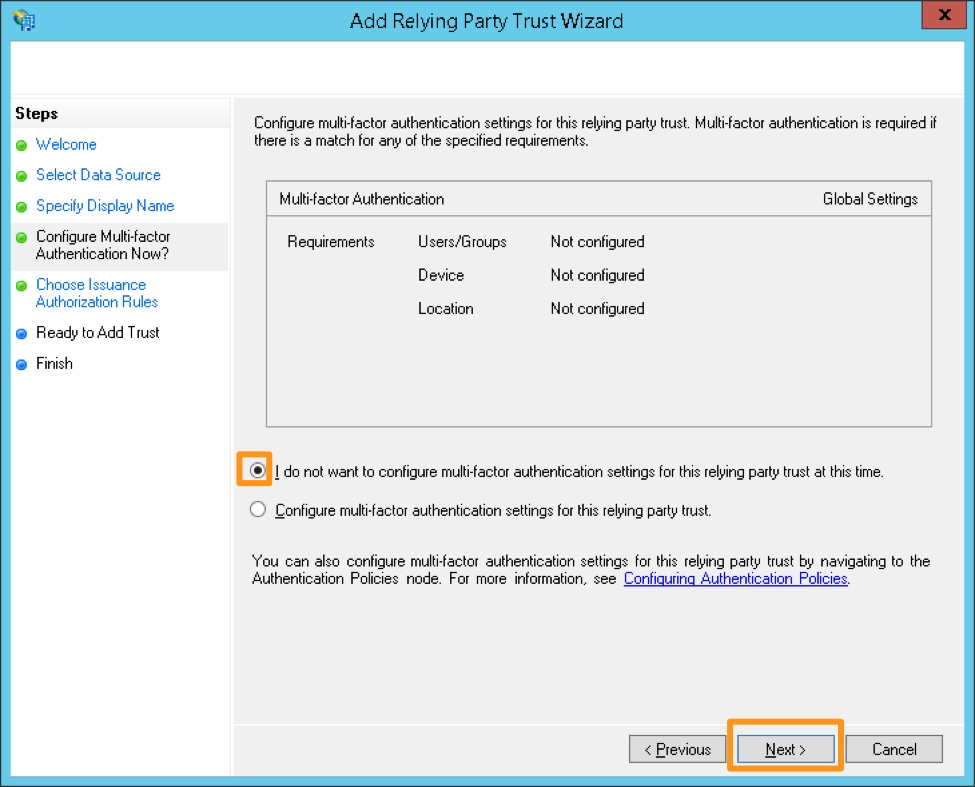
#多要素認証を設定します。これは機能的には必要ありませんが、組織のセキュリティコンプライアンスのために必要な場合があります。このステップは、Splunk On-CallとのSAMLインテグレーションが機能していることを確認してから、コンプライアンスに準拠した設定にする必要がある場合に、後で実行することもできます。
Permit all users to access this relying party を選択し、次に Next を選択します。
#。(オプション) Select Deny all users access to this relying party を選択し、この設定を完了した後、組織で必要なアクセスルールを設定します。
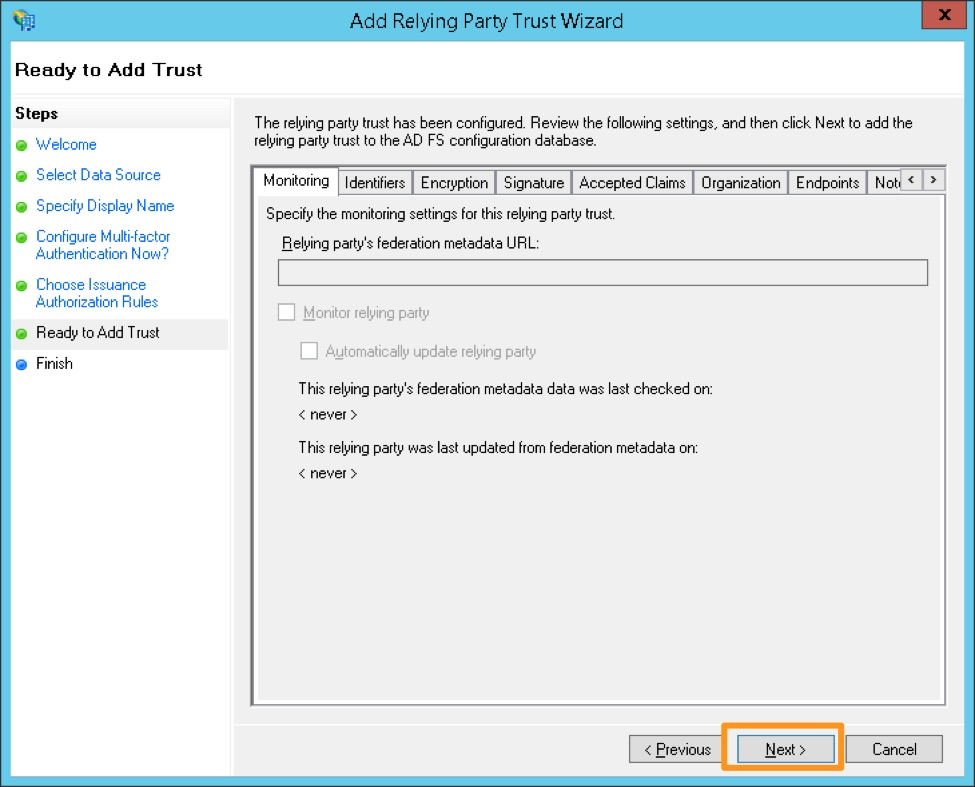
設定を確認し、正確であれば Next を選択します。次の画面からは戻れないので、変更が必要な場合は後から手動で設定を更新する必要があります。
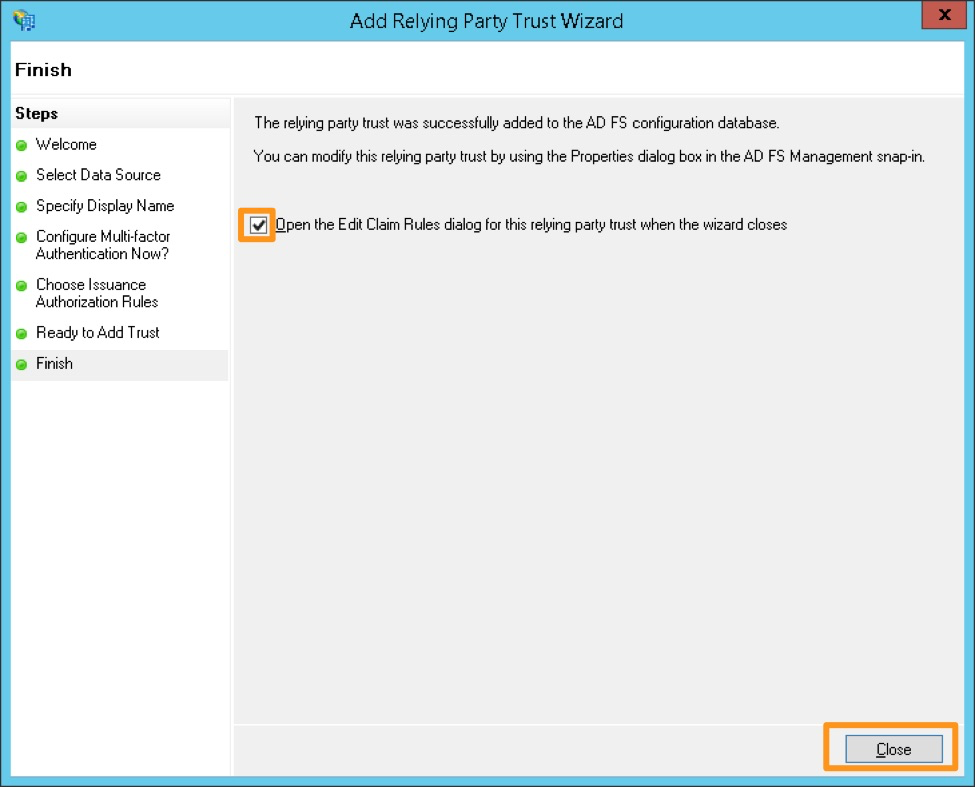
Open the Edit Claim Rules dialog チェックボックスが選択されていることを確認し、Close を選択します。
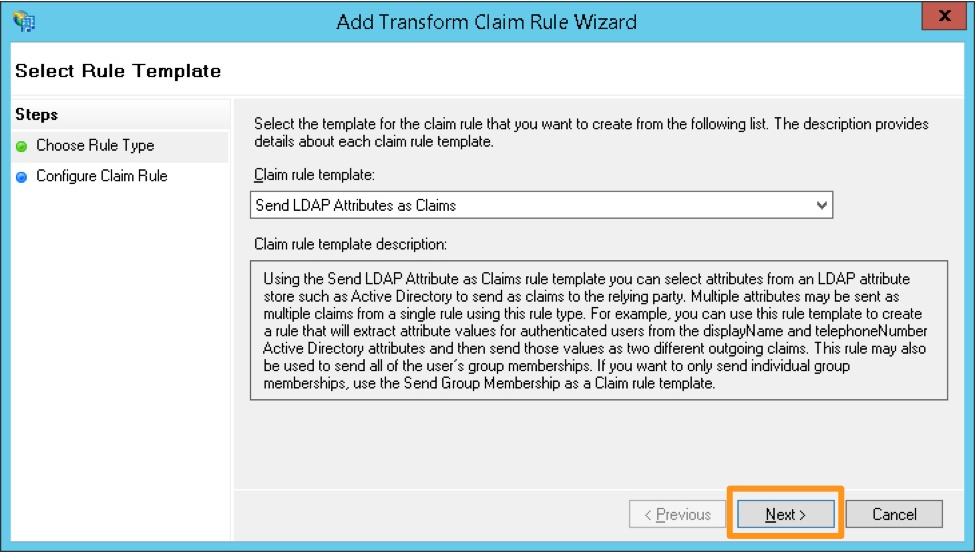
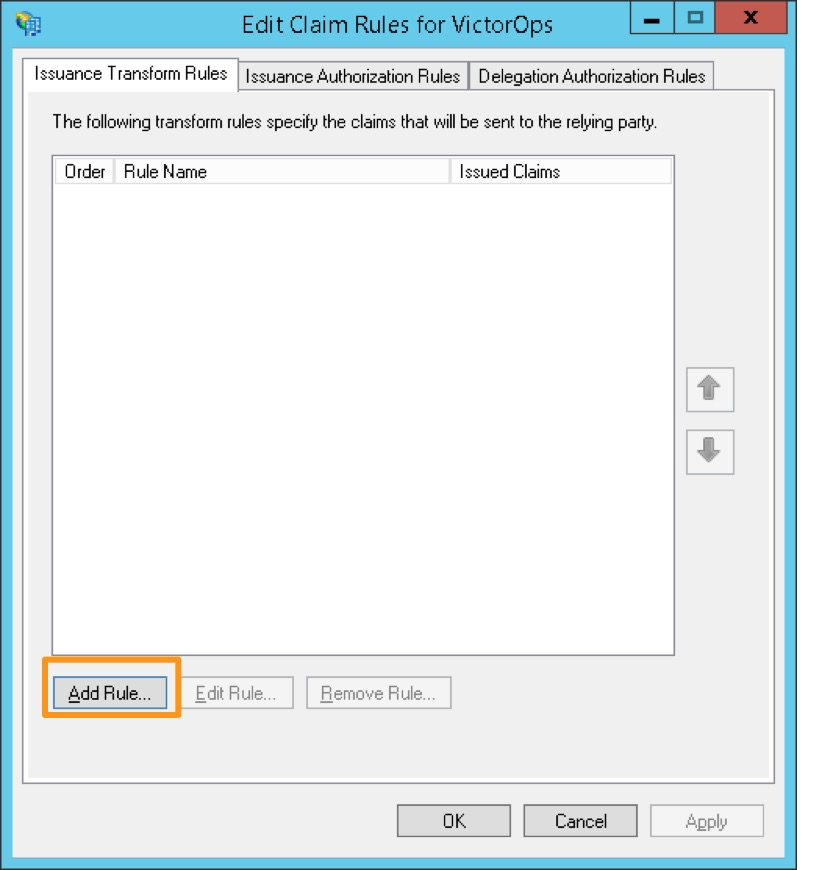
Add Rule を選択します。
クレームルールテンプレート Send LDAP Attributes as Claims を選択します。

#. Create a name for the rule and select Active Directory as the Attribute store. Under the LDAP Attribute, select E-Mail-Addresses and map it to the Outgoing Claim Type of Name ID, then select Finish.
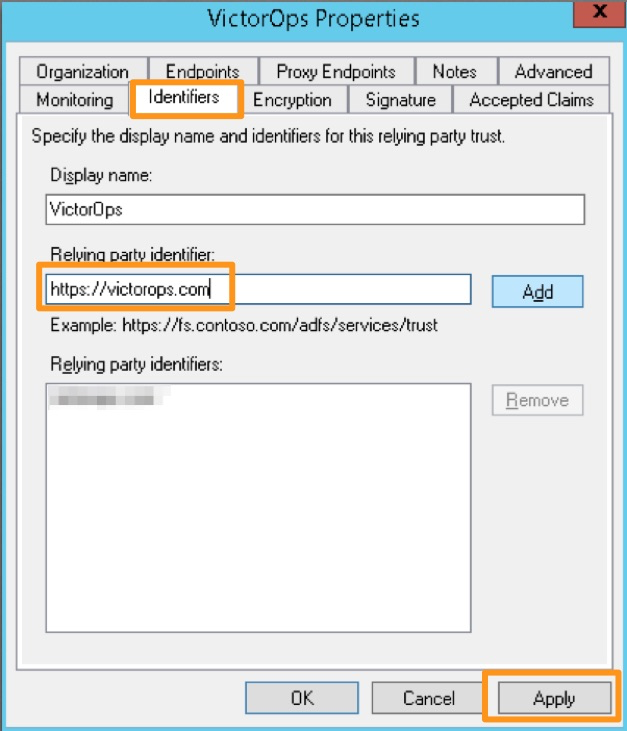
#. Open the Relying Party Trust you just configured for Splunk On-Call by right-clicking the entry and selecting Properties. On the Identifers tab, add https://victorops.com as a Relying party identifier, then select Apply.