Google Appsを使用してSplunk On-Callのシングルサインオンを設定する 🔗
Google Appsを使用してSplunk On-CallのSSOを設定するには、以下の手順を完了します。
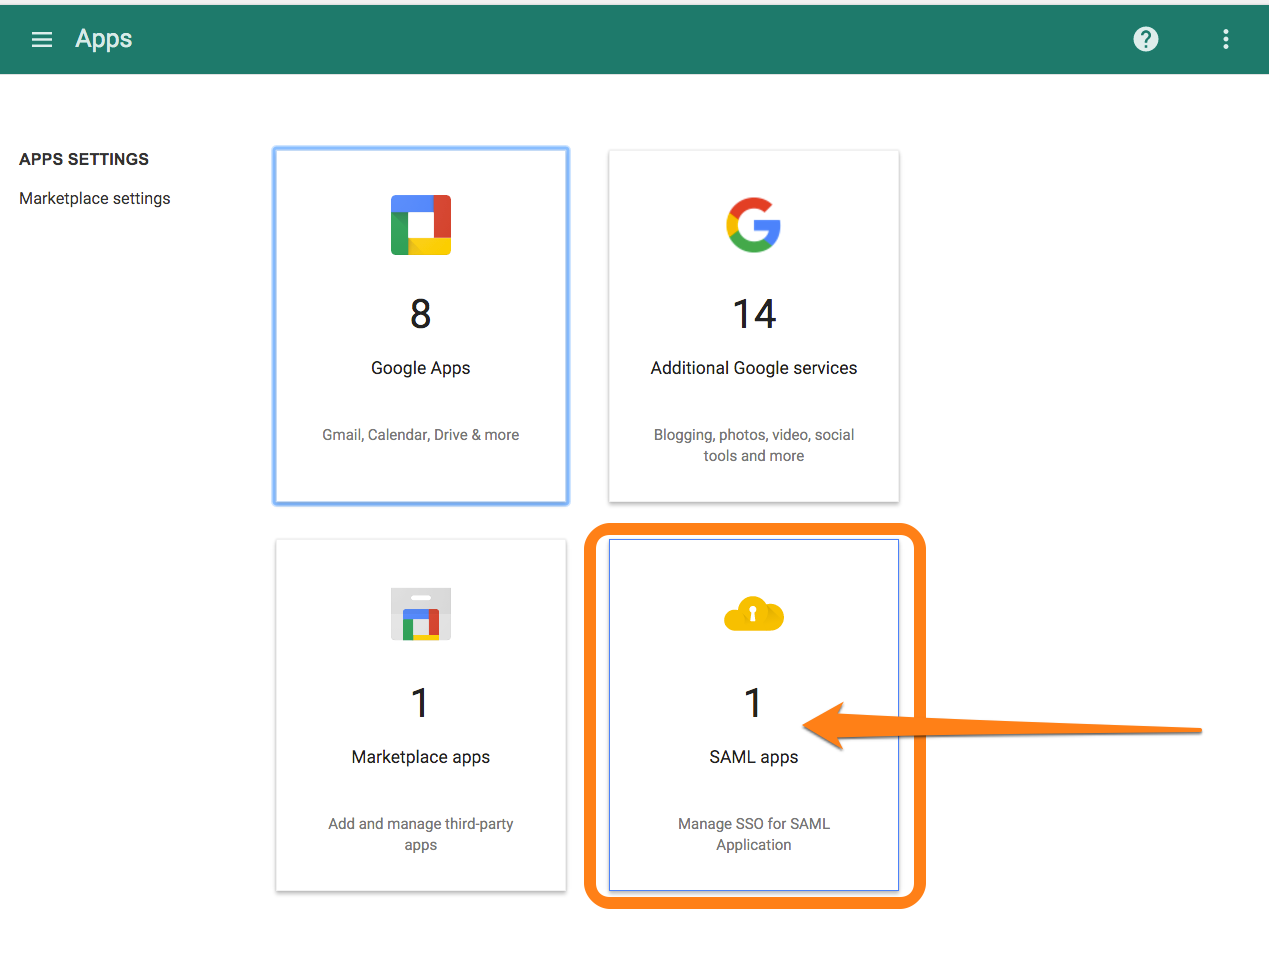
Google Appsの管理者ポータルにアクセスし、Apps、SAML Apps の順に移動します。
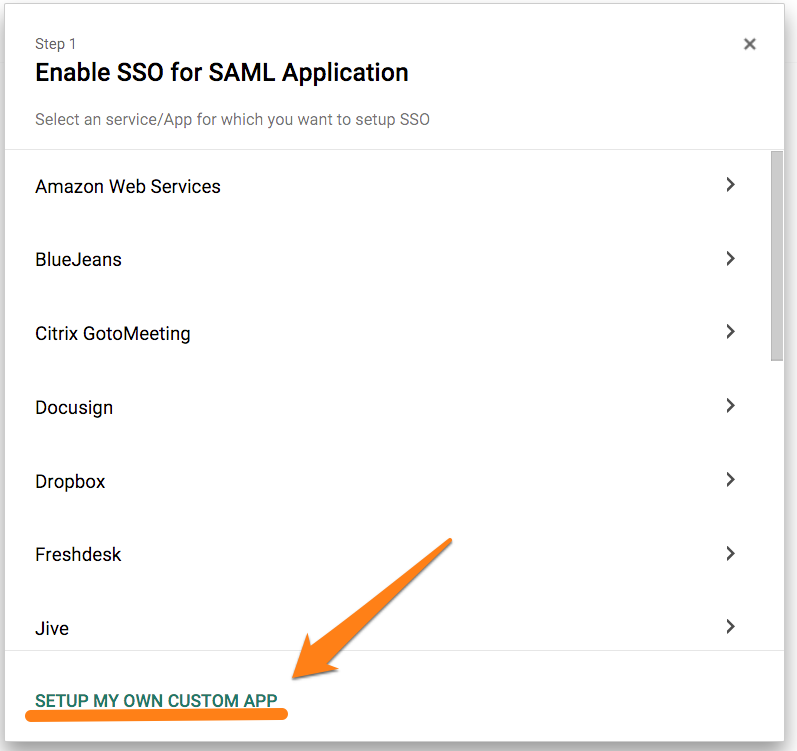
Set up my own custom app を選択します。
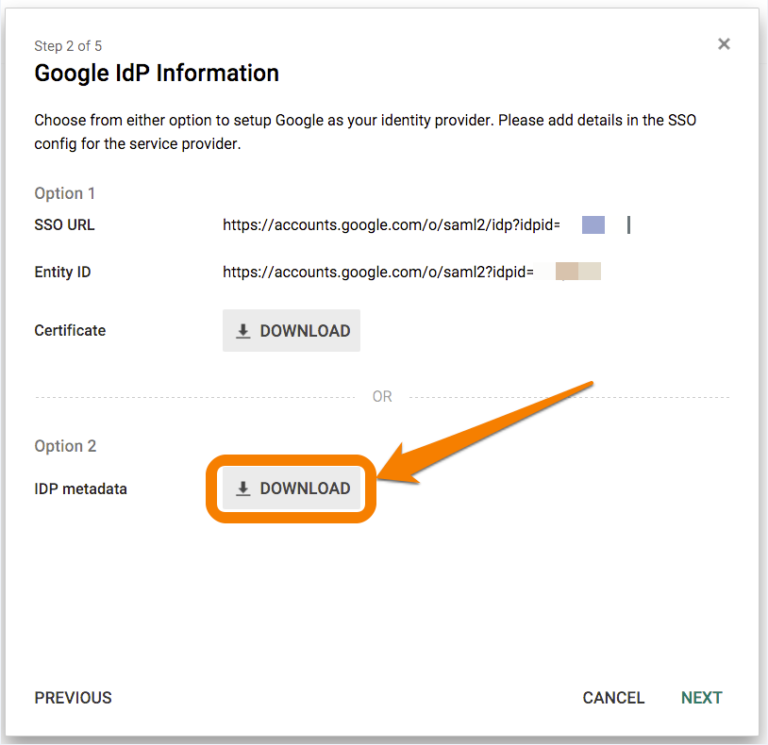
ガイド付きセットアップのステップ2から、Option 2 を選択してIDPメタデータをXML形式でダウンロードします。ダウンロードした .xmlファイルを添付して Splunk On-Callサポート に送信します。
こちら にあるSplunk On-Callロゴファイルを保存します。
アプリケーションの名前 (Splunk On-Call) を入力し、ロゴファイルをアップロードします。

Service Provider Details ステップで、以下の値を入力します:- ACS URL フィールドに次の値を入力:
https://sso.victorops.com:443/sp/ACS.saml2- Entity ID フィールドに次の値を入力:victorops.com- Start URL フィールドに次のように入力して、最後に正しい組織スラグを入力:https://portal.victorops.com/auth/sso/<<org-slug-here>>.属性マッピングのステップをスキップして、Finish を選択します。