Splunk On-Call管理者向けスタートガイド 🔗
チームページは、チーム、スケジュール、ローテーション、エスカレーションポリシーを設定するための中心的な場所です。
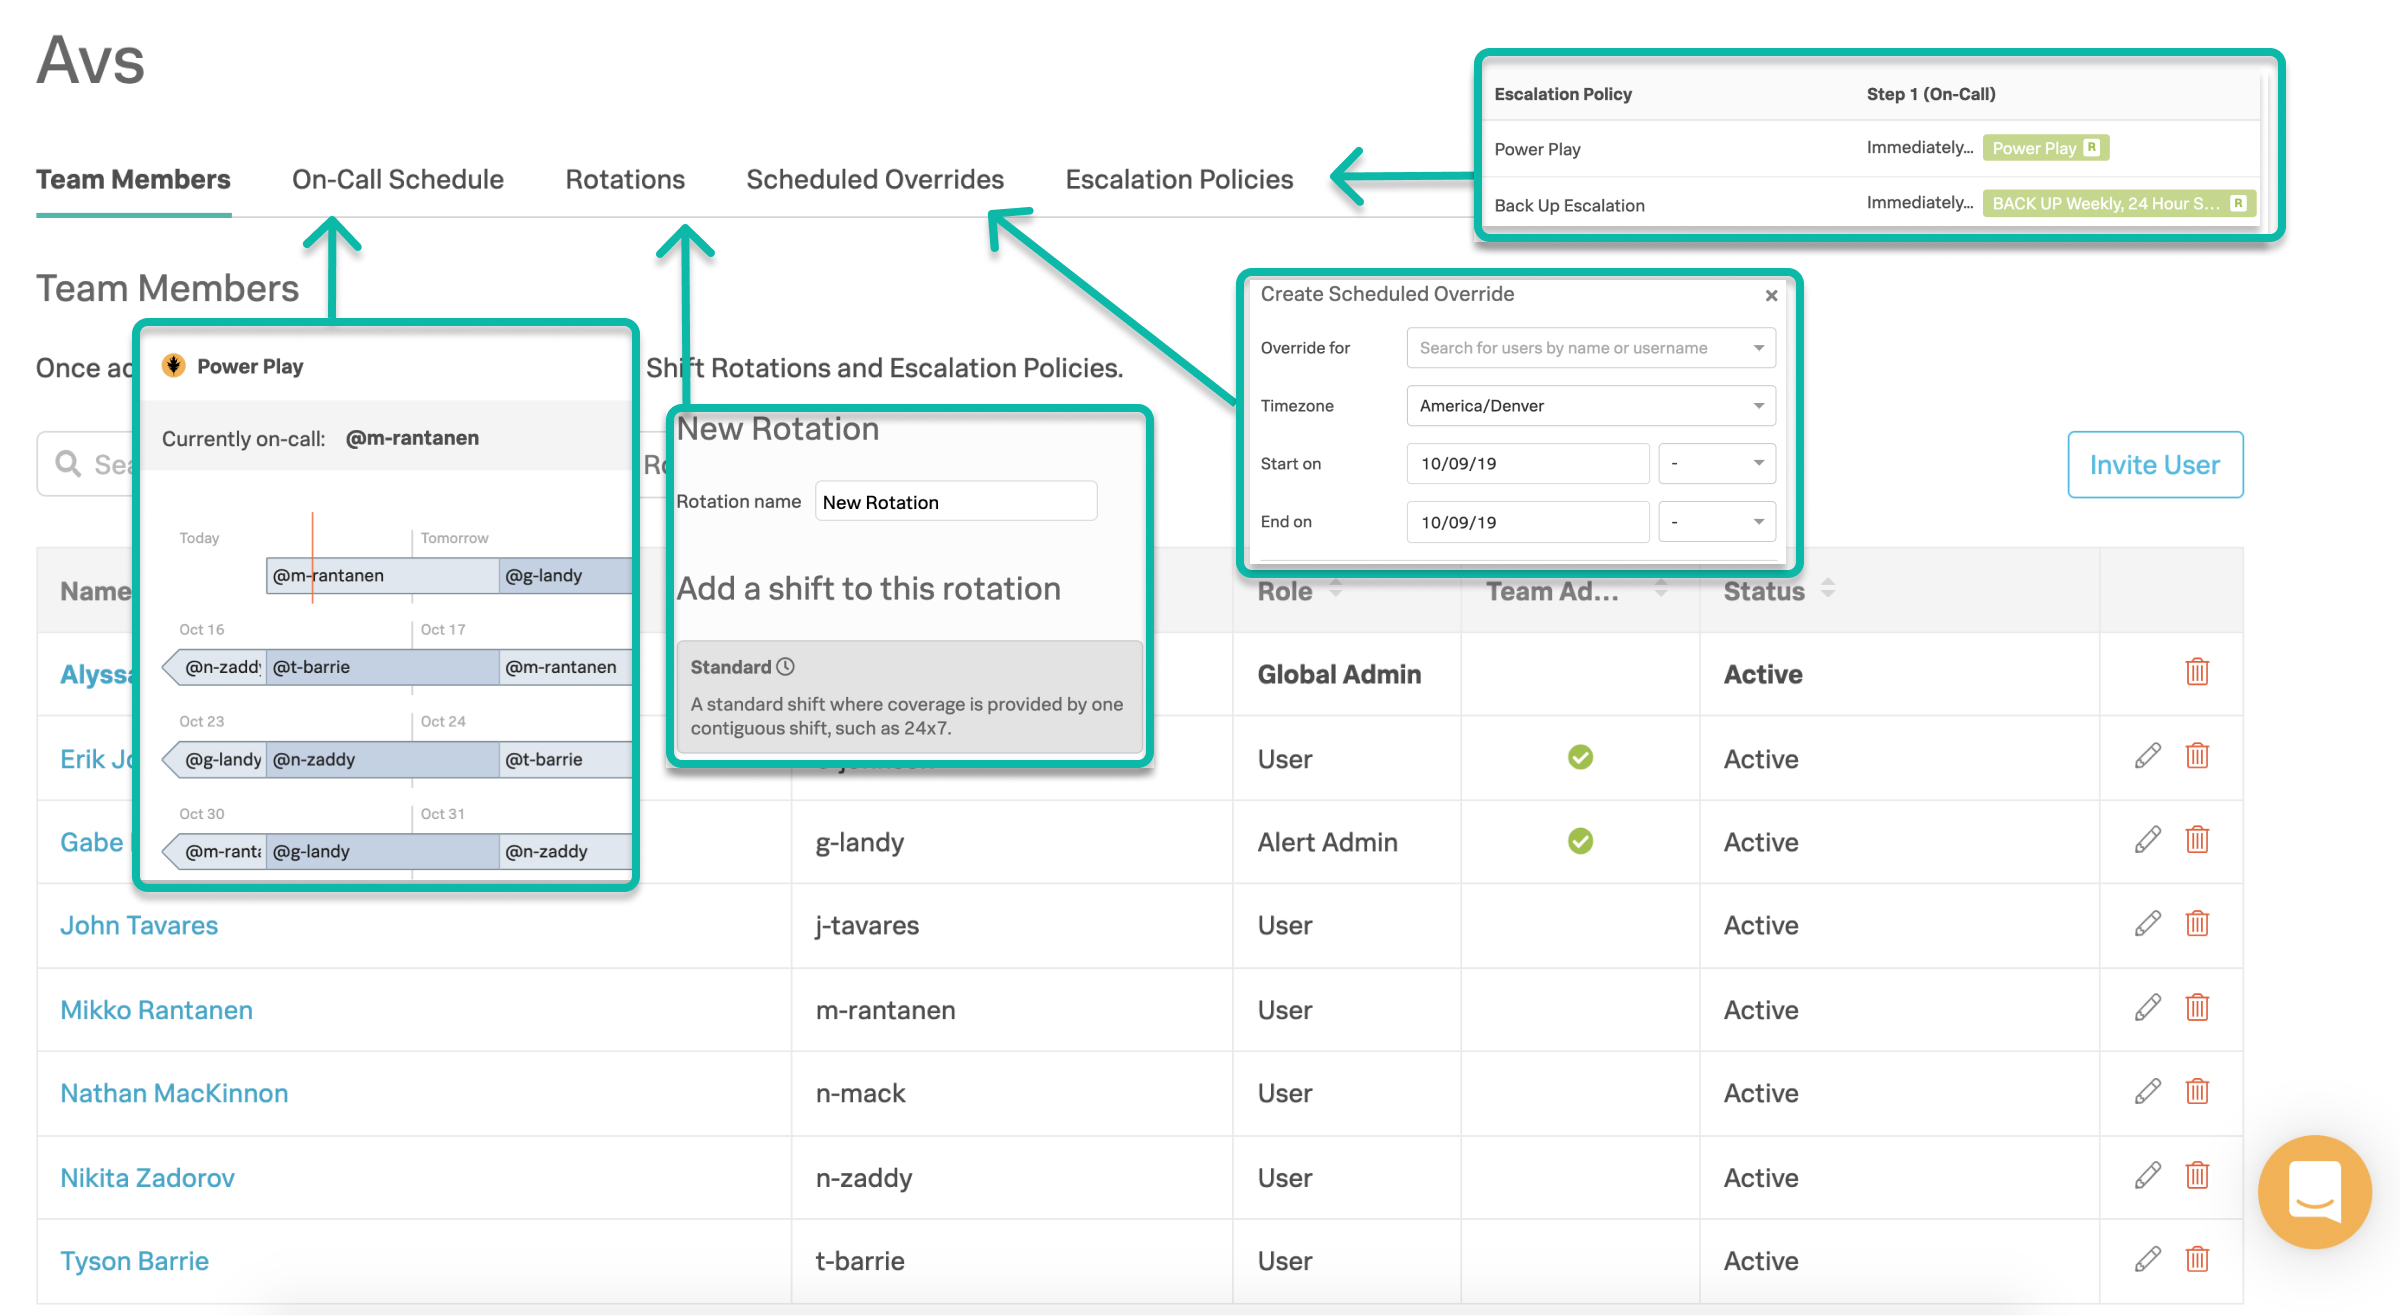
ユーザーの追加 - Splunk On-Call のセットアップで最も重要な最初のステップは、ユーザーの追加です。新しいユーザーを追加するには:
ポータルのメールアドレスを活用する( Users、次に Invite User )。
APIを利用します(IDとキーが必要で、Integrations、API の順で見つかります)たくさんのユーザーをアップロードしていますか?ご連絡いただければお手伝いします。
チームを作成する:チームは、ユーザーリスト、オンコールシフト、エスカレーションポリシーを保持します。チームを作成するには、上部のナビバーから セクションに移動します。 ページから Add Team を選択します。次に名前を選択します。
チーム間を明確に区別するために、チーム名を標準化することをお勧めします。サービスや社内チーム名などに基づいてチーム名を決めることができます。あなたの組織にとって意味のあるものであれば何でも使えますが、一貫性を目指してください。
ユーザーを招待 し、管理者を宣言する - いくつかのチームを作ったら、次のステップはユーザーを追加することです。招待ユーザーを追加できます。次に、ユーザーのロールに基づいてユーザーの階層を確立します。たとえば、管理者、ユーザー、チーム管理者 です。
ローテーションを構築する - ローテーションは、オンコール・スケジュールの繰り返しで、基本的にはオンコールシフトのグループです。シフトは多数の人が共有します。
また、カスタムローテーションの設定についてもご相談ください。注::ローテーションがスケジュールされてもオンコールであるとは限りません。ローテーションは、エスカレーションポリシーと関連付ける必要があります。
エスカレーションポリシーを作成する - エスカレーションポリシーは、どのインシデントを誰にルーティングし、どのようにエスカレーションするかを決定します。基本的に、エスカレーションポリシーとは、Splunk On-Callがトリガーされたイベントをどのようにエスカレーションするかということです。
エスカレーションポリシーを設定する際のベストプラクティスは、最低次の3つのエスカレーションパスを設定することです:勤務中のユーザー、ローテーションの前または次のユーザー、マネージャーまたはチームリーダー。
1つのチーム内で複数のアラート動作を管理する方法についてのヒントやコツについては、こちらの記事をお読みください。
ルーティングキーを設定する - ルーティングキーは、監視ツールからのアラートをSplunk On-Callの特定のチーム (またはエスカレーションポリシー) に結びつけます。これにより、適切な担当者が問題に対処できるようになり、特定のインシデントに無関係なアラートのノイズを減らすことができます。これらのキーは、、 の順に移動して見つけることができます。
シンプルにしてください。アラートを処理するチーム名/ポリシー名、アラートのサービス名/ホスト名、アラートのモニタリングツール名を使用します。ルーティングキーは大文字と小文字を区別しませんが、アラートがデフォルトのルーティングチームに送られるのを防ぐため、すべて小文字にすることをお勧めします。
マッチングチーム名:CloudOps(チーム)=cloudops(ルーティングキー)
マッチング監視ツールSplunk (ツール) = splunk (ルーティングキー)
最後に、カスタムインテグレーションを設定します。インテグレーションは、Splunk On-Callにアラートをフィードしてインシデントを作成し、ページアウトします。
インテグレーションの全リストは、Splunk On-Callインテグレーション を参照してください。
お探しのものが見つかりませんか? 汎用メール または`RESTエンドポイント<spoc-rest-endpoint>`をご覧ください。
アラートインテグレーションを設定する前に、チャットインテグレーションまたはアラート以外のインテグレーションを設定することをお勧めします。
ルールエンジン - ルールエンジンは`フルスタック<https://victorops.com/pricing>`サービスレベル機能です。これは、特定の条件を設定し、その条件が満たされたときに、アラートに画像、リンク、メモ、アラートフィールドの上書き、新しいフィールドの追加などの注釈を付けるカスタムアクションをトリガーすることができるルールエンジンです。
管理者として、継続的に改善するために、チームの活動とパフォーマンスを追跡し、報告できるようにすることが重要です。トップナビゲーションメニューの に移動します。
インシデント後レビュー - インシデントの履歴インサイトを把握し、問題解決方法を文書化します。
パフォーマンス (MTTA/MTTR) レポート - Splunk On-Call への投資とDevOpsの実践のストーリーを語ります。
オンコールレポート - チームまたはユーザーごとのオンコールに費やされた時間とインシデントの数を確認できます。
インシデント頻度レポート - 事後にインシデントの流れを分析することで、システムで問題を引き起こしているインシデントを解決するための上流工程に移動できます。
Splunk On-Callライセンス数の大幅な増減が必要な場合は、地域営業マネージャーまたはカスタマーサクセスマネージャーにご相談ください。誰に依頼すればよいかわからない場合は、victorops-sales@splunk.comまでお問い合わせください。