AlertSite by SMARTBEARのインテグレーション 🔗
AlertSite by SMARTBEARは、API、モバイル、Webアプリケーション向けの高度な合成監視プラットフォームを提供します。Splunk OnCallとAlertSiteのインテグレーションにより、汎用メールエンドポイントを使用してSplunk OnCallタイムラインにアラートを送信することができます。以下のガイドでは、このインテグレーションについて説明します。
In Splunk OnCall 🔗
Splunk OnCallでAlertSiteインテグレーションを有効にして、メールでインシデントをトリガーして解決できるようにするには:
Splunk OnCallで、Settings、Alert Behavior の順に移動します。Integrations を選択し、AlertSiteを選択します。
![[すべてのインテグレーション]で、AlertSiteロゴを選択します。](../../_images/integration-alertsite1.png)
まだ有効になっていない場合は、Enable Integration を選択します。これにより、メールアラートを送信できるメールアドレスが生成されます。このアドレスをメモしてください。AlertSiteアプリケーションで指定する必要があります。
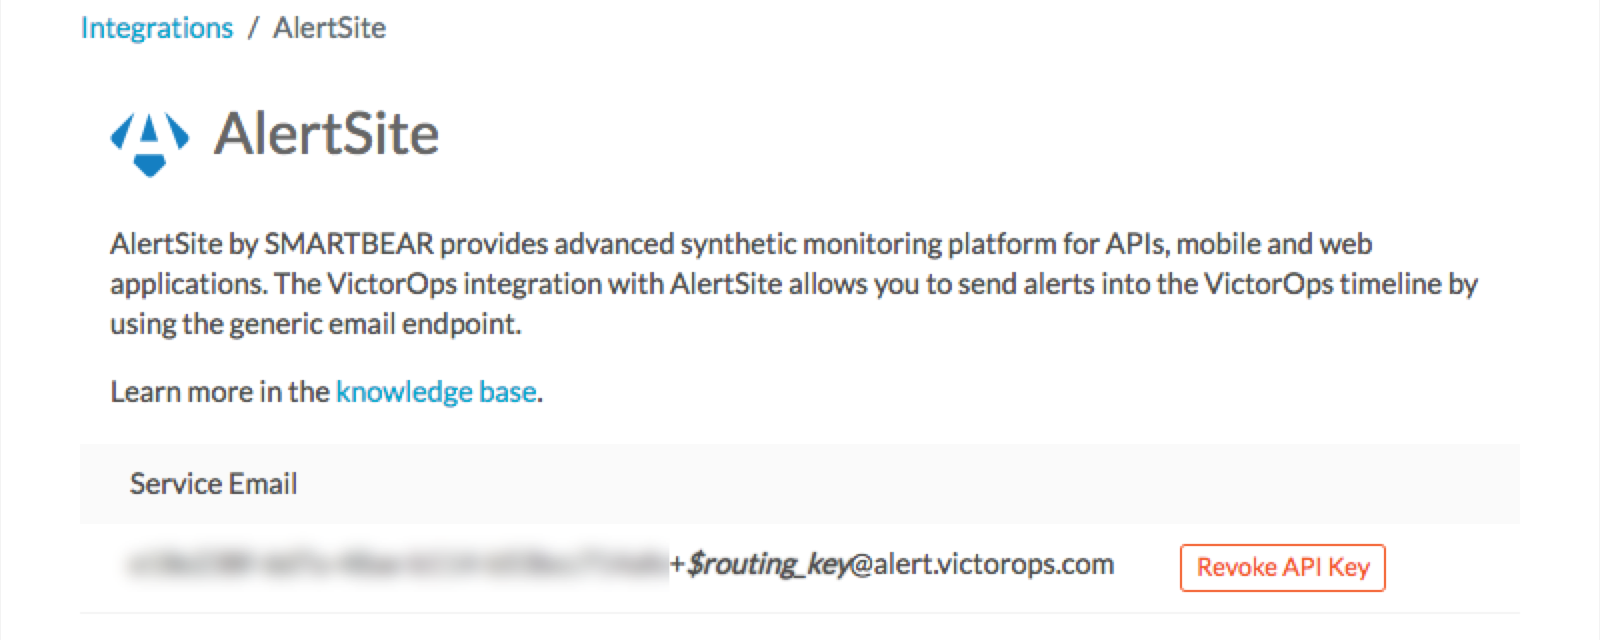
$routing_key は、アラートをルーティングするチームのキーに置き換えてください。例:
db212e48-……8669+databaseteam @alert.victorops.com
チームルーティングキーは、Settings、次に Integrations` ページの下部で設定されます。詳細については、Splunk On-Callでルーティングキーを作成する を参照してください。
ルーティングを使用しない場合は、プラス記号を含む +$routing_key の部分を削除して、メールが以下のようになるようにしてください:
db212e48-……8669@alert.victorops.com
AlertSiteの設定 🔗
メールテンプレートのカスタマイズ 🔗
Splunk OnCallメールエンドポイントを使用する場合、メールの件名には特定のキーワード(新規インシデントを開く場合はCRITICALまたはPROBLEM、インシデントを解決する場合はRESOLVEDまたはOK)を含める必要があります。これらのキーワードを含むようにAlertSiteメールアラートをカスタマイズできます。
注釈
メールの件名行は、エラーテンプレートとクリアテンプレートの両方で同じでなければなりません(CRITICAL/PROBLEMとRESOLVED/OKの単語は除きます)。これは、Splunk OnCallが」clear」メールが」error」メールによって開かれたインシデントに関連していることを認識するために必要です。たとえば、件名に$STATUS変数を使用しないでください。」error」アラートと」clear」アラートではステータスコードが異なるため、この場合Splunk OnCallはこれらのアラートをマッチできません。
AlertSiteでSplunk OnCall用のカスタムアラートテンプレートを作成するには:
AlertSiteユーザーインターフェイスで、Alerts に移動し、次に Template Editor に移動します。
- エラーテンプレートを設定するには:
テンプレートリストをフィルターして、アラートタイプのみを表示します:サイトエラー
リストで、配信方法 :strong:` テキスト` を使用して、サイトエラー ` のアラートサイトテンプレートを選択します。
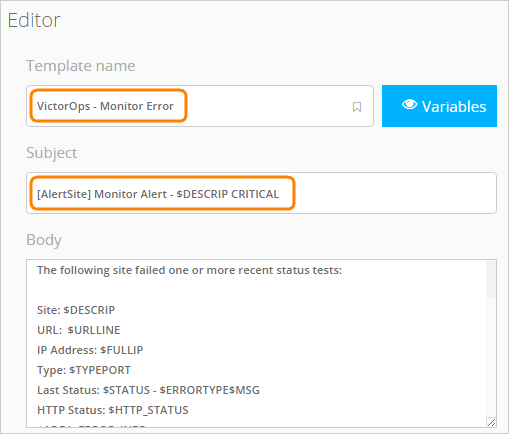
エディターでテンプレートテキストを選択し、編集モードを有効にします。
以下のように入力します:- テンプレート名: Splunk OnCall - Monitor Error (または類似したもの) - 件名:[AlertSite] 監視アラート - $DESCRIP CRITICAL
注釈
別の件名を使うこともできますが、クリティカル という単語が含まれており、$STATUS 変数が含まれていないことを確認してください。
Save As を選択して、変更を新しいテンプレートとして保存します。
- 「すべてクリア」テンプレートを設定するには:
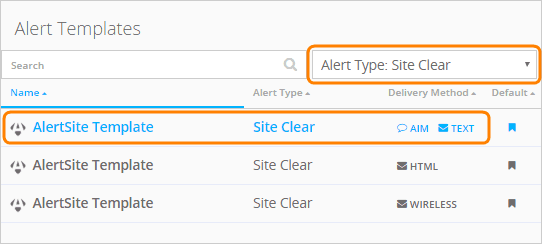
テンプレートリストをフィルターして、Alert Type: Site Clear のみを表示します。
サイトクリア の AlertSiteテンプレート を、配信方法テキストで選択してください。
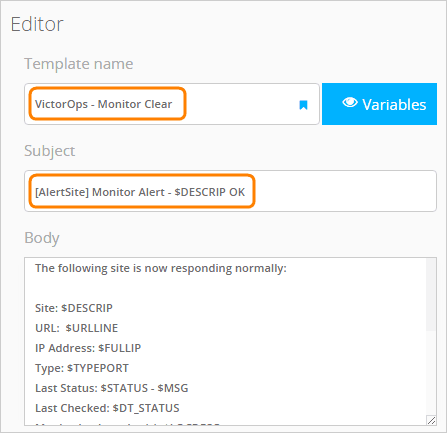
エディターでテンプレートテキストを選択し、編集モードを有効にします。
次のように入力します:
テンプレート名:Splunk OnCall - Monitor Clear (または類似したもの)。
件名:[AlertSite] 監視アラート - $DESCRIP OK
注釈
件名はエラーテンプレートとまったく同じでなければなりませんが、CRITICAL の代わりに OK という単語を使用します。
Save As を選択して、変更を新しいテンプレートとして保存します。
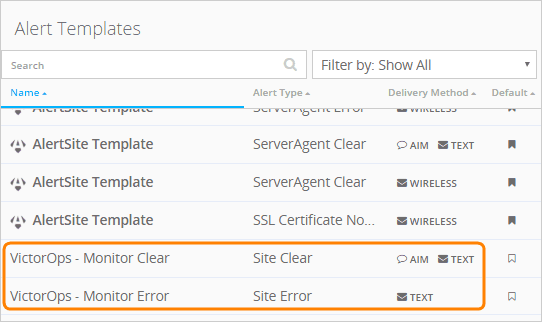
作成されたテンプレートはテンプレートリストに表示されます:
アラート受信者へのSplunk OnCallの追加 🔗
次に、In Splunk OnCall で生成したSplunk OnCallメールエンドポイントを AlertSiteのアラート受信者として追加する必要があります:
AlertSiteで、Alerts に移動し、次に Alert Recipient に移動します。
+ New Recipient を選択します。
- 表示されるダイアログで、以下を入力します:
名前:任意の名前、例えば、Splunk OnCall
受信者: Splunk OnCallで生成したメールアドレス
モード:メール(テキスト形式)
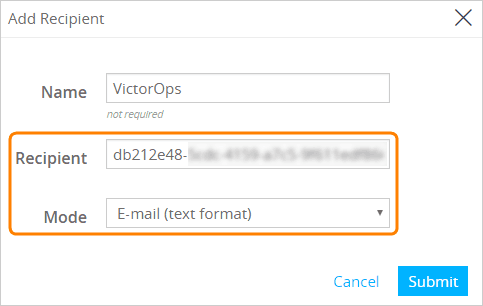
Submit をクリックします。
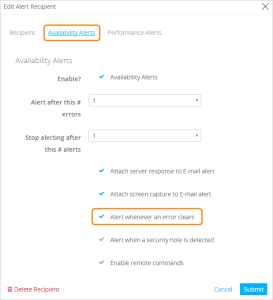
作成した受信者を選択し、Edit Recipient をクリックします。
Availability Alerts タブで、エラーがクリアされるたびにアラートするオプションを設定します。これは、AlertSiteでエラーがクリアされたときにSplunk OnCallでインシデントを自動的に解決するために必要です。
必要に応じてその他のオプションを設定します。使用可能なオプションについては、受信者のプロパティ - 利用可能アラート を参照してください。
Submit をクリックします。
Splunk OnCallメールアラートにカスタムテンプレートを割り当てる 🔗
ここで、カスタムアラートテンプレートをSplunk OnCallアラート受信者に割り当てる必要があります。そのためには、Splunk OnCallの受信者、カスタムテンプレート、Splunk OnCallにアラートを送信するモニターを含む`受信者グループ<http://doc.alertsite.com/synthetic/alerts/recipient-groups.htm>`を作成する必要があります:
AlertSiteで、Alerts に移動し、次に Recipient Groups に移動します。
New Recipient Group を選択します。
グループ名を入力します。
Monitors で、Splunk OnCallにアラートを送信するモニターを追加します。
Recipients で、Splunk OnCallの受信者を追加します。
Custom Templates の下に、先ほど作成したSplunk OnCall 「error」テンプレートと」clear」テンプレートを追加します。
オプション: Error Types で、Splunk OnCallに報告する特定のエラーコードを選択します。デフォルト値はすべてエラーです。
Save as new を選択します。
これで、指定したモニターがSplunk OnCallにアラートを送信するようになります。
Splunk OnCallでアラートを表示する 🔗
AlertSiteアラートは、Splunk OnCall Timeline および Incidents タブで表示できます。
More info を選択すると、発生したエラーの説明を含むアラート内容が表示されます:
その後、チームメンバーはインシデントを確認し、解決のためのアクションを取ることができます。また、AlertSiteから「クリア」通知が届くと、インシデントは自動的に解決されます。